Sleeve installation, Drive axle wheel end service – Spicer TPCS (Tire Pressure Control System) Service Manual User Manual
Page 42
42
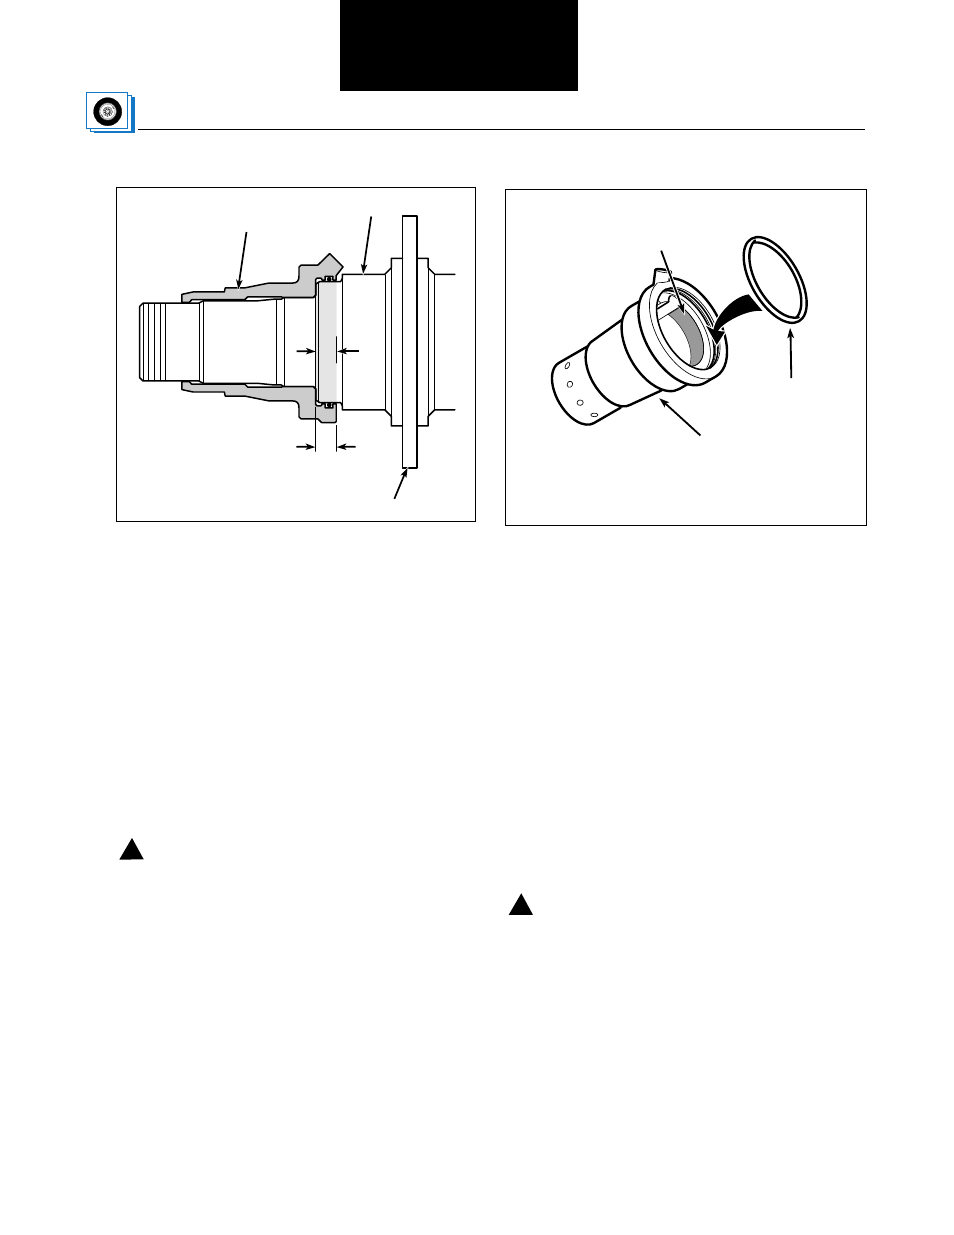
Drive
Axle Sleeve
Brake Spider
Spindle
A
B
Figure 28 Spindle Sleeve Depth Measurement
Sleeve Installation
1. Measure the depth of the first step in spindle
sleeve to +/– .001". (See Figure 28, dimension “A”)
Measure out this distance on the axle spindle’s oil
seal area. (See Figure 28, dimension “B”.) Mark
this point on spindle.
2. Apply an anti-seizing compound to the sleeve as
shown. See Figure 29.
3. Apply lubricant to the sleeve inner O-ring and
install in groove in large diameter end of sleeve.
See Figure 30.
Caution: Do not allow anti-seize to get into air
passages.
4. Apply grease to the inboard sealing surface of the
axle spindle. See Figure 30.
5. Position the sleeve on the axle spindle, making
sure to align the input air port of the sleeve with
the Tire Pressure Control System air line access
hole on the brake flange and spider. See Figure 32.
6. Attach the sleeve installation fixture to the brake
spider as follows:
• Install base plate to four threaded rods and
against welded locating nuts. Secure with flat
washers and nuts. See Figure 32.
!
Drive Axle
Sleeve
Sleeve
Inner O-ring
Apply
Anti-seize
Figure 29 Sleeve Inner O-Ring Installation
!
• Align four threaded rods with holes in brake
spider and install. See Figure 32. Secure with
flat washers and nuts.
7. Press the sleeve onto the axle spindle as follows:
See Figure 32.
• Install mounting cup on spindle and align with
end of sleeve.
• Hold the bottle jack against the base plate and
pump until jack head engages the other end of
the installation tube.
• Extend jack until sleeve is bottomed on axle
spindle.
Caution: Be sure that the inside end of spindle
sleeve is installed far enough to meet mark put on
spindle in step 1.
• Retract bottle jack and remove sleeve installa-
tion fixture.
8. Lubricate and install O-ring and backup ring into
drive axle sleeve as shown in Figure 31.
Note: Position O-ring and backup ring on spindle. Use
outer bearing and hand pressure to press them into
position.