Margin adjustment, 2margin adjustment—adjusting the margin – Ricoh 450e User Manual
Page 95
Margin Adjustment—Adjusting the Margin
69
2
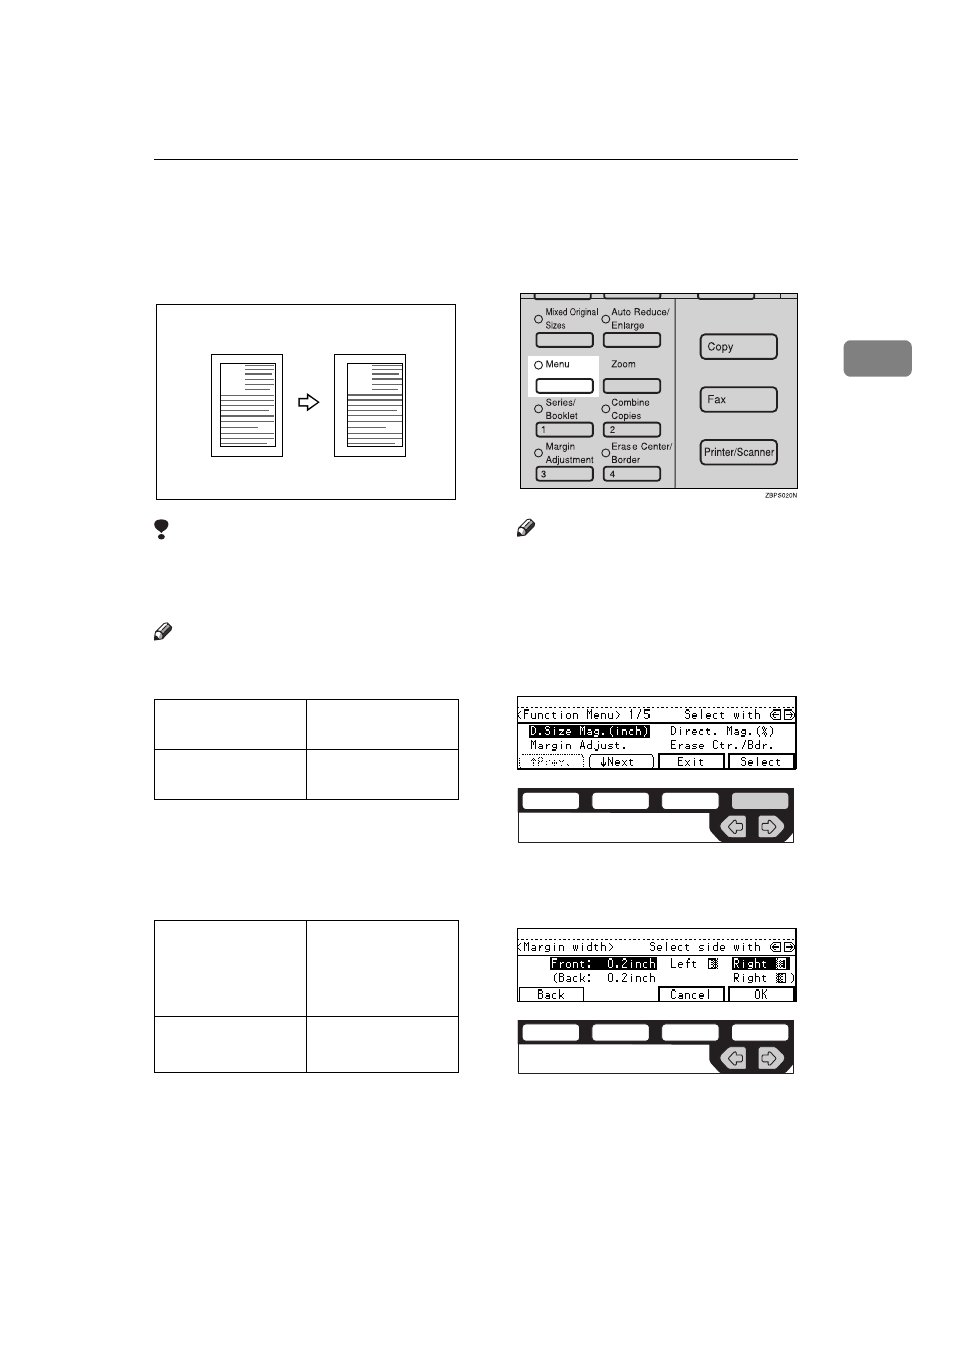
Margin Adjustment—Adjusting the Margin
You can shift the image either left or
right to make a binding margin.
Limitation
❒ If you set too wide margin, areas
you do not want to delete might be
erased.
Note
❒ You can change the width of the
binding margin as follows:
❒ The margin width default is as fol-
lows. You can change this default
setting with the user tools. See “3.
Marg.Adjust.Front” in
.
A
Press the {
Menu
} key.
Note
❒ If you have not changed the de-
fault setting, press the 3 {
Margin
Adjustment
} key. Go to step
C.
B
Select the
[Margin Adjust.]
with the
<> keys. Then, press the
[Select]
key.
C
Select
[Left]
(left margin) or
[Right]
(right margin) with the <> keys.
D
Enter the desired margin width
with the number keys.
Metric version
0 – 30mm (in 1mm
steps)
Inch version
0" – 1.0" (in 0.1"
steps)
Metric version
• Front: 5mm
Left
• Back: 5mm
Right
Inch version
• Front: 0.2" Left
• Back: 0.2" Right
A
A
ND2C0109
ND2C0105