Seat removal/installation – Pride Mobility ACN# 088 609 661 User Manual
Page 13
Basic Operation Instructions
13
www.pridemobility.com
Synergy Seat
SEAT REMOVAL/INSTALLATION
The Synergy Seat can be disconnected from the power base to aid in transport
or storage.
WARNING! Removing and installing your seating system
should be accomplished with no fewer than two people.
To remove the Synergy Seat from the power base:
1. Remove the safety snap pins from all of the seat mount connectors. See
figure 3.
2. Lift the Synergy Seat. One person should lift from the front of the seat
and another should lift from the rear. Lift the seat straight up out of the
seat mount connectors.
To install the Synergy Seat on the power base:
1. Lift the Synergy Seat above the power base. One person should lift from
the front of the seat and another should lift from the rear.
2. Lower the seat so that the four seat towers are inserted into the four seat
mount connectors. See figure 3.
3. Without removing the seat towers from the seat mount connectors, lift
either the front or rear of the Synergy Seat and insert the safety snap pins
to lock the seat at the desired height.
4. If an angled seat is desired, set the front of the Synergy Seat higher than
the rear. The seat base angle can be adjusted to achieve up to 20° of
posterior tilt (seat dump).
NOTE: You may need to loosen the setscrews on the seat mount connec-
tors on some power chairs.
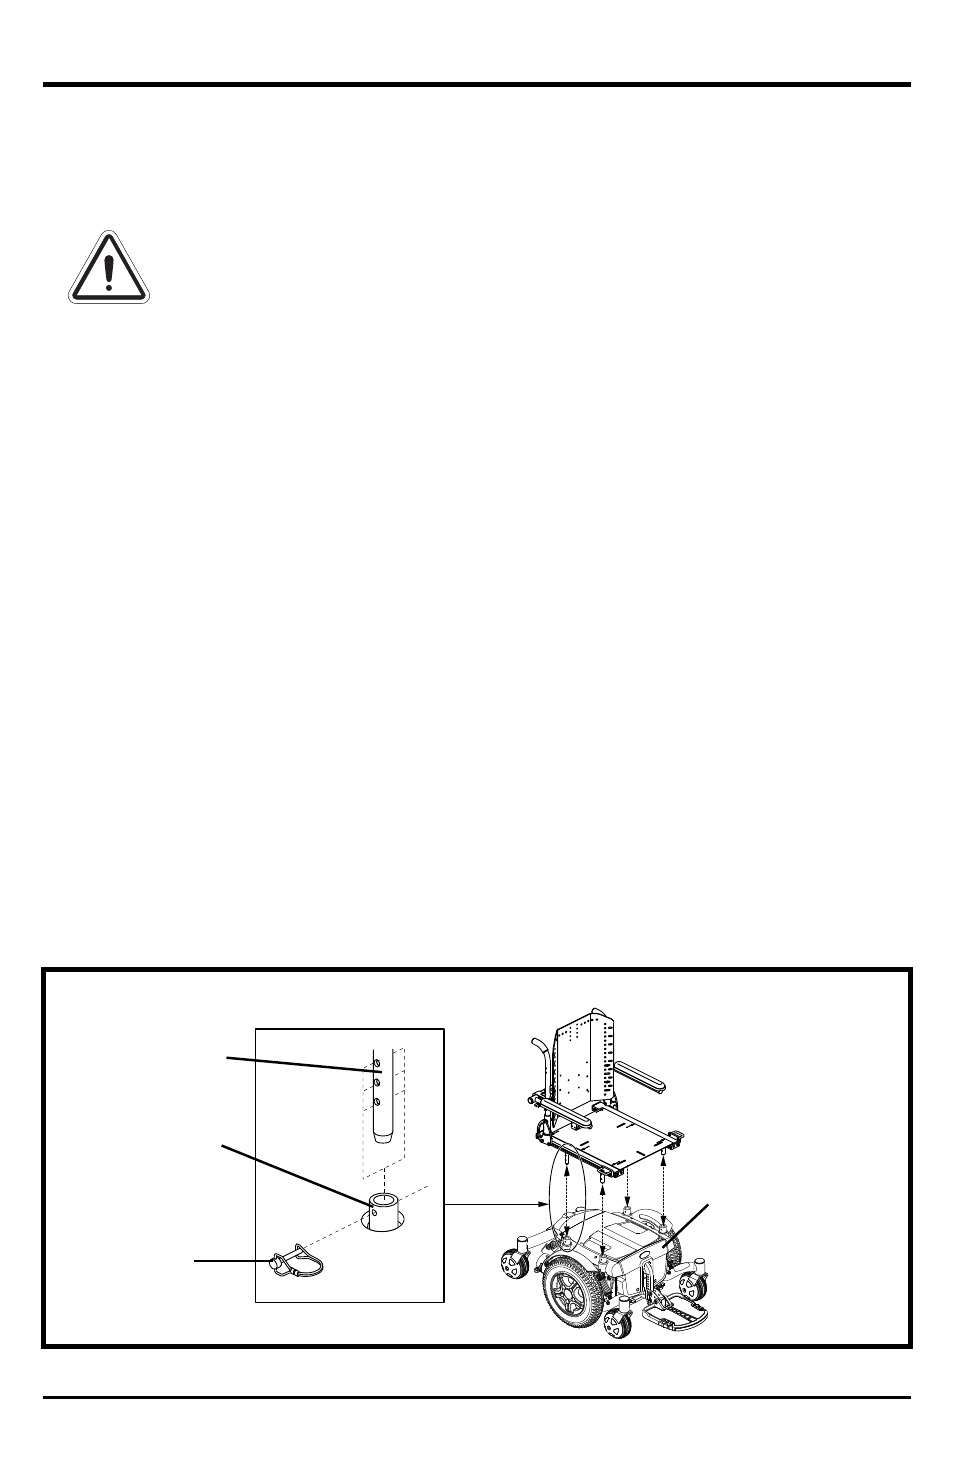
Figure 3. Seat Installation/Removal
POWER BASE
SAFETY
SNAP PIN
SEAT TOWER
SEAT MOUNT
CONNECTOR