Line 6 POD X3 Family User Manual
Page 8
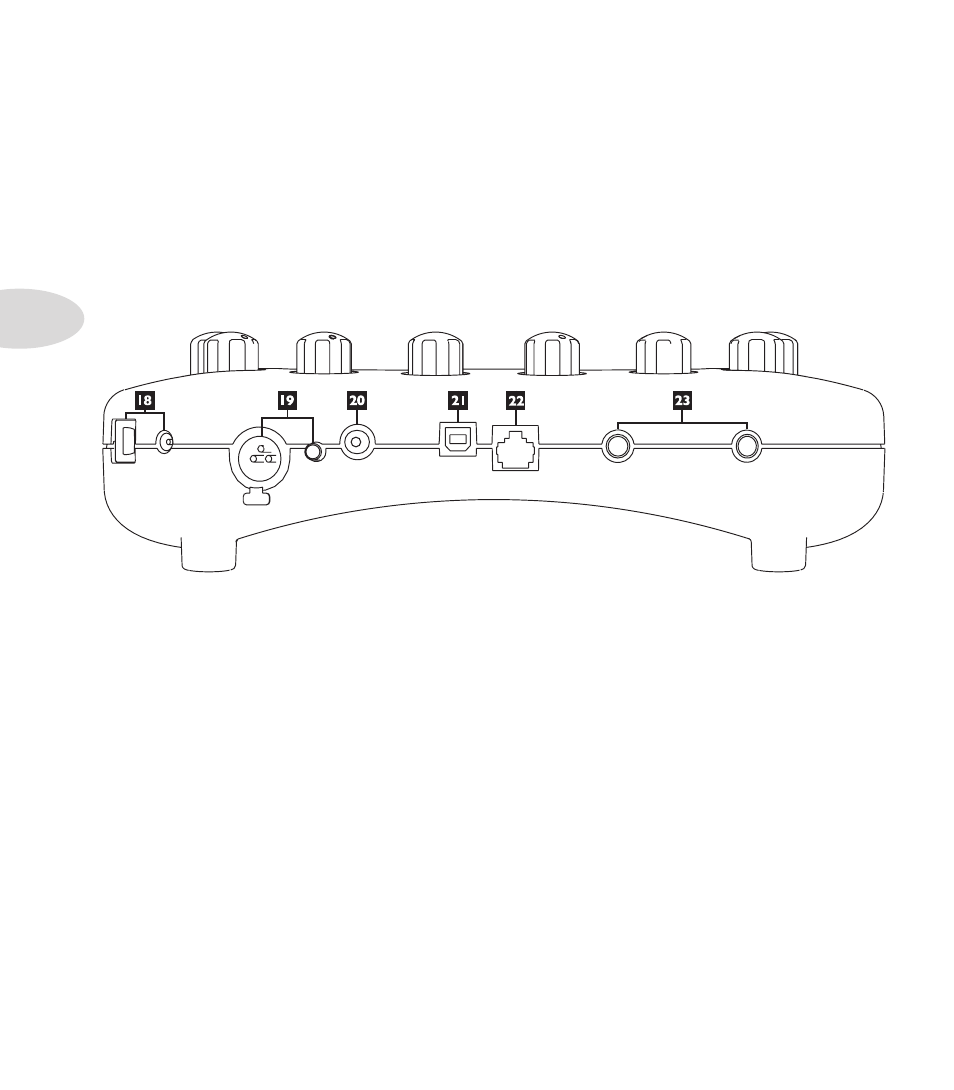
Controls & Connections
1•4
below the Home Page.
16. Input 1/Guitar In –
plug your guitar or bass in here. You techies will want to know this is a mono,
unbalanced connection. The
Inputs
page is where you assign whether this input feeds Tone 1, Tone 2 or
both.
17. Phones –
plug your headphones in here to avoid noise complaints from the neighbors (or the rest of
your family). The volume is set by the
Master Volume
knob. Any time you use headphones, it important
to be sure they’re not set for ridiculous volume before your slap them on your ears. Try a
Master Volume
knob setting of about 10 o’clock to start, then turn up from there if you need more volume.
To give you great sound through the headphones, your POD X3 automatically switches to Studio Mode
whenever headphones are connected.
18. Power –
connect the included PX-2 power pack and flip the switch here to bring your POD X3 to
life.
19. Input 2/Microphone In and Trim –
plug in your microphone here and use the Trim control
to get a nice, healthy level. The
Inputs
page is where you assign whether this input feeds Tone 1, Tone 2
or both.
20. S/PDIF Out –
this jack sends out 24-bit digital versions of the
Left & Right Outputs
. The
System
setup page lets you choose the sample rate and adjust the level.
21. USB 2.0 –
POD X3’s USB 2.0 jack lets you connect directly to a USB 2.0-equipped computer, and
take advantage of many computer-powered features:
Line 6 Monkey software makes it easy to install software and get updates. Install driver software with
•
Line 6 Monkey, and POD X3 provides 8 audio inputs to your computer via USB:
1-2 is the main signal, configured on POD X3’s Outputs page for Digital Outs.
•
3-4 is Tone 1 separately in stereo.
•
5-6 is Tone 2 separately in stereo.
•
7 is the sum of the inputs you’ve chosen for Tone 1.
•
8 is the sum of the inputs you’ve chosen for Tone 2.
•