Line 6 POD X3 Family User Manual
Page 17
Controls & Connections
1•13
4. Inputs –
press to enter the Inputs setup page to configure which inputs you’re using.
5. 4-way Nav –
pressing this will do different things depending on what page you’re on.
Home Page –
press
Up
,
Down
,
Left
, and
Right
to navigate to a processing block.
Edit Page –
press
Up
and
Down
to move through each row of parameters available. You can also press
Left
and
Right
to move to the previous or next edit page.
6. On/Off –
press to turn the selected processing block on or off (the blocks are on when the buttons
are lit and the block on the Home Page is solid). Double-press to enter the processing block’s Edit page,
where you can fine-tune the parameters for that block. Press the
Home
button to leave the Edit page and
return to the Home Page.
7. Outputs / Hold for System –
press to enter the Outputs setup page, where you can set up POD
X3 Pro for whatever you’re connecting it to. This is a very important step for getting the best sound out
of your POD X3 Pro. Press and hold for 2 seconds to enter the System setup page.
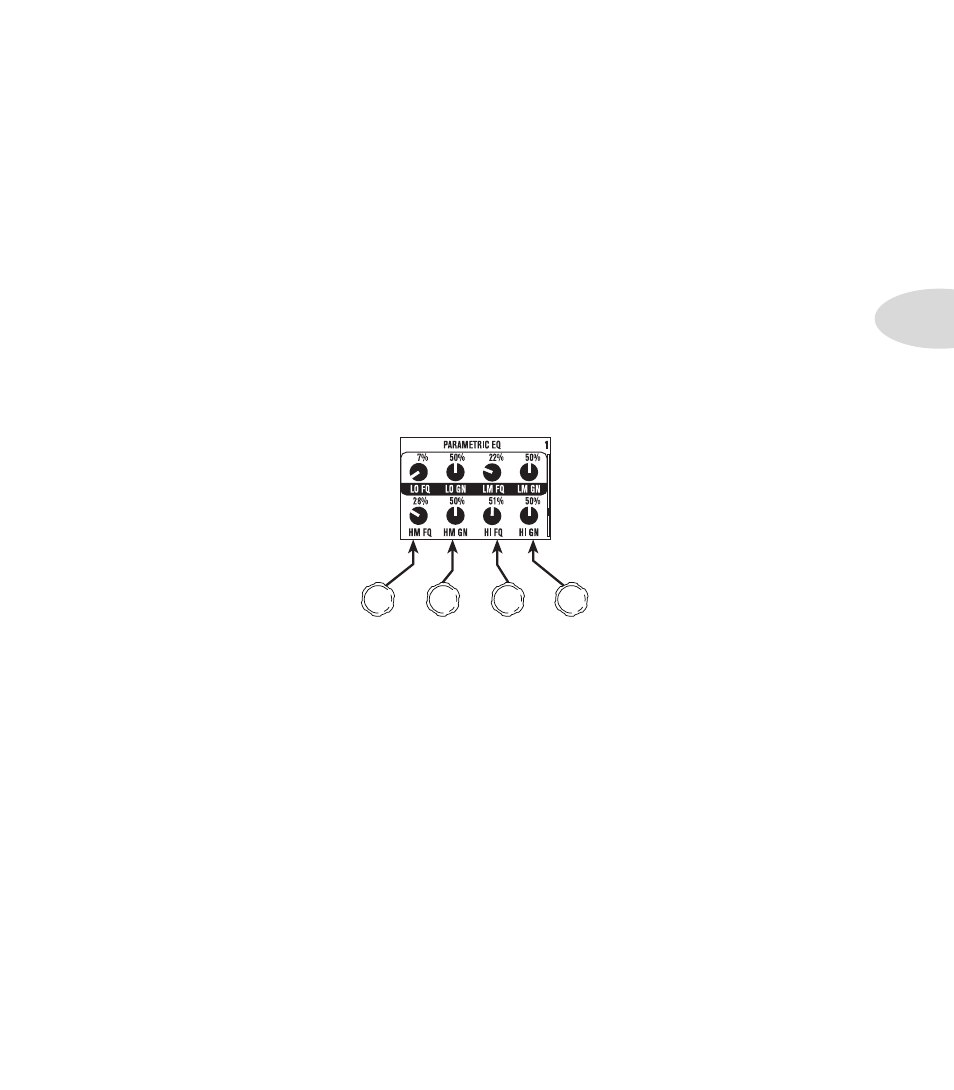
8. Multi-function Knobs –
turn any one of these knobs to adjust the corresponding parameter in the
display.
9. Keypad –
these buttons allow you to do the following:
Tone 2 / Hold for Dual –
press to toggle between Tone 1 and Tone 2 (you’re editing Tone 2 when the
button is lit). Press and hold to turn Dual Tone on or off.
Amp, Stomp, Mod, Delay, Verb –
press to turn the Amp, Stomp, Mod, Delay, and Reverb processing
blocks on or off (the blocks are on when the buttons are lit). Double-press one of these buttons to
tweak the block. For example, just press the
Stomp
button two times quickly and you’re instantly
taken to the Stomp Box Edit Page. Press the
Home
button to leave the Edit Page and return to the
Home Page.
Tap / Hold for Tuner –
POD X3 Pro allows you to control the time and speed of your Delay and/or Mod
effects by simply tapping on this button. Just tap it a few times and the effects that are set to “lock”
to that tempo will change to match what you tapped. There’s also a Tempo parameter in the effects’
Edit Pages, so you’ll see exactly what Tempo you’ve tapped. This is especially useful if you are trying to
nudge your Tap, setting to just the right value.
Press and hold the
Tap
button for 2 seconds to activate the tuner. You can also add footswitch tuner
activation with an optional FBV foot controller.
10. Drive –
controls how hard you’re driving the input of the chosen Amp Model. Like the input volume