Overwriting a tempo map event, Deleting a tempo map, Tempo track – KORG XTENDED DEFINITION D32XD User Manual
Page 73: Operation
63
(3) Verify that the settings are correct.
• Access the TEMPO, “TempoMap” tab page to check
the tempo map.
Inserting a rhythm pattern by adding a tempo map
event
To create a new tempo map event, access the New Map dia-
log box and press the Insert button to turn it on (highlight-
ed).
This will insert a tempo map event at the specified measure.
The measure number locations of subsequent tempo map
events will be moved backward by the corresponding
number of measures.
(1) Verify the location at which you want to insert the
tempo map event.
Access the TEMPO, “TempoMap” tab page, and verify
the current tempo map event. In this example, we will
insert a tempo map event at the beginning.
(2) Create the new tempo map event.
• Press the New button to display the New Map dialog
box.
• Set the parameters.
• Press the Insert button to turn it on (highlighted), and
then press the OK button.
(3) Verify that the tempo map event was inserted as you
intended.
Access the TEMPO, “TempoMap” tab page, and check
the tempo map.
Overwriting a tempo map event
If you want to add a tempo map event to switch rhythm pat-
terns, make sure that the Insert button is turned off in the
New Map
dialog box before you create the new tempo map
event.
In this case, the tempo map event of the specified measures
will be added, but the overall number of measures will not
change.
(1) Verify the location at which you want to overwrite the
existing tempo map event.
Access the TEMPO, “TempoMap” tab page, and check
the existing tempo map.
(2) Create a new tempo map event.
• Press the New button to display the New Map dialog
box.
• Set the parameters.
(3) Verify that the tempo map event was replaced as you
intended.
Access the TEMPO, “TempoMap” tab page, and check
the tempo map.
Deleting a tempo map
The tempo maps located after the deleted tempo map will be
shifted toward the beginning of the song by the number of
measures that were deleted.
This operation cannot be undone.
(1) Select the tempo map event that you want to delete.
Access the TEMPO, “TempoMap” tab page, and select
(highlight) the tempo map event that you want to delete.
(2) Delete the tempo map event.
• Press the Delete button. A dialog box will ask you to
confirm the operation.
• Press the Yes button to delete the selected tempo map
event.
If you turn on the Select All button, all tempo map events
other than tempo map event “001” will be deleted, and the set-
tings of tempo map event “001” will be initialized.
(3) Verify that the tempo map event was deleted as you
intended.
Access the TEMPO, “TempoMap” tab page, and check
the tempo map.
If you want to edit the settings, press the Edit button to dis-
play the Edit Map dialog box, and edit the parameters as de-
sired.
Tempo track
You can record MIDI Clock data or Tap Tempo data on the
tempo track, and use the tempo track to control the tempo of
the song.
Recording MIDI Clock data from an external MIDI
sequencer, and using it as the tempo track
MIDI Clock data from an external MIDI sequencer can be re-
corded as tempo data on the tempo track.
You can use this when you want to synchronize a D32XD/
D16XD song with song data created on a MIDI sequencer in
which the tempo changes continuously.
If MIDI Clock data was not received correctly from your MIDI se-
quencer, recording may stop in the middle of the song.
(1) Specify the time signature of the song.
If the time signature of the song data created on your
MIDI sequencer changes during the song, create a new
tempo map that begins where the time signature
changes. (
Tempo settings will play back in synchronization, but meas-
ures will become incorrectly aligned if the time signature
changes do not match.
(2) Connect the MIDI OUT connector of your MIDI
sequencer to the D32XD/D16XD’s MIDI IN connector.
(3) Set your MIDI sequencer so that it will transmit MIDI
Clock messages.
Refer to the owner’s manual of your MIDI sequencer.
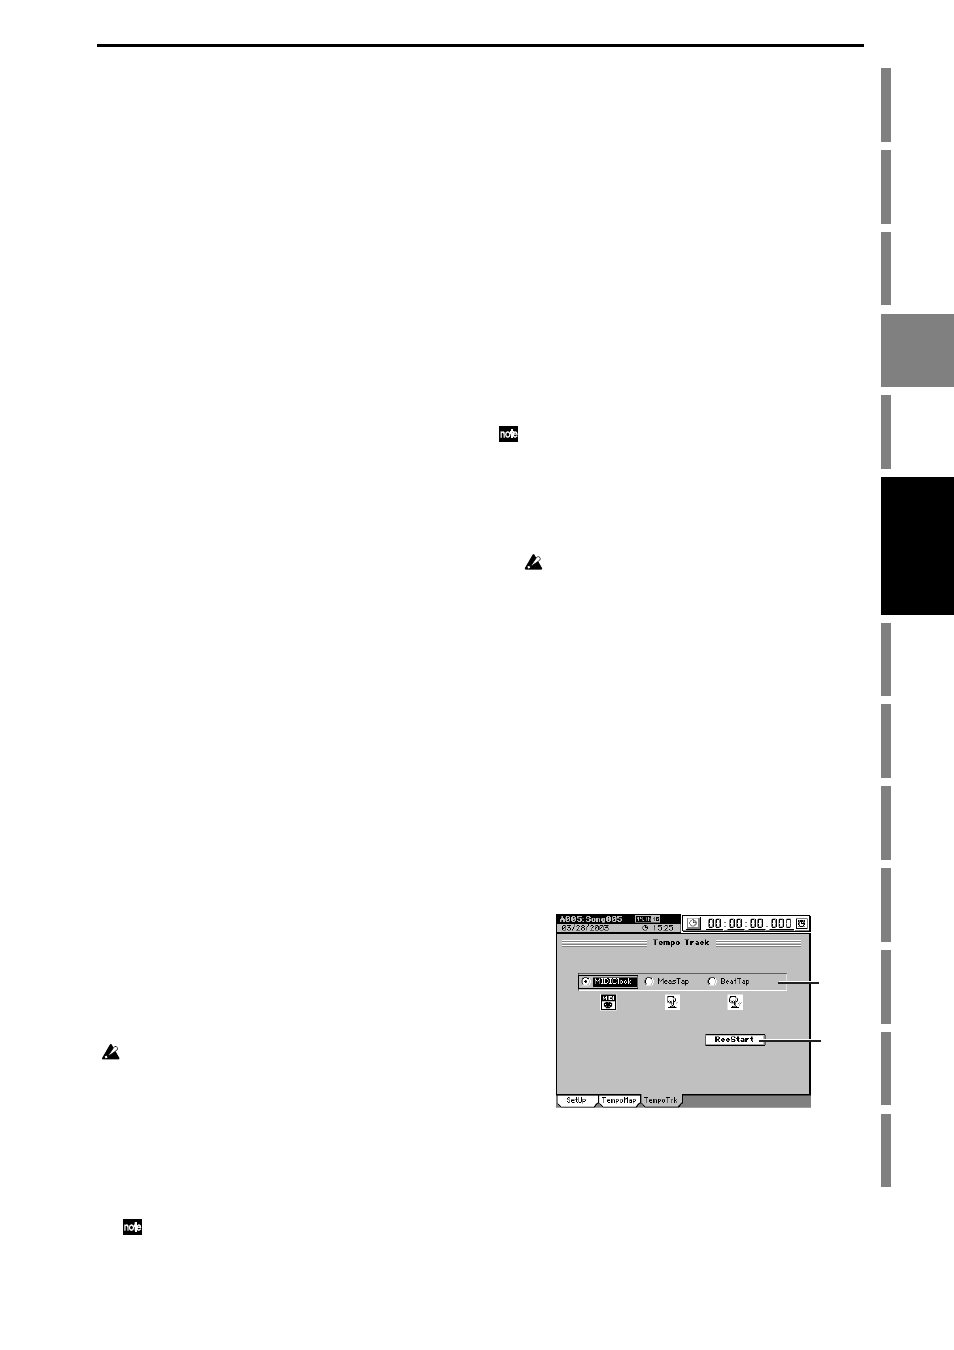
(4) Specify how you want to record the tempo.
Access the TEMPO, “TempoTrk” tab page, and choose
“MIDI Clock.”
(5) Record MIDI Clock data.
• Press the RecStart button to put the D32XD/D16XD in
the record-ready state.
• Start your MIDI sequencer.
• When the D32XD/D16XD starts receiving MIDI Clock
data from your MIDI sequencer, it will indicate
“Receiving MIDI Clock.”
(6) When your MIDI sequencer finishes playing, stop the
MIDI sequencer.
When the D32XD/D16XD finishes recording, it will
indicate “Complete.” Press the OK button.
(7) Check the tempo source.
When you record the tempo track, the TEMPO, “SetUp”
tab page Tempo Source will automatically be set to
“TempoTrk.”
(4)
(5)