6. group settings (d32xd), Fader groups, Ch on groups – KORG XTENDED DEFINITION D32XD User Manual
Page 60: 7. monitor settings, Fader groups ch on groups, P.50, 1, Refer to “3-7. monitor settings, P.50)
50
(3) Use the Pan Mode radio buttons to select how the PAN
knob will operate for paired channels (
3-6. Group settings (D32XD)
On the D32XD, multiple channels can be assigned to a
“Group”. Operating the fader of any channel assigned to that
group will adjust the volume of all channels in the group
while maintaining their relative volume balance. This can be
extremely useful. As an example, you could assign all the
Drum tracks to one group, and use a single fader to bring all
the drum tracks up and down in the mix.
In addition to fader groups, you can also assign each channel
to a CH ON group. Switching the CH ON key of any channel
in that group will switch all channels in the group. In this
way, if you had three tracks of backing vocals, you could turn
all three off with a single key.
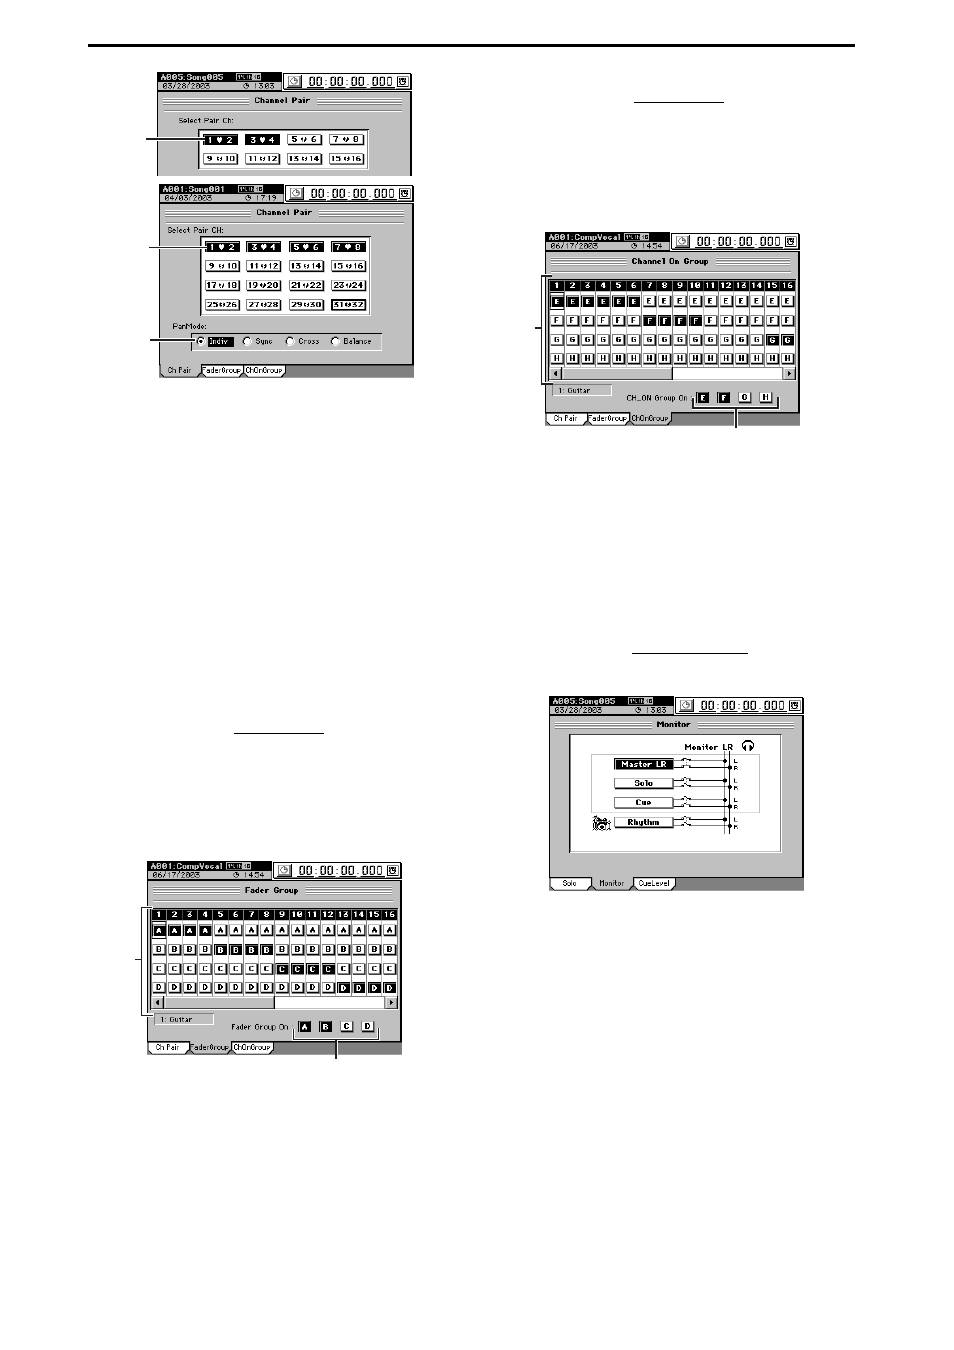
Fader groups
(1) Access the MIXER, PAIR/GROUP, “FaderGroup” tab
page.
(2) Use the radio buttons to select a group (A–D) for each
channel fader.
(3) Use the Fader Group On buttons A–D to enable the
desired groups.
You may enable more than one group.
CH ON groups
(1) Access the MIXER, PAIR/GROUP, “ChOnGroup” tab
page.
(2) Use the radio buttons to select a group (E–H) for each
CH ON button.
(3) Use the Ch On Group On buttons E–H to enable the
desired groups.
You may enable more than one group.
3-7. Monitor settings
Here’s how to select the audio signal that will be output from
MONITOR OUT
and PHONE.
(1) Connect your monitor system.
You can either connect amplified speakers or a similar
system to the MONITOR OUT L/R jacks, or connect
headphones to the PHONES jack.
(2) Select the monitor source.
Access the MIXER, SOLO/MONITOR, “Monitor” tab
page, and select the source that you want to monitor.
Master LR
Monitor the audio of the master bus.
Solo
Monitor the audio that is being soloed.
When you adjust the settings in the “Solo” tab page, the
monitor source will be selected automatically.
If you want to defeat this, you can do so in the “Solo”
tab page (
Cue
Monitor the volume and pan as set in the cue mix, inde-
pendent of the channel faders and PAN knobs (
“3-8. Adjusting the cue level”).
Rhythm
If this is on, the rhythm sound will be output only from
the monitor bus. In this case, the TEMPO, “SetUp” tab
page Rhythm Assign setting will be set to “Monitor.”
This is convenient when you want to monitor only the
rhythm, such as during a live performance.
(2)
(2)
(3)
D16XD
D32XD
(3)
(2)
(3)
(2)