Importing the class list – Smart Technologies 2011 User Manual
Page 37
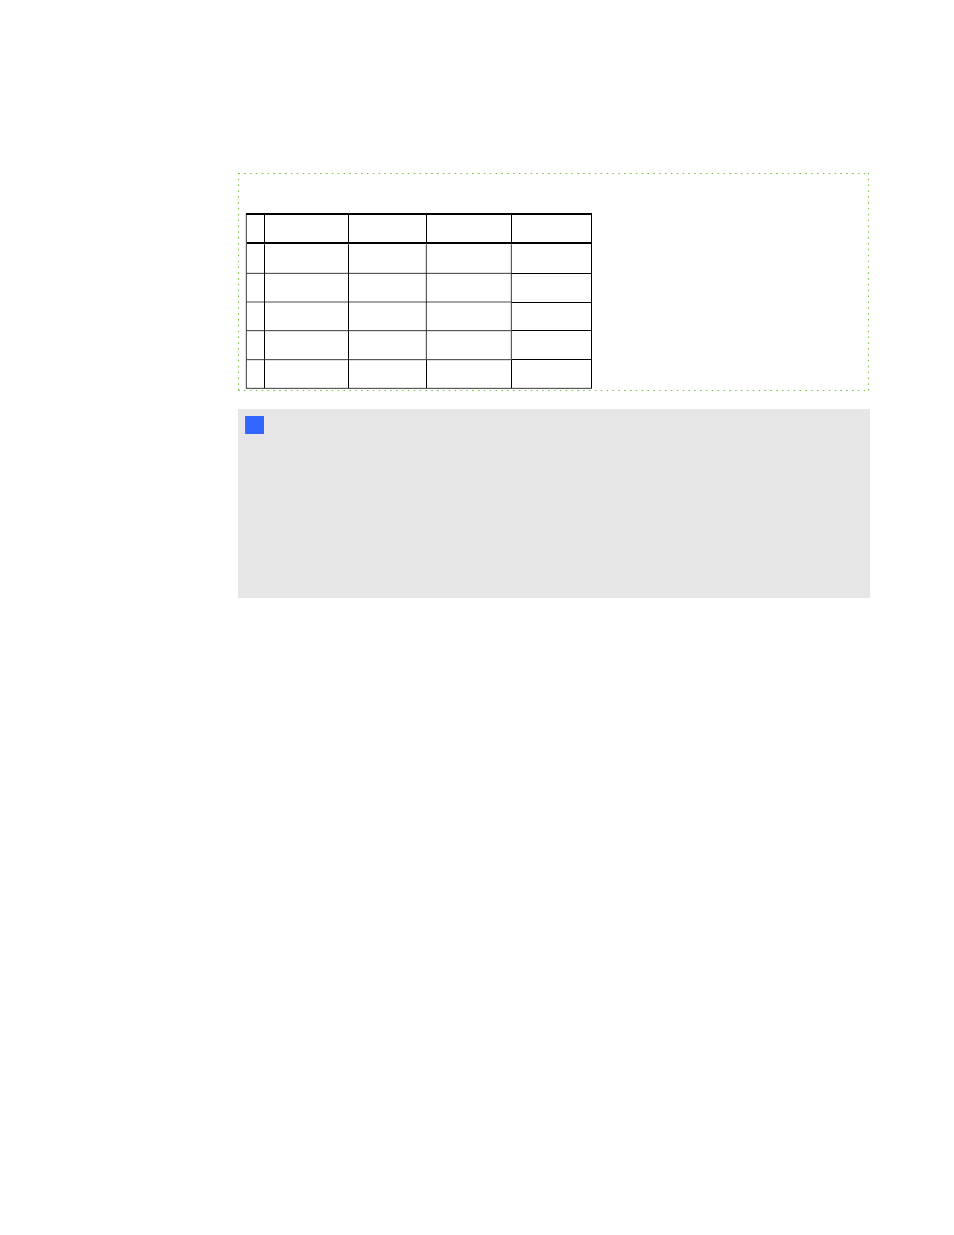
9. In column B, type a unique clicker ID from 1 to 199 for each student's clicker.
E X A M P L E
A
B
C
D
1 ID Number Clicker ID First Name Last name
2 12345
1
David
Jones
3 67890
2
Jane
Doe
4 56789
3
John
Swartz
5 34567
4
Mary
Smith
N
N O T E S
o
The clicker ID must match the ID programmed into the student’s clicker. See
Assigning clicker IDs on page 21.
o
If you don’t include a Clicker ID column in the spreadsheet, SMART Response
software will insert sequential Clicker IDs into the class list. You must then match the
clicker IDs to the clickers either by editing the class list or by re-programming the
clickers.
10. Save the spreadsheet.
Importing the class list
g
To import a class list from an Excel spreadsheet
1. Start Teacher Tools. See Starting Teacher Tools on page 23.
Teacher Tools appears.
2. Click Add a Class in the Gradebook area on the left.
3. Type a name for your class, add any optional details to the Class Information boxes, and then
click Add.
After a short delay, the new class's window appears, and the class name appears in the
Gradebook area.
4. Click the Students tab at the top of the window.
5. Click the Import button at the top of the window, and then select Students.
The Import dialog box appears.
6. Select the class you want to import the student list into, and then click Next.
7. Select Microsoft Excel from the Import from list, and then click Next.
C H A P T E R 2
Getting started
31