Scag Power Equipment STR User Manual
Page 44
38
Section 7
B. Blade Sharpening
-NOTE-
If possible, use a file to sharpen the blade.
Using a wheel grinder may burn the blade.
-NOTE-
DO NOT sharpen the blades beyond 1/3 of
the width of the blade.
1. Sharpen the cutting edge at the same bevel as the
original. See Figure 7-9. Sharpen only the top of the
cutting edge to maintain sharpness.
30°
30°
X Must NOT Exceed
1/3 Blade Width
Angle Blade Back
Do Not Cut In
Figure 7-9 Blade Sharpening
2. Check the balance of the blade. If the blades are out
of balance, vibration and premature wear can occur.
See your authorized Scag dealer for blade balancing
or special tools, if you choose to balance your own
blades.
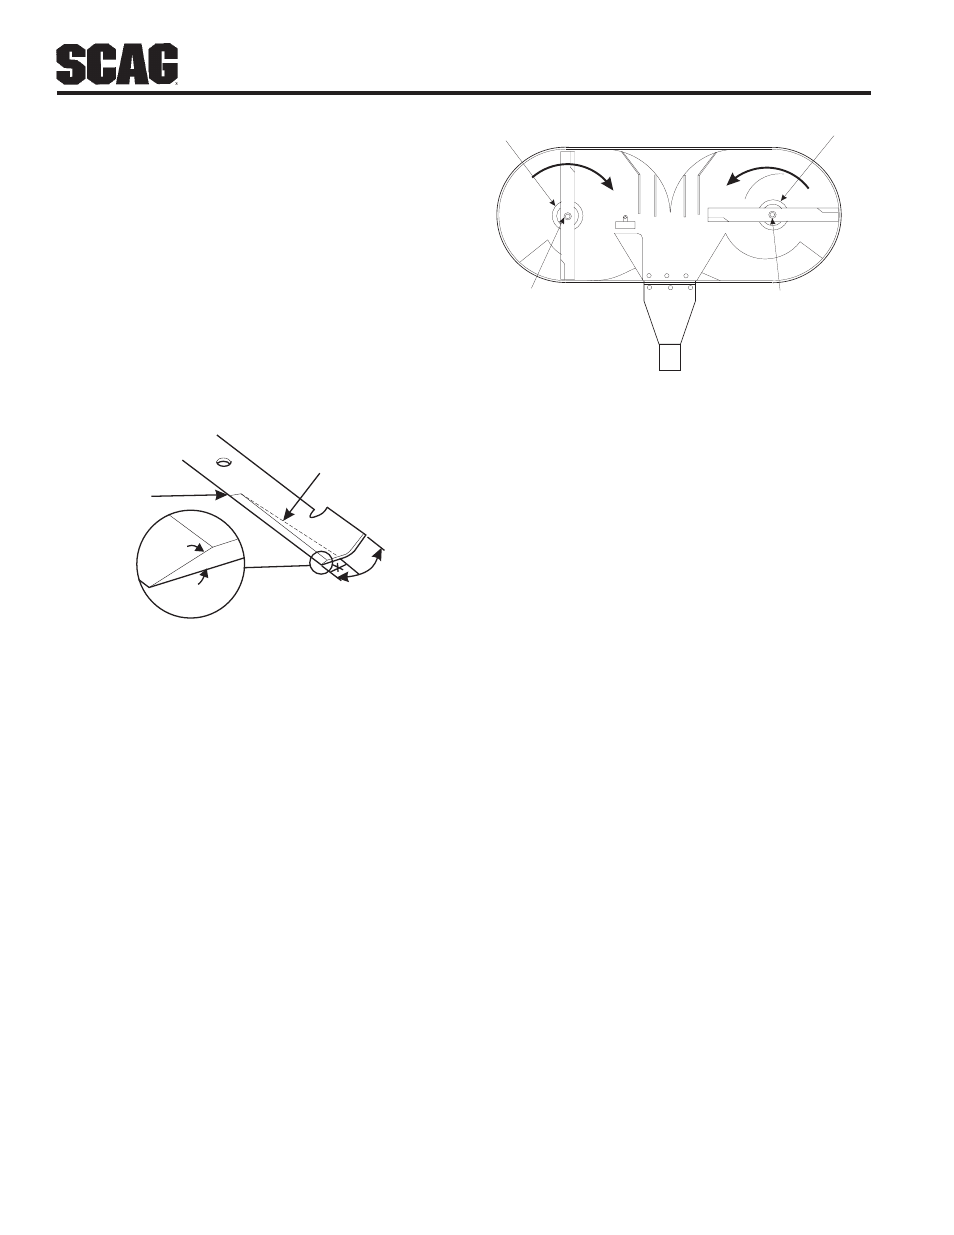
C. Blade Replacement
1. Remove the ignition key before replacing the blades.
2. Tilt the mower deck and secure in place using the two
prop rods.
3. Using the Blade Buddy accessory, remove the
attaching bolt, lockwasher, flatwasher and the spacer.
Remove the cutter blade and blade drive adapter from
the spindle shaft. (Figure 7-10).
4. Remove the cutter blade from the blade drive adapter
by removing the (2) two # 10-32 X 1/2" socket head
capscrews, elastic stop nuts and spacers.
Attaching Hardware
Bolt, Lockwasher and
Flatwasher
Attaching Hardware
Bolt, Lockwasher and
Flatwasher
Blade Adapter
Blade Adapter
-IMPORTANT-
Do not interchange the blades. There is a
left and a right cutting blade. Be sure to
install the blades correctly or the mower will
not cut properly.
-IMPORTANT-
The blade must be installed 90° to each other
as shown in Figure 7-10. If the blades are
not installed as shown, they will contact each
other and could cause severe damage to the
blades, deck, and blade drive system.
4. To install the cutter blade, position it on the blade
drive adapter and secure using the #10-32 X 1/2"
socket head capscrews, spacers and elastic stop nuts.
Install the cutter blade and blade drive adapter
assembly to the spindle shaft using the flatwasher,
lockwasher, spacer and bolt. Tighten the bolt to a
torque of 150 ft-lb.
7.10 TIRES
Check the tire pressures after every 8 hours of operation
or daily.
Caster Wheels ......................................... 25 PSI
Rear Wheel ............................................. 25 PSI
Drive Wheels .......................................... 15 PSI
Figure 7-10 Blade Replacement