Fade/wipe effects, Important, Effect selection – JVC GR-DVX70 User Manual
Page 41: Fade/wipe selection ( , , , , , , , , , and )
EN
41
A
M
PL
AY
/PC
OFF CAMER
A
5S
DS
C
DS
CPLA
Y
MANUAL
PAUSE
W
H
FOCUS
EXPOSURE
AUTO
OFF
AUTO
AUTO
W. BALANCE
4
FADER
/ WIPE
END
OFF
TO MODE MENU
P. AE
FLASH ADJ.
/ EFFECT
0
4
FADER / WIPE
SEL.
FADER – BLACK
WIPE – SHUTTER
RANDOM
OFF
FADER – WHITE
P
R
?
W
H
B
K
FADER –MOSAIC
B W
FADER – B.W
Fade/Wipe Effects
IMPORTANT:
If certain modes of Programme AE with special effects
(
੬
pg. 44) are activated, some Fade/Wipe Effects cannot
be used. If you select a Fade/Wipe Effect that is unusable
in the current situation, the indication blinks.
These effects let you make pro-style scene transitions. Use
these to spice up the transition from one scene to the next.
You can also vary transitions from scene to scene.
This function is available only when the Power Switch is
set to “
”.
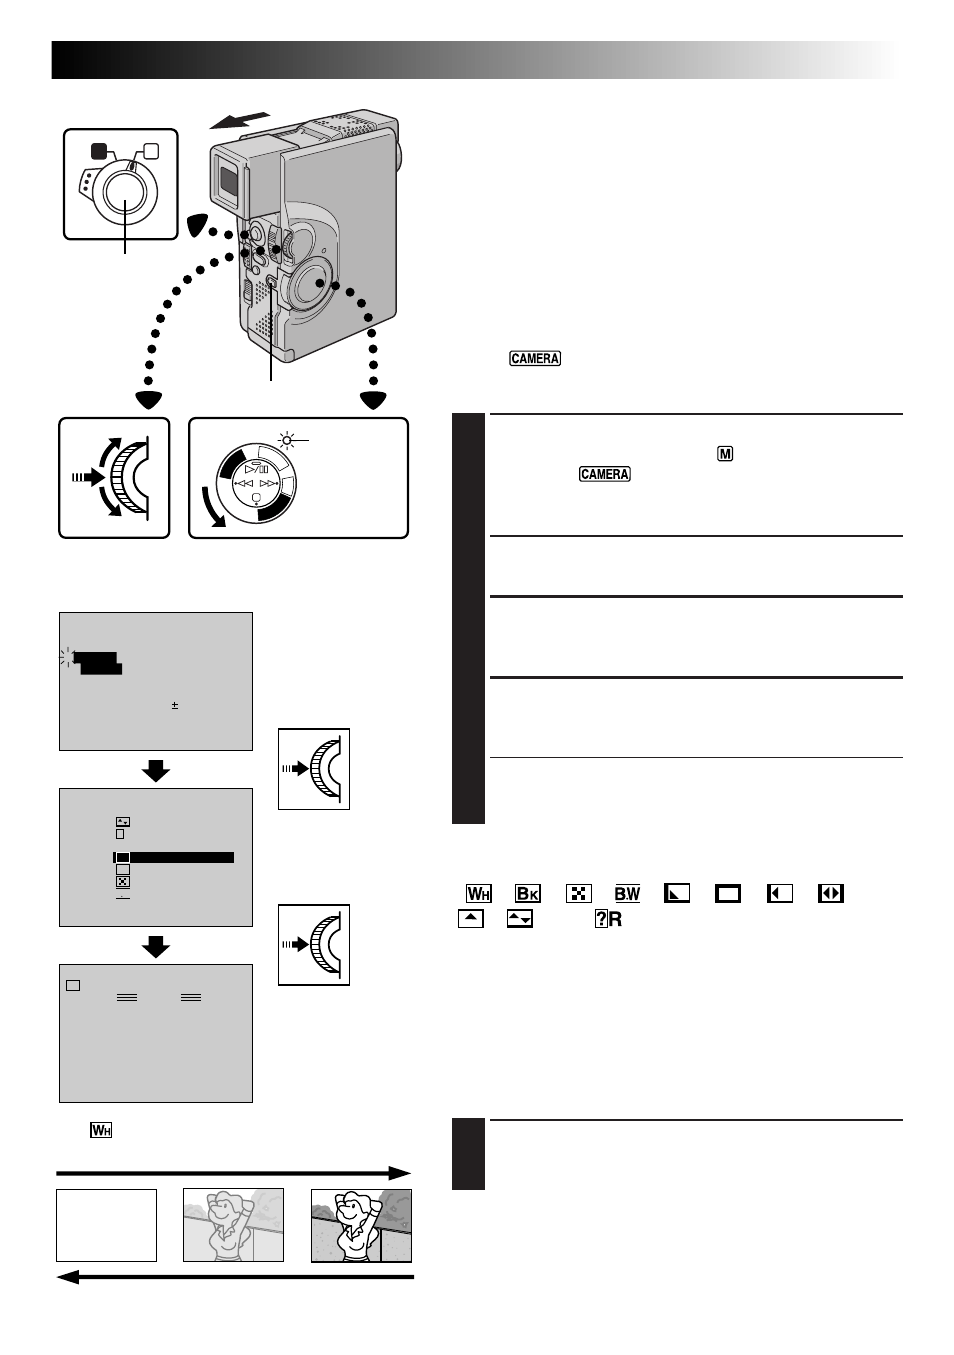
EFFECT SELECTION
1
SELECT OPERATION MODE
Set the Operation Switch to “
”. Then set the Power
Switch to “
” while pressing down the Lock
Button. Pull out the viewfinder fully or open the LCD
monitor fully.
2
ACCESS RECORDING MENU
Press MENU/SET. The Recording Menu appears.
3
ACCESS “FADER/WIPE” MENU
Rotate MENU/SET to move the highlight bar to
“FADER/WIPE”, then press it.
4
SELECT EFFECT
Rotate MENU/SET to move the highlight bar to the
desired function, then press it.
•The FADER/WIPE Menu disappears and the effect is
reserved. The indicator representing the selected
effect appears.
Fade-in
START/STOP
Button
Recording Menu
FADER/WIPE Menu
[Ex.:
FADER – WHITE]
MENU/SET Dial
Display
Fade-out
FADE/WIPE SELECTION
(
,
,
,
,
,
,
,
,
,
and
)
A scene gradually appears on a black, white, or black-and-
white screen (Fade-in or Wipe-in); or disappears, leaving a
black, white, or black-and-white screen (Fade-out or
Wipe-out).
Fade or Wipe works when recording is started or when
you stop recording.
Before the following step, perform the above steps 1
through 4.
5
START OR END RECORDING
Press START/STOP to activate Fade-in/out or Wipe-in/
out.
NOTE:
੬
pg. 42.
Lock Button
Power lamp
Power Switch
Operation Switch