Maintenance and troubleshooting, Micro-v belt, adjustment and replacement – MK Diamond Products MK CX-3 User Manual
Page 35
MK CX-3
Revision 09/04, Effective Date September 17, 2004
Page 35
MAINTENANCE AND TROUBLESHOOTING
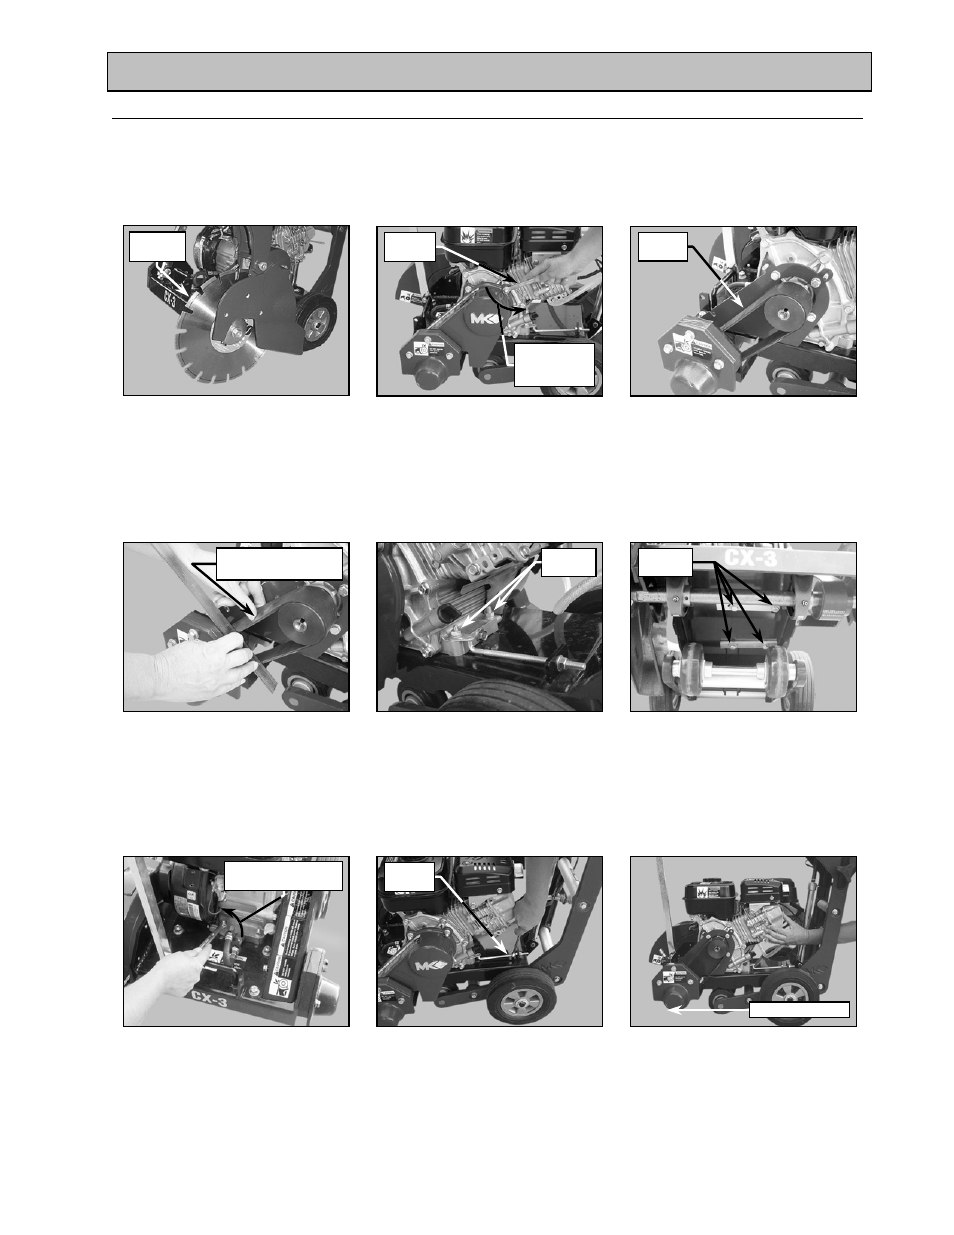
14. Micro-V Belt, Adjustment and Replacement:
In order to ensure the CX-3 operates at peak efficiency, the power transmission Micro-V belt should be
inspected monthly and changed if any signs of damage and/or excessive wear is observed.
NOTE:
1. When a new belt is installed, it should be inspected and re-tensioned after the first forty-eight
(48) hours of operation.
(E)
Locate the 4 upper Engine
Mounting Nuts on both ends of
the CX-3 motor
(G)
Loosen the Engine Mounting
Bolts using two 1/2-inch wrenches
(C)
Inspect the V-belt for excessive
wear, cracks and cuts – if worn,
proceed to Step E
(B)
Locate and remove the Belt Guard
Retaining Screws using a 7/16-
wrench and then remove the Belt
Guard
(H)
Loosen the Motor Tension Arm
using a 1/2-inch Wrench
(D)
Check V-belt for proper tension if
tension is correct, go to Step R
(Proper tension is approximately
1/8-inch deflection of the belt)
Inspect
V-belt
(A)
Remove the Blade
(See Blade Removal /Installation
section)
Diamond
Blade
(F)
Locate the 4 Lower Engine
Mounting Bolts on both ends of
the CX-3 motor
(I)
Push the Motor forward to loosen
the Micro-V belt
7-16”
Wrench
Turn counter-
clockwise to
loosen
Check Tension 1/2-way
between pulleys
Mounting
Nuts
Mounting
Bolts
Rotate counter-
clockwise to loosen
Tension
Arm
Direction of Push