Analog recording and playback, 1. basic recording and playback, D-160 owner's manual (recording /playback) – Fostex D-160 User Manual
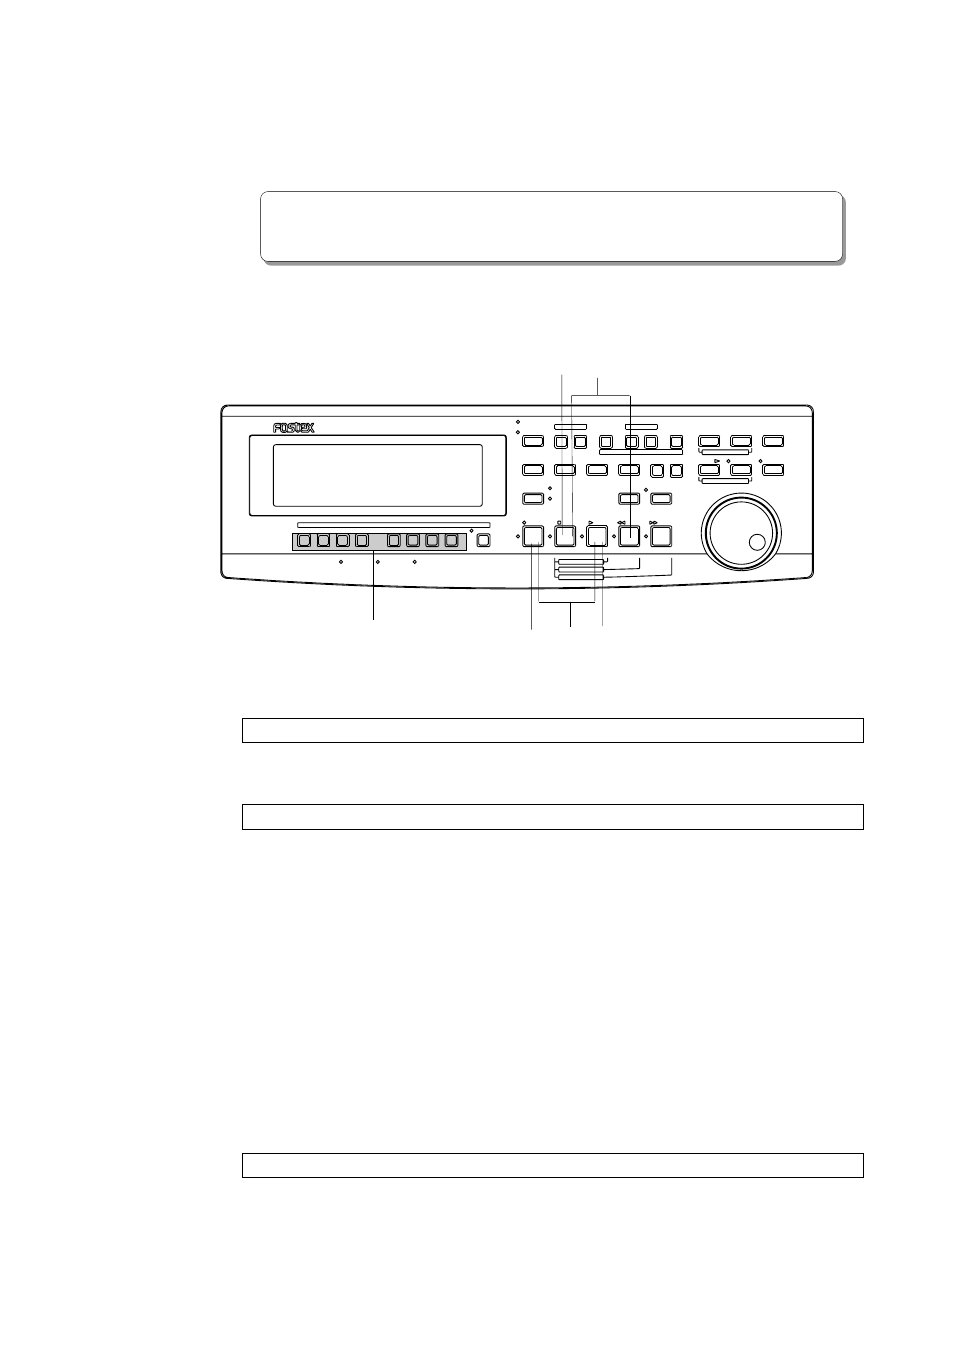
Page 53: Selecting a recording track 1, Adjusting the recording level, Start recording 3, D-160, Press the record button once
D-160 Owner's Manual (Recording /Playback)
53
3. Analog Recording and Playback
This explanation is based on the assumption that the D-160 is connected to a
mixer, and the sound source is input from the mixer’s BUSS OUT (GROUP OUT)
connector, as shown in the “1. Basic Connection” section.
* Restore the default settings on the D-160.
* Check the Program selection and the sampling rate setting. Do not change these settings until this
session is complete.
3-1. Basic recording and playback
Assume that “P01” has been selected for recording.
If you wish to record data in another Program, see the section 3-2.
1,5
6
4
2
3
7
Turn on the power to the D-160, and check to make sure that the Time Base display
indicates ABS time “00m 00s 00f” and “P01”.
Selecting a recording track
1
. Press any RECORD TRACK select key (1-16) to "READY" the track.
The number of the selected track will blink on the display.
Adjusting the recording level
The D-160 does not have a recording level control. You need to adjust the recording
level on a connected device that sends out sound data. Primarily use the GROUP
OUT master faders (or the faders that control the output level of BUSS OUT 1-16)
on the mixer. The recording track of the D-160 also needs to enter input monitoring
status.
2
. Press the RECORD button once.
The READY track enters input monitoring status. Raise the GROUP OUT master fader on
the mixer so that the meter of the "READY" track approaches level "0-3" at peak volume.
If the "OL" indication is lit, the recording level is too high.
Unlike an analog recorder, if the recording level is too high, the signal may be distorted on
a digital recorder. In particular, recording vocal or acoustic musical instruments requires
more attention because the recording level may change suddenly, causing signal overflow.
It may be a good idea to use a compressor/limiter connected to an INSERT connector on
the mixer.
Start recording
3
. After adjusting the recording level, press the RECORD button while holding down the
PLAY button.
The blinking RECORD LED and track indicator will light up.
SHIFT
AUTO
CLIPBOARD PLAY
LOCATE ABS 0
DIGITAL MULTITRACK RECORDER
D-160
IN / OUT
PUNCH
PGM CHANGE
8/16
7/15
6/14
5/13
4/12
3/11
2/10
1/9
RECORD TRACK
HD ACCESS
LOCKED
MTC IN
END
IN
OUT
START
AUTO PUNCH
AUTO PLAY
IN
OUT
AUTO RTN
CLIPBOARD
PASTE
MOVE
COPY
AUTO RTN
ERASE
UNDO
REDO
DISP SEL
EXECUTE
/YES
EXIT
/NO
HOLD/
STORE
RECALL
TIME BASE SEL
TAKE
REHEARSAL
LOCATE
PUNCH
F FWD
REWIND
PLAY
STOP
RECORD
VARI PITCH
LOCATE ABS END