Installing the new system board – HP VECTRA VL800 User Manual
Page 49
2 Installing and Replacing Hardware Parts in Your PC
Replacing the System Board
49
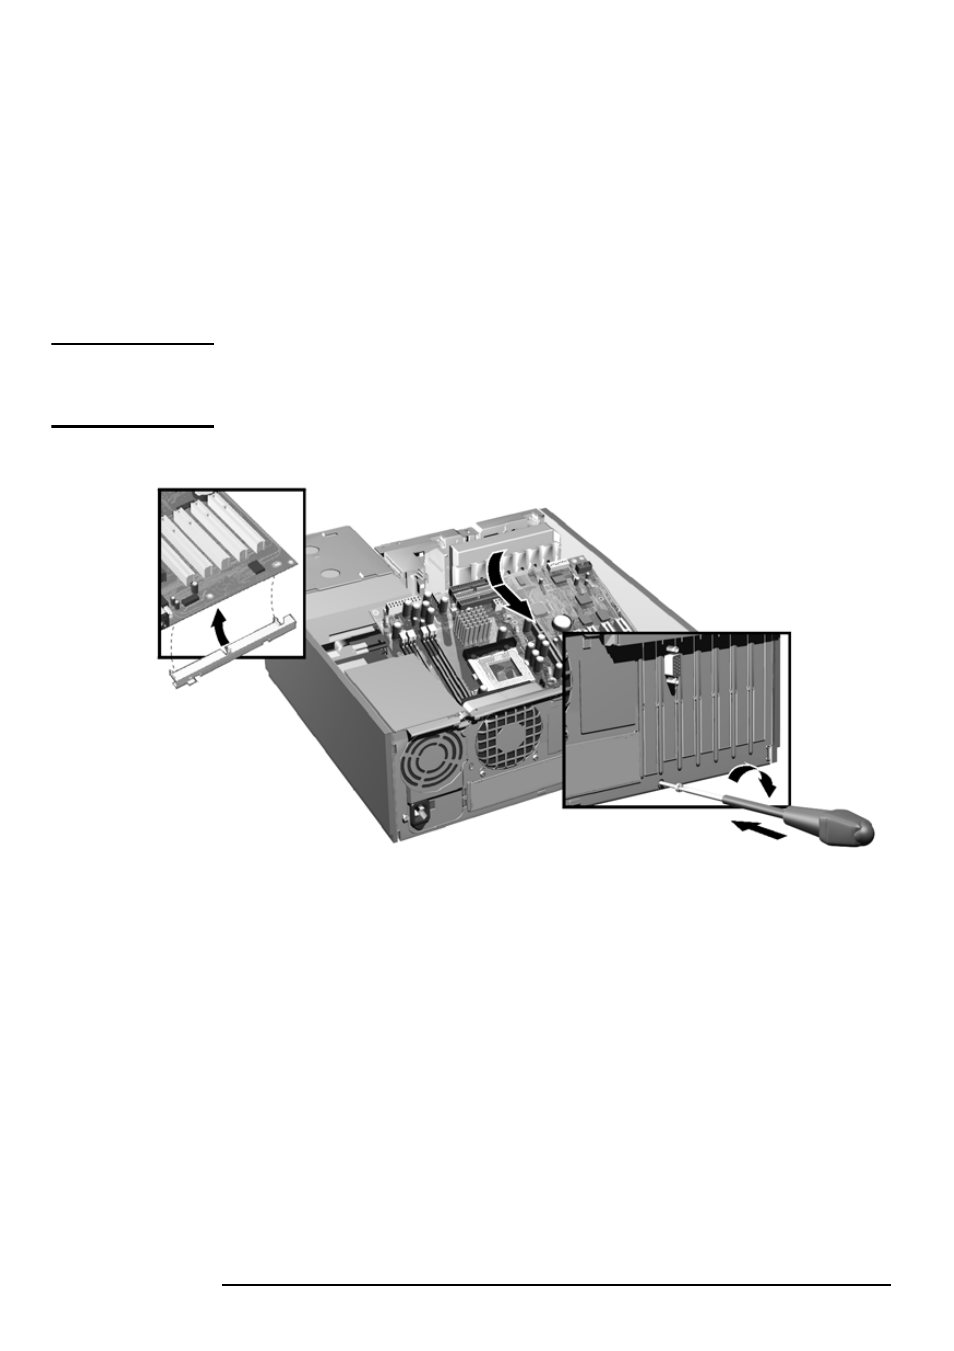
Installing the New System Board
1
Clip the retaining metal bracket onto the new system board.
2
Aligning the rear connectors with their corresponding sockets, insert the
system board and lower it onto the guide pins. Ensure that all hooks are
correctly positioned. Check that the rear connectors are correctly
aligned in their sockets.
CAUTION
When inserting the system board, be careful not to damage or bend the metal
fingers on the rear connector EMI shield. If the shield is damaged it can be
very difficult to install the system board correctly.
3
Replace the rear screw to secure the system board in place.
4
Slide the front access cage back into position (described on page 36).
5
Replace the main memory, processor, heatsink and any accessory cards
in the new system board (described in this chapter). When reinstalling
the heatsink, remember to replace the thermal interface (described on
page 46).
6
Reconnect any cables you disconnected earlier from the system board.
Note that there are two power connectors on the system board – you
must connect both. To find out the positions of system board
connectors, refer to page 53 or to the label located on the PC chassis.
7
Check the system board switches to ensure they are correctly set. Refer
to page 51 for more information.
8
Replace the PC’s cover and front bezel (refer to page 25). Reconnect all
the power and telecommunications cables.