Epson 10600 User Manual
Page 55
1-40
1-40
|
Setting Up the Printer
8. Look at the other patterns across the same row to see if the same number
is consistently the best line. If not, determine which number is generally
the best.
9. Check the control panel display. It shows
#1 C=8
, which means that
number 8 is the current setting for row
#1 C
. If you need to change the
setting, use the
+
or
–
button to select the best line for that row. Then
press the
Enter
button to register the setting.
10. Repeat step 7 through step 9 for each additional row.
11. When done, press the
Pause
button to exit the head alignment.
If during the adjustment you had to select a line that was less than 7 or
greater than 9, you should reprint the alignment pattern to verify that
number 7, 8, or 9 is now the best line in each row. You may have to
repeat the head alignment more than once to ensure that number 8 (±1)
is the best choice in each case.
12. When done performing the adjustment in Uni-D (uni-directional)
mode, as described above, you should repeat it in Bi-D mode (select
ALIGNMENT = Bi-D ALL
). The process is exactly the same, but the
printed pattern is different:
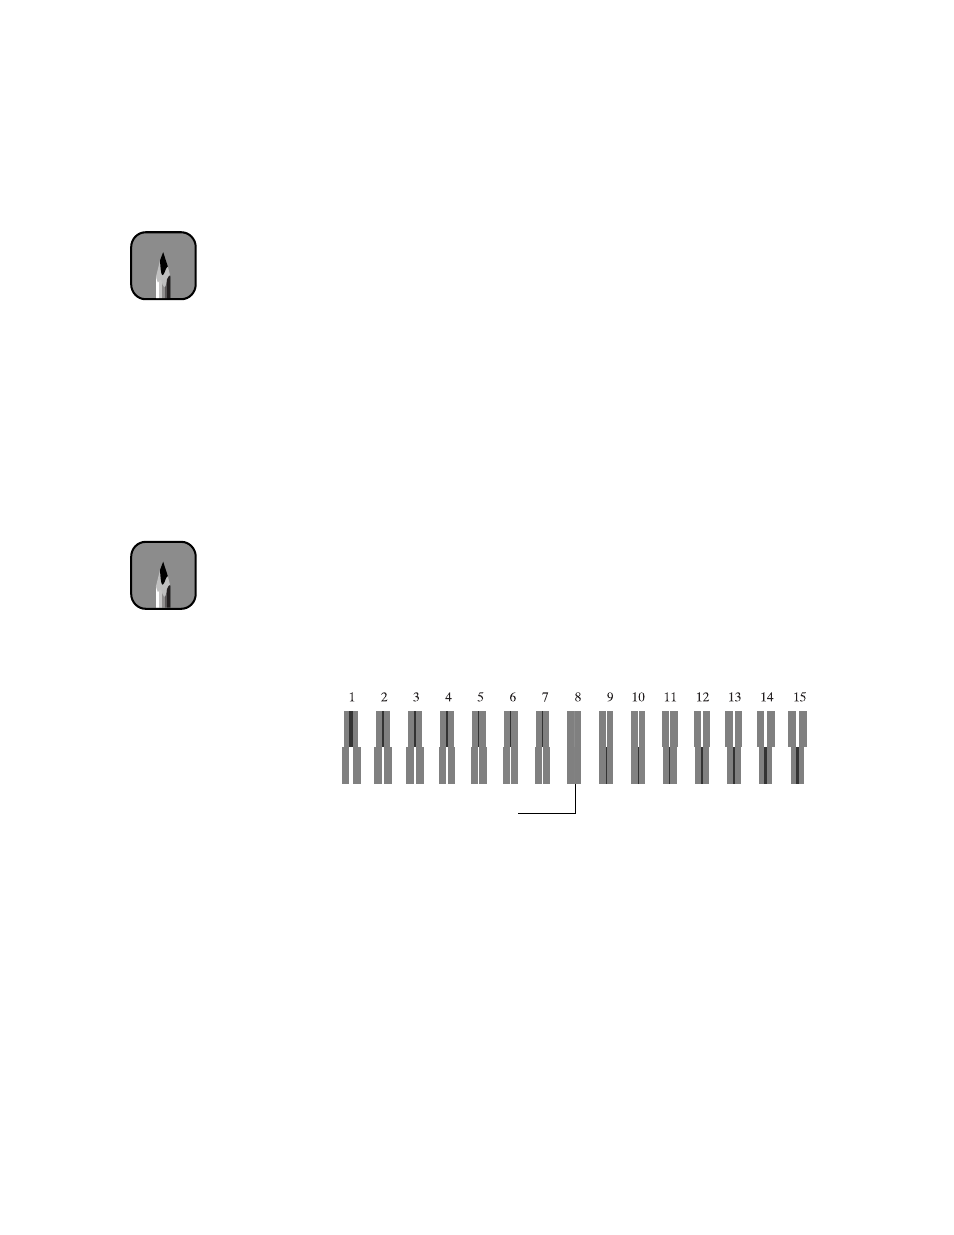
To select the best pattern, use an eye loupe to determine which block has
the smallest gaps. In the example above, number 8 has the smallest gaps.
Once this adjustment is done, you’ve finished setting up your Stylus Pro
10600.
Note
Ideally, number 8 (±1)
should be the best line in
all of the printed patterns.
If it is, you can press
Pause to exit the
adjustment early.
Note
You’ll get best results by
performing the Uni-D
adjustment first, then
performing the Bi-D ALL
adjustment.
Number 8 is the best choice