MINOURA MPT-200S User Manual
Page 4
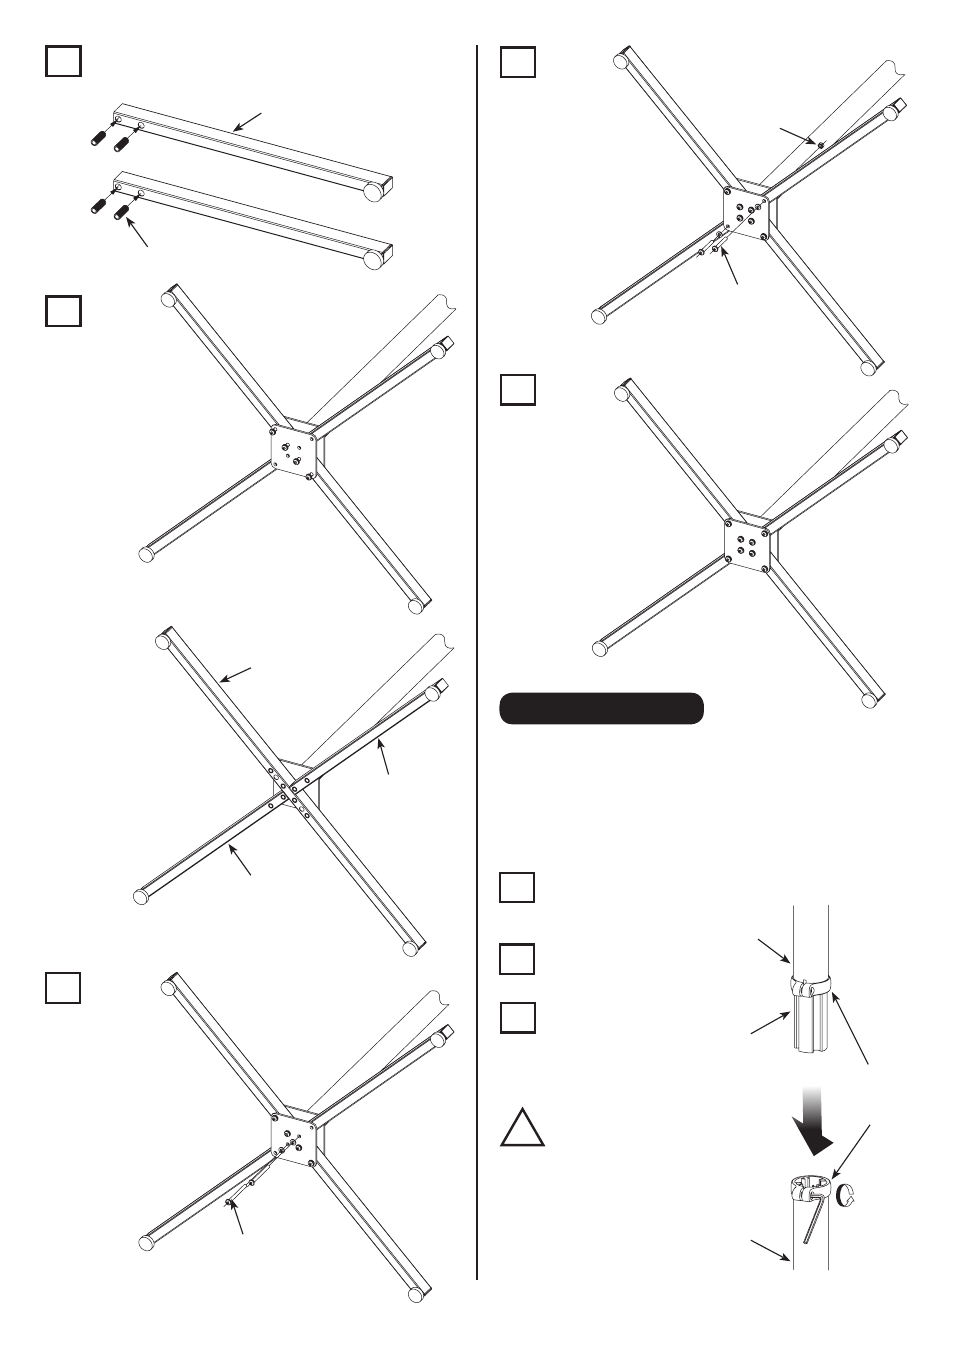
2
- 4 -
3
4
5
6
Joint the Pillars
1
2
3
!
Loosen
Put the black Collars to all holes on the Short Leg.
Collar must be inserted from the larger hole.
Short Leg
Collar (Black)
(Fig. N)
Set the Short Legs as
they make "X" shape.
(Fig. O)
Inside layout is as shown in Fig. P.
Long Leg
Short Leg
Short Leg
(Fig. P)
Put the longer
M6x70 Bolt to the
end hole on the
Short Leg, then
screw into the
Pillar.
M6x70 Bolt
Spring Washer
(Fig. Q)
Put the shorter
M6x45 Bolt to other
hole, sandlwich the
Short Leg with two
Leg Brackets, then
screw to the Dome
Nut.
Dome Nut
M6x45 Bolt
Spring Washer
(Fig. R)
Tighten every bolt.
Over-tightening
the M6x70 Bolt
may cause serious
damage to the alloy
Pillar.
Do not overtighten.
(Fig. S)
The pillars on MPT-200S are separated.
Both pillars have same diameter, and the pillar joint fastens
the pillars.
The pillar joint has already been installed on the upper pillar.
You insert it into the lower pillar, then tighten the clamps to
fix.
At first, loosen the clamp on the
lower pillar by M5 hex wrench.
Insert the pillar joint
into the lower pillar.
While keeping both
pillars are tightly
attached, tighten
the clamp firmly
(tightening torque:
3 N.m).
Upper Pillar
Pillar
Joint
Clamp
(Fig. T)
Lower Pillar
Pillar Joint
If some space remains
between the pillars, it
may be bent or broken
caused by the bike
weight. Make sure
the pillars are tightely
attached.