MINOURA MPT-200S User Manual
Page 3
4
5
6
- 3 -
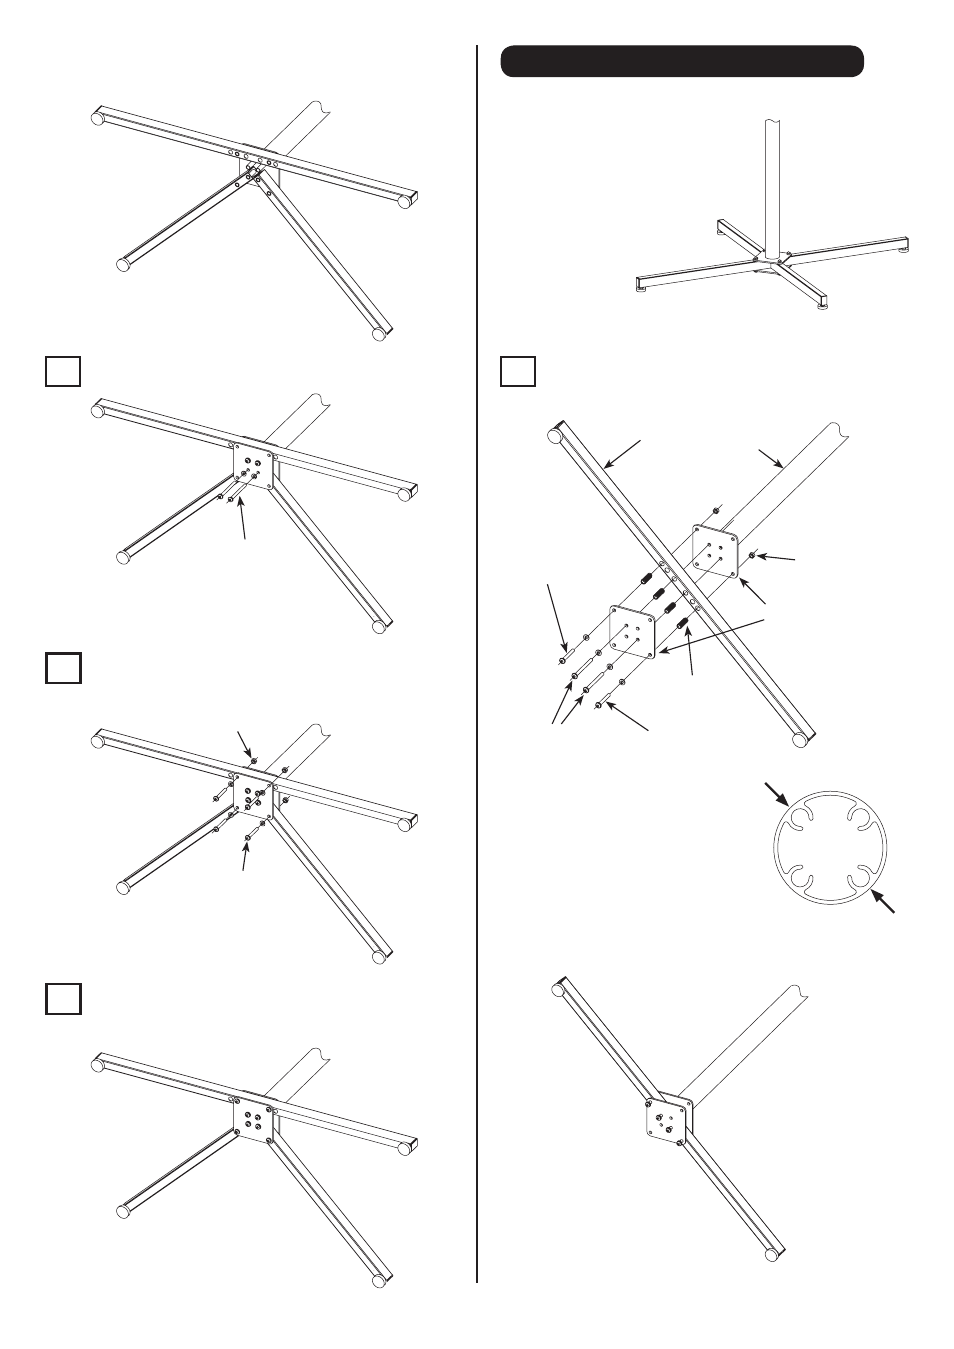
Assemble MPT-200S in X-style Leg
1
(図M)
Inside layout is as shown in Fig.F.
You will install short Legs first, so you don't have to
set Long Leg at this moment.
(Fig. F)
Put the longer M6x70 Bolt to the end hole on the
Short Leg, then screw it into the Pillar.
M6x70 Bolt
Spring Washer
(Fig. G)
Put the shorter M6x45 Bolt into the corner hole to fix
the Long and Short Legs. M6x45 Bolt will be screwed
to the Dome Nut.
Dome Nut
M6x45 Bolt
Spring Washer
(Fig. H)
Tighten every bolt.
Over-tightening the M6x70 Bolt may cause serious
damage to the alloy Pillar. Do not overtighten.
(Fig. I)
to be placed anywhere due
to the larger footprint and
maximum stability of the X.
It also allows you to install
extra bike cradles and/or
optional attachments on the
back side (max number of
bikes is 4).
Setting up the MPT-200S in the X-style allows the stand
(Fig. J)
Please note, setting the stand up in the
X-style does require more floor space.
Put 4 black Collars to the designated holes on the
Long Leg. Sandwitch the Long Leg with 2 Leg
Brackets, then attach to the Pillar.
Pillar
Long Leg
Dome Nut
Leg Bracket
(both are exactly same)
M6x45 Bolt
Spring Washer
Collar
(Black)
M6x45 Bolt
Spring Washer
M6x70 Bolt
Spring Washer
(Fig. K)
Screw the bolts
to these slots
(Fig. L)
Use the longer M6x70 Bolts
to the center 2 holes for
screwing into the Pillar.
Use the shorter M6x45 Bolts
to the outer holes, then screw
to the Dome Nuts.
Every bolt should not be
tightened firmly yet.
This is the image after every bolt is screwed in.