Install the ink cartridges – Epson 900N User Manual
Page 20
13
Install the Ink Cartridges
1. Make sure the printer is turned off (the
P power button should be up). Then
plug the printer’s power cord into a grounded outlet.
Don’t use an outlet controlled by a wall switch or timer, or one
that uses the same circuit as a large appliance. This may
disrupt the power, which can erase memory or even damage
the power supply.
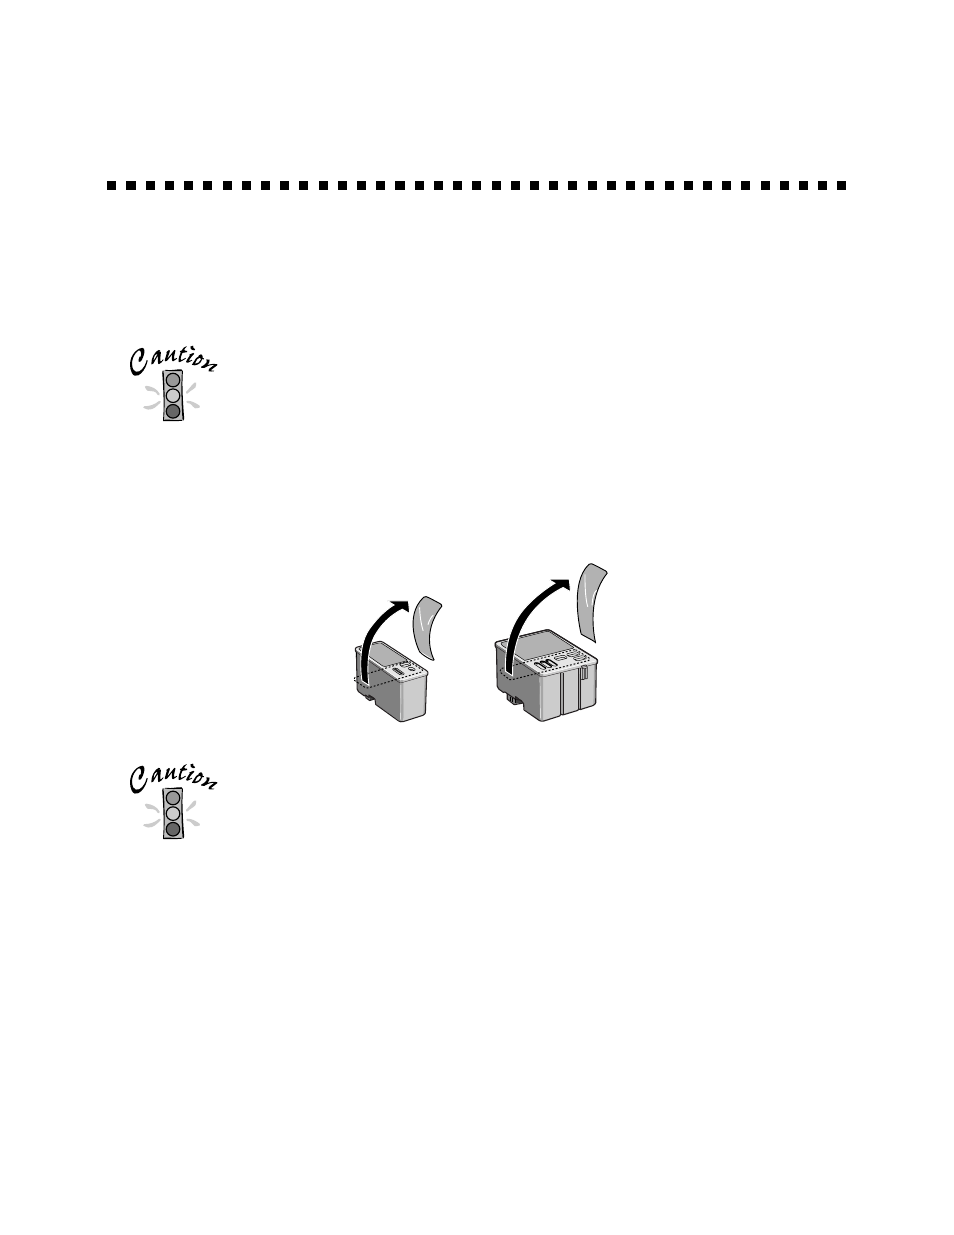
2. Unwrap the ink cartridges. Then remove only the yellow part of the tape seal on
the top, as shown. Don’t pull off the blue portion or remove the clear seal
underneath the cartridge.
To ensure the print heads charge correctly, install the ink
cartridges that came with your printer.
You must remove the yellow tape from the top of the
cartridge or you will permanently damage it. It’s okay if a small
corner of the yellow tape stays on the cartridge.
setup.fm Page 13 Friday, February 19, 1999 4:00 PM
- Stylus Pro 7800 (11 pages)
- Stylus Pro 4000 (49 pages)
- Stylus Photo R300 (2 pages)
- Stylus Pro 7000 (147 pages)
- AcuLaser C3000 (316 pages)
- Stylus Pro 7900 (24 pages)
- Stylus Pro 4450 (21 pages)
- 1000 (272 pages)
- T034120 (4 pages)
- T580300 (4 pages)
- 300 (91 pages)
- B 510DN (190 pages)
- B 510DN (218 pages)
- Stylus NX510 (8 pages)
- Stylus Photo RX580 (95 pages)
- T549300 (4 pages)
- B 500DN (168 pages)
- AculaserCX11NF (5 pages)
- 480SXU (24 pages)
- 4500 (317 pages)
- STYLUS RX500 (99 pages)
- 2100 (13 pages)
- Stylus NX215 (2 pages)
- T098320 (4 pages)
- T041020 (4 pages)
- R210 (8 pages)
- All-In-One Stylus Photo RX600 (164 pages)
- 777I (53 pages)
- T033120 (4 pages)
- Stylus CX7000F (8 pages)
- 60 (113 pages)
- T034220 (4 pages)
- WorkForce 40 Series (36 pages)
- T054220 (4 pages)
- Stylus CX3200 (11 pages)
- Stylus CX7800 (18 pages)
- T060220 (4 pages)
- 2500 (180 pages)
- AcuLaser CX11N (32 pages)
- AcuLaser CX11N (4 pages)
- 2000P (16 pages)
- T606600 (4 pages)
- Stylus CX6000 (18 pages)
- FS-4000DN (2 pages)
- MSDS T544700 (4 pages)