7 decommissioning, 1 removing the speedwire/webconnect data module, Shipping – SMA SPEEDWIRE V.1.6 User Manual
Page 25
SMA Solar Technology AG
7 Decommissioning
Installation Manual
SWWEBCONDM-IA-en-16
25
7 Decommissioning
7.1 Removing the Speedwire/Webconnect Data Module
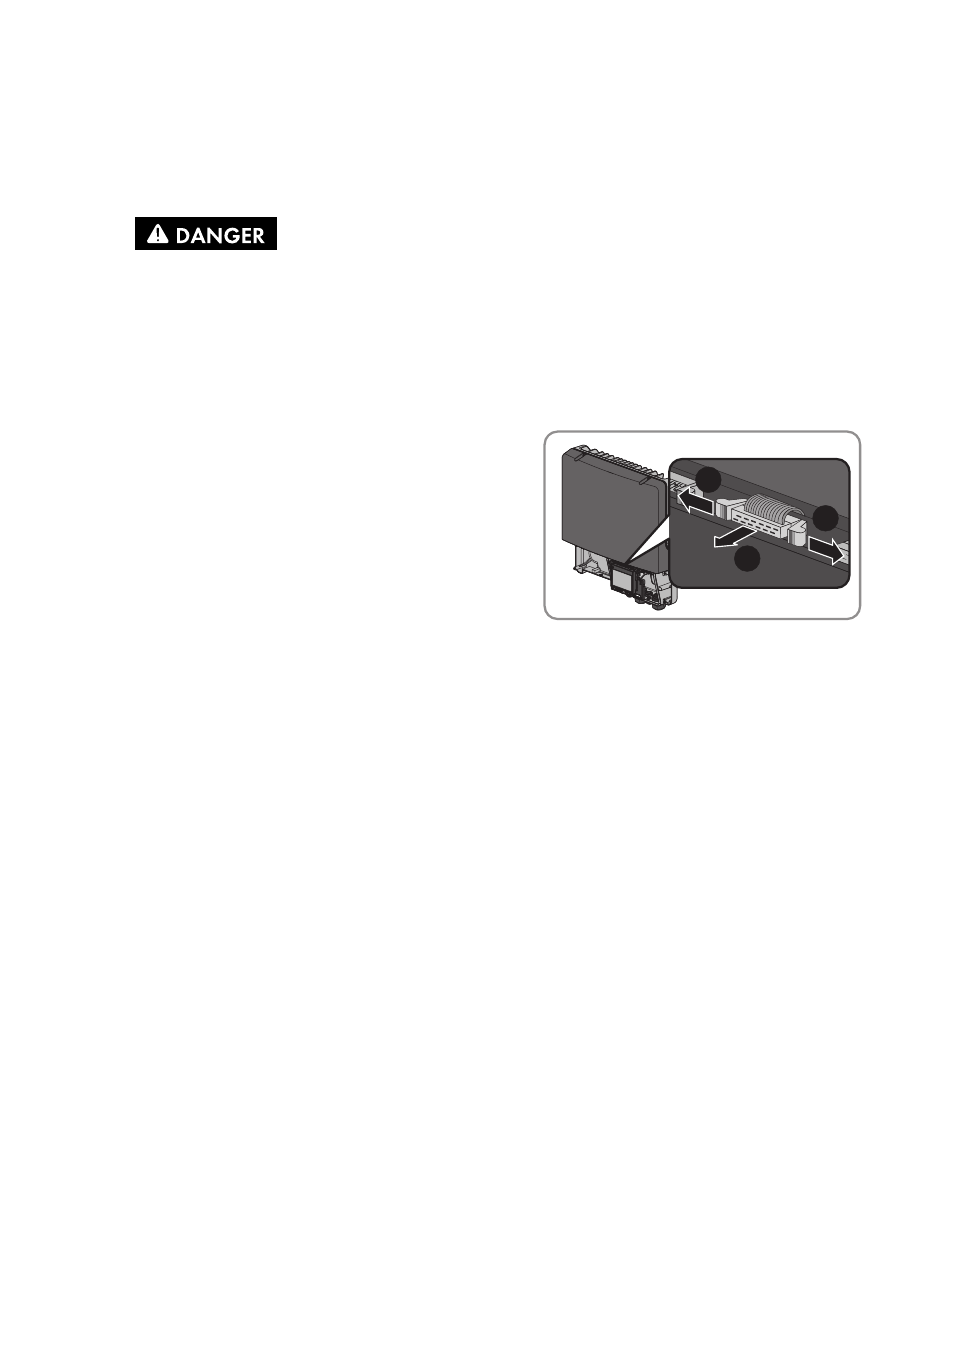
2. Press the left-hand and right-hand lock hooks
outwards and remove the ribbon cable plug from
the center connector strip of the inverter.
3. Release the screw of the display far enough to allow the display to be flipped up.
4. Flip up the display until it snaps into place.
5. Unscrew the swivel nut of the cable gland.
6. Remove the network cables from the Speedwire/Webconnect data module.
7. Unscrew the counter nut of the cable gland.
8. Remove the cable gland and network cables from the inverter.
9. Release the hexagon socket screw (AF 3) of the Speedwire/Webconnect data module and
remove the module.
10. Flip the display down and fasten the display screw hand-tight.
11. Seal the enclosure opening of the inverter with the corresponding filler plug.
12. Close the inverter (see inverter installation manual).
7.2 Packaging the Speedwire/Webconnect Data Module for
Shipping
• Pack the Speedwire/Webconnect data module for shipping. Use the original packaging or
packaging that is suitable for the weight and size of the Speedwire/Webconnect data module
(see Section 9 "Technical Data", page 28).
7.3 Disposing of the Speedwire/Webconnect Data Module
• Dispose of the Speedwire/Webconnect data module in accordance with the regulations for the
disposal of electronic waste applicable at the installation site.
1.
Danger to life due to electric shock when opening the inverter
High voltages are present in the conductive components of the inverter. Touching live
components results in death or serious injury.
• Disconnect the inverter from all voltage sources on the AC and DC sides and open it
(see the inverter installation manual). Observe the waiting time to allow the capacitors to
discharge.
2
1
1