I - 3 milling specific oper ations – HEIDENHAIN ND 522 User Manual
Page 46
46
I Operating Instructions
I - 3 Milling Specific Oper
ations
Circle, and linear Patterns (Milling)
This section describes the hole pattern functions for Circle, and Linear
patterns.
Press the circle pattern, or linear pattern hard keys to select the
desired hole pattern function, and enter the required data. This data
can usually be taken from the workpiece drawing (e.g. hole depth,
number of holes, etc.).
With hole patterns, the ND 522/523 then calculates the positions of all
the holes, and displays the pattern graphically on the screen.
The View Graphic enables verification of the hole pattern before
machining starts. It is also useful when: selecting holes directly,
executing holes separately, and skipping holes.
Functions for milling patterns
Circle Pattern
Information required:
Pattern type (full, or segment)
Holes (number of)
Center (center of circle pattern in pattern plane)
Radius (defines radius of the circle pattern)
Start angle (angle of 1st hole in the pattern) - The start angle is
between the zero angle reference axis, and the first hole ( for added
information see page 14).
Step angle (optional: this only applies if creating a circle
segment.) - The step angle is the angle between holes.
Depth (the target depth for drilling in the tool axis)
ND 522/523 calculates the coordinates of the holes which the tool can
then be moved to by traversing to display value zero.
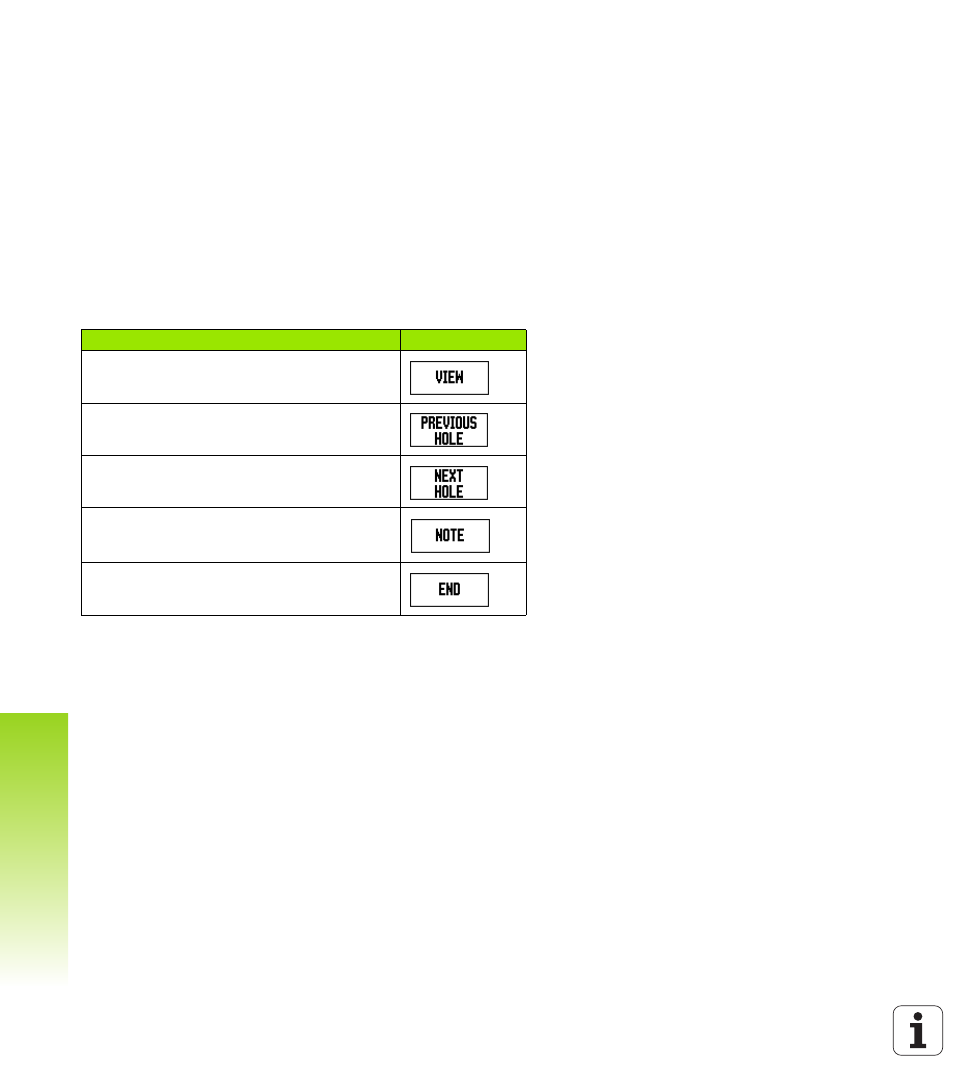
Function
Soft key
Press this to see the layout of the current
pattern.
Press to go to previous hole.
Press to manually advance to the next hole.
Press this to use the existing position.
Press to end drilling.