Verifying the installation, Grounding the router – H3C Technologies H3C SR8800 User Manual
Page 42
32
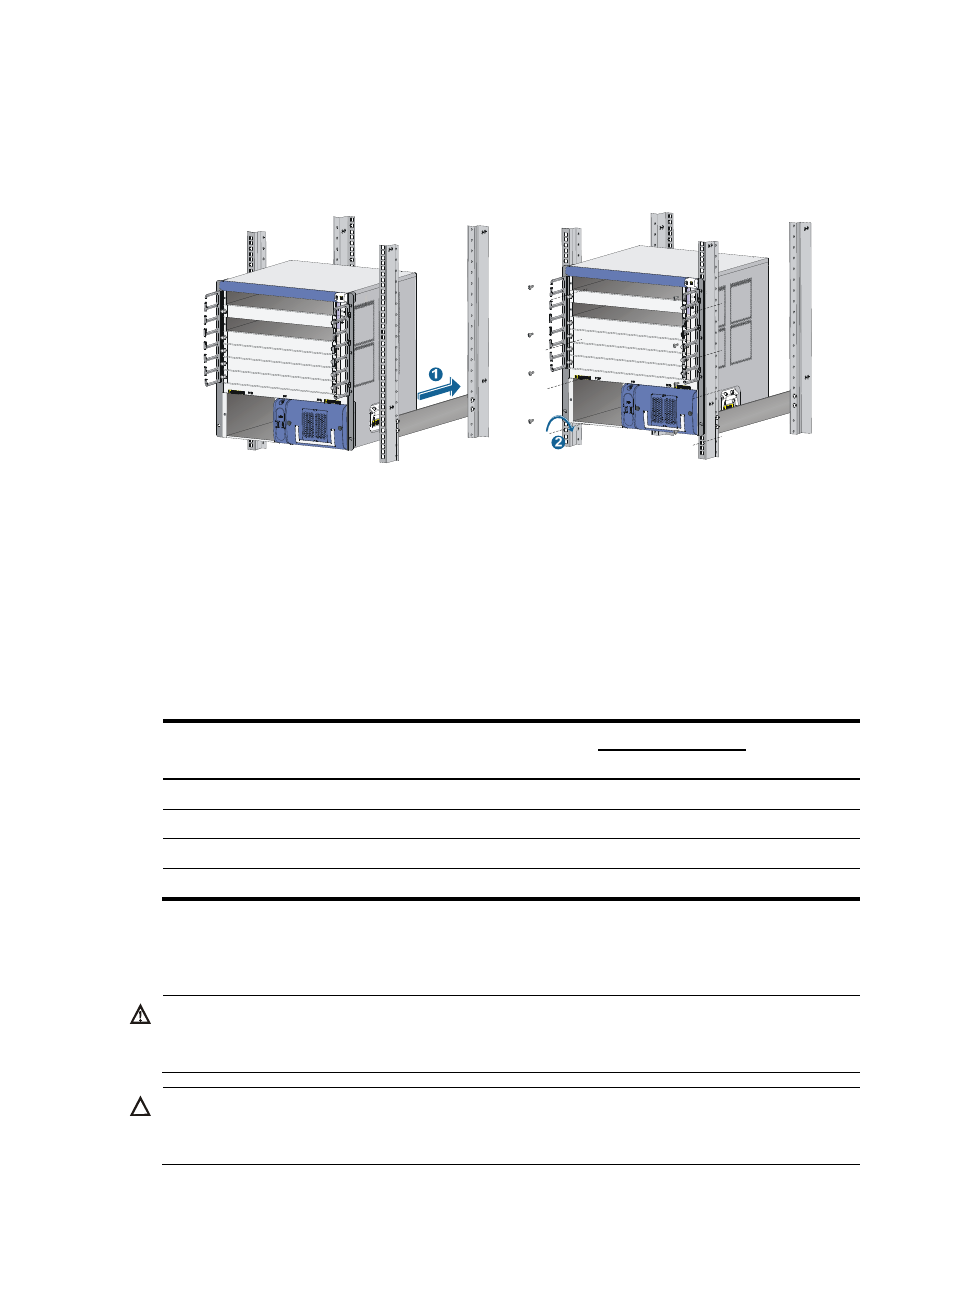
1.
Mount the router on the rack shelf or slide rails in cooperation with several people. Slide the router
into the rack until the mounting brackets on the router touch the front rack posts.
2.
Secure the mounting brackets to the rack posts with mounting screws. See
Figure 27 Installing the router in a standard 19-inch rack
If the screw holes on the mounting brackets cannot align with the cage nuts on the rack, check that the
bottom edge of the slide rail aligns with the middle of the narrowest metal area between holes and that
the cage nuts are installed in the correct holes.
Verifying the installation
After the installation is completed, check the installation against the following checklist. Make sure all
check results are positive.
Table 13 Installation checklist
Item
Result
Remarks
Yes
No
The mounting brackets are firmly fixed onto the router.
The router is installed in the right position.
The mounting brackets on the router are firmly fixed onto the rack.
There are enough spaces for dissipation around the router.
Grounding the router
WARNING!
For the safety of operators and equipment, securely ground the router. Make sure the resistance reading
between the router chassis and the ground is less than 1 ohm.
CAUTION:
Connect the grounding cable to the earthing system in the equipment room. Do not connect it to a fire main
or lightning rod.