Airaid 510-312 User Manual
Page 3
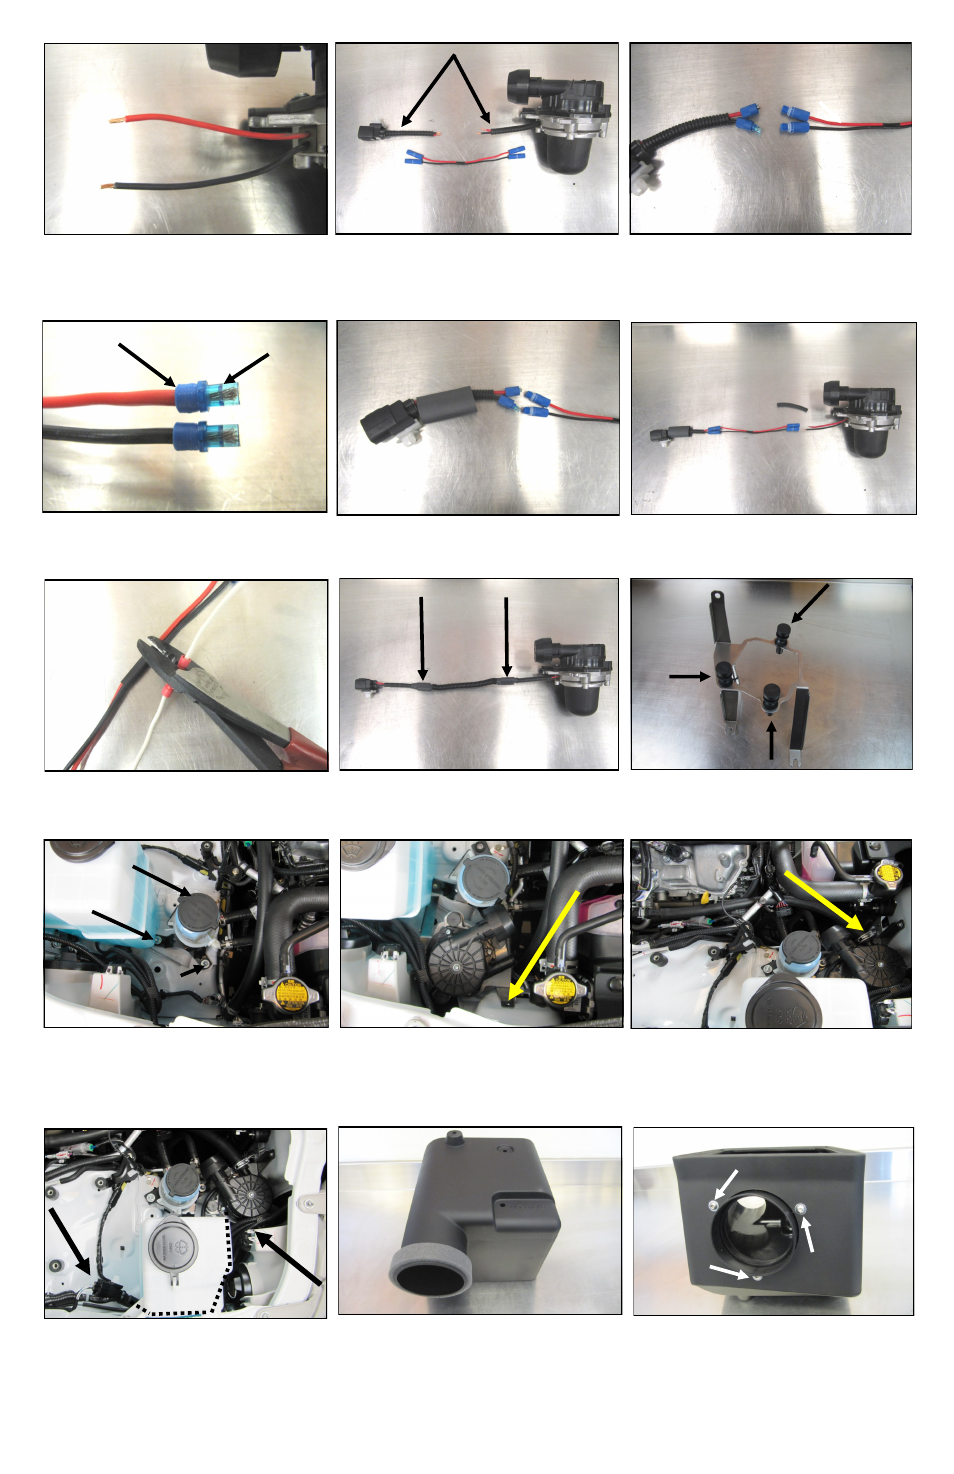
21. Cut 1 inch from each piece of the factory wire loom
and re install onto the pump and connector wires.
20. Carefully strip the factory wires back 3/8”.
25. Repeat step 24.on the other end of the harness.
24 Slide the large heat shrink tubing on to the wiring
harness. Hand tighten the threaded female cap and wire
in to the Posi Lock® connector.
26. On vehicles with the two Secondary, White wires,
these will need to be extended as well. Carefully cut and
strip the White wires back 3/8” and crimp in the supplied
extension wires.
23. Twist the wire as you insert it into seal and stop at
the end of the wire guide.
22. Pass the stripped wires through the Posi lock® con-
nector cap and into the seal.
27. Slide the supplied split loom onto the Airaid exten-
sion wiring. Carefully position the loom and heat shrink
and apply heat to complete the harness extension..
29. Remove the three 6mm bolts securing the power
steering reservoir bracket to the inner fender.
28. Transfer the three rubber air pump mounts from the
factory bracket into the Airaid Air Pump Bracket (#6)
and re mount the pump.
33. Apply the self adhesive, Foam Weatherstrip (#11)
onto the air inlet on the Cold Air Box (#3).
30. Reinstall the air pump assembly underneath the
power steering reservoir bracket in the number 2 and 3
bolt holes from step 29. Finish the install by bolting the
third Bracket tab to the vehicle using the 1/4-20 Button
Head Bolt (#18), 1/4” Flat Washer (#19), and 1/4-20
Flange Nut (#20).
34. Mount the Filter Adapter (#5) to the Cold Air Box,
as shown, using three 1/4-20 x 1/2” Button head Bolts
(#18) and 1/4” Flat Washers (#19).
31. Connect the 3/4” hose from step 17 to the air pump
outlet and re use an OEM spring clamp to secure it.
1
2
3
32. Route the air pump harness behind washer reservoir
and reconnect it to the main vehicle harness
WIRE GUIDE
SEAL