Recording, Menu structure – Teac DR-22WL User Manual
Page 10
10
TASCAM DR-22WL
6
Level meter
The level of input sound is shown.
When the auto-recording function is on, the level at
which auto-recording starts is shown as a frame.
7
Pre-recording setting status
Blank: Pre-recording off
: Pre-recording on
8
Recorder operation status
9
Auto-recording setting status
Blank: Auto-recording off
: Auto-recording on
0
File name
The file name that will automatically be given to the
recorded file is shown.
q
Function button information
These icons show the recorder operation status.
Indicator Meaning
09
Recording in standby or recording paused
0
Recording in progress
w
Peak value in decibels (dB)
The peak recording level value is shown digitally.
is shown when recording over the maximum input
level (−2 dB or more).
e
Elapsed recording time
The elapsed recording time of a recorded file is shown as
hours : minutes : seconds.
r
Remaining recording time
The remaining recording time for the microSD card is
shown as hours : minutes : seconds.
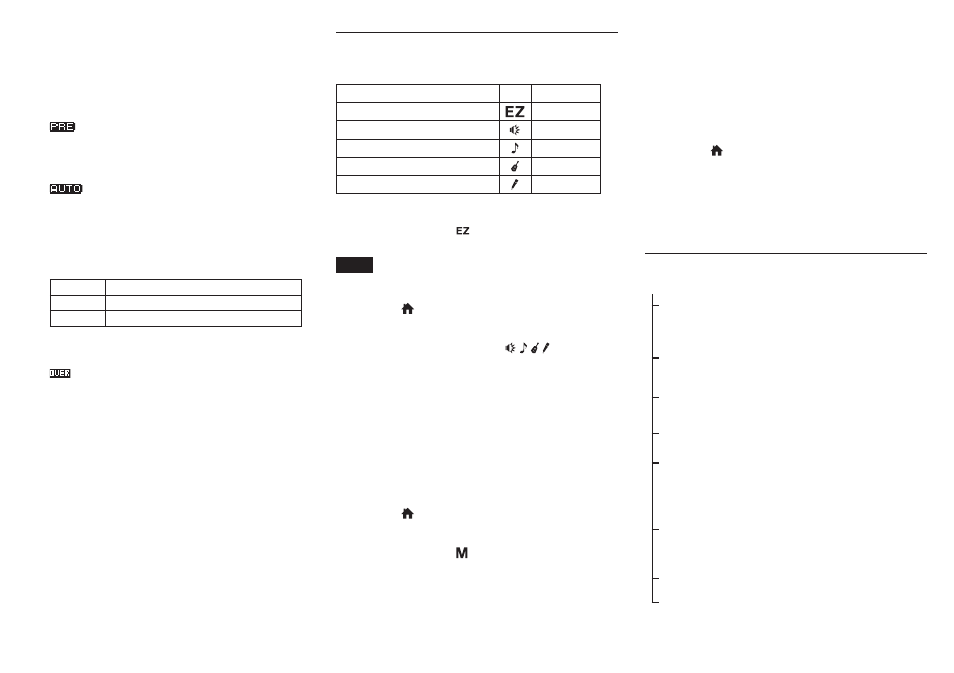
Recording
By selecting with the scene dial, you can record easily with an
optimized setting for the scene you want to record.
Purpose
Mark Name
Record easily right away
EASY
Record loud sounds
LOUD
Record a concert or chorus
MUSIC
Record an instrument such as a guitar
INSTRUMENT
Record an interview
INTERVIEW
8
Recording easily right away
1. Set the scene dial to .
2. Press the RECORD button to start recording immediately.
NOTE
The input level is adjusted automatically (you cannot
change manually).
3. Press the /MENU/8 button to finish recording.
8
Recording using selected scene settings
1. Set the scene dial to the scene ( / / / ) you want to
record.
2. Press the RECORD button to enter recording standby.
3. Use the INPUT LEVEL volume control to adjust the input
level.
To obtain higher quality, it is recommended that you
record as loud a sound as possible. Raise the input level
so that the −12 dB indicator lights green in order to
optimize the recording level. If the input level is set too
high, the sound may be distorted. To avoid this, lower the
input level when the PEAK indicator lights red.
4. Press the RECORD button again to start recording.
5. Press the /MENU/8 button to finish recording.
8
Recording using the manual mode
1. Set the scene dial to .
2. Press the RECORD button to enter recording standby.
3. Use the INPUT LEVEL volume control to adjust the input
level.
To obtain higher quality, it is recommended that you
record as loud a sound possible. Raise the input level
so that the −12 dB indicator lights green in order to
optimize the recording level. If the input level is set too
high, the sound may be distorted. To avoid this, lower the
input level when the PEAK indicator lights red.
4. Press the RECORD button again to start recording.
When recording starts, the REC indicator lights continu-
ously and the display shows the elapsed recording time
and the remaining recording time.
5. Press the /MENU/8 button to finish recording.
8
Pausing recording
You can pause recording and then continue recording in the
same file.
1. While recording, press the RECORD button to pause.
2. Press the RECORD button again to resume recording.
Menu structure
REC
FORMAT
Set the file format
WAV: 16/24 bit,
MP3: 32 k–320 kbps
SAMPLE
Set the sampling frequency
44.1/48/96 kHz (96 kHz for WAV only)
TYPE
Set to mono or stereo
MONO, STEREO
PRE REC
Set the pre-recording function
ON, OFF
AUTO FUNC
Set the track incrementation, auto-recording,
and mark function
TRACK INCREMENT, AUTO REC, PEAK
MARK, AUTO MARK
DUAL FORMAT
Set dual format recording
OFF,
MP3: 32 k–320 kbps
COUNT INIT
Reset the number used as the file name
PEAK HOLD
Set the peak hold function
OFF, ON