Configuring alarms – Measurement Computing WiFi-500 Sensor Series User Manual
Page 11
WiFi-500 Sensor Series User's Guide
Changing device logging settings
11
Configuring alarms
In the
TEMPERATURE ALARMS
and
HUMIDITY ALARMS
dialog boxes, you configure the following alarm
settings:
Low/High Alarms
– Enable alarms that are triggered when a device logs data that exceeds a high
temperature/humidity value, or that is below a low temperature/humidity value.
The low alarm value must be less than the high alarm value.
Alarm Delay
– Filter out unwanted alarms by selecting a delay time from the dropdown box. For example,
when monitoring the temperature of a refrigerator, you might not need to know if the temperature exceeds
the alarm level briefly – when someone opens and closes the door, for instance – but you do need to know
if someone leaves the door open for more than one minute.
You can set a separate delay for temperature and humidity alarms.
Alarm Hold
– Holds an alarm state even when the temperature/humidity returns to an acceptable range. For
example, if the high temperature alarm is set to 42°C and the measured temperature rises to 46°C, an alarm
is triggered. If the reading then drops down to 41°C when the
Alarm hold
checkbox is selected, the device
retains its alarm status.
If
Alarm hold
is not selected, the device reverts back to normal status, and the only way to check missed
alarms is to review the logged data.
Audit Check
– Record an event on the graph by pressing and holding the device button for three seconds to
indicate an onsite check of the device.
Complete the following steps to configure WiFi-500 Sensor Series temperature and humidity alarm settings:
1. Select the
On
option button for
Low alarm
to enable a low alarm, and then select a low
temperature/humidity alarm value from the list.
2. Select the
On
option button for
High alarm
to enable a high alarm, and then select a high
temperature/humidity alarm value from the list.
3. Select the
On
option button for
Alarm hold
to retain the alarm status when the temperature/humidity
returns within the alarm range.
4. Select a delay time from the
Delay alarm trigger by
listbox to filter out unwanted alarms.
5. Select the
Enable
option button for
Audit Check
to record an event on the graph when a device is checked
onsite (
TEMPERATURE SETTINGS
dialog box only).
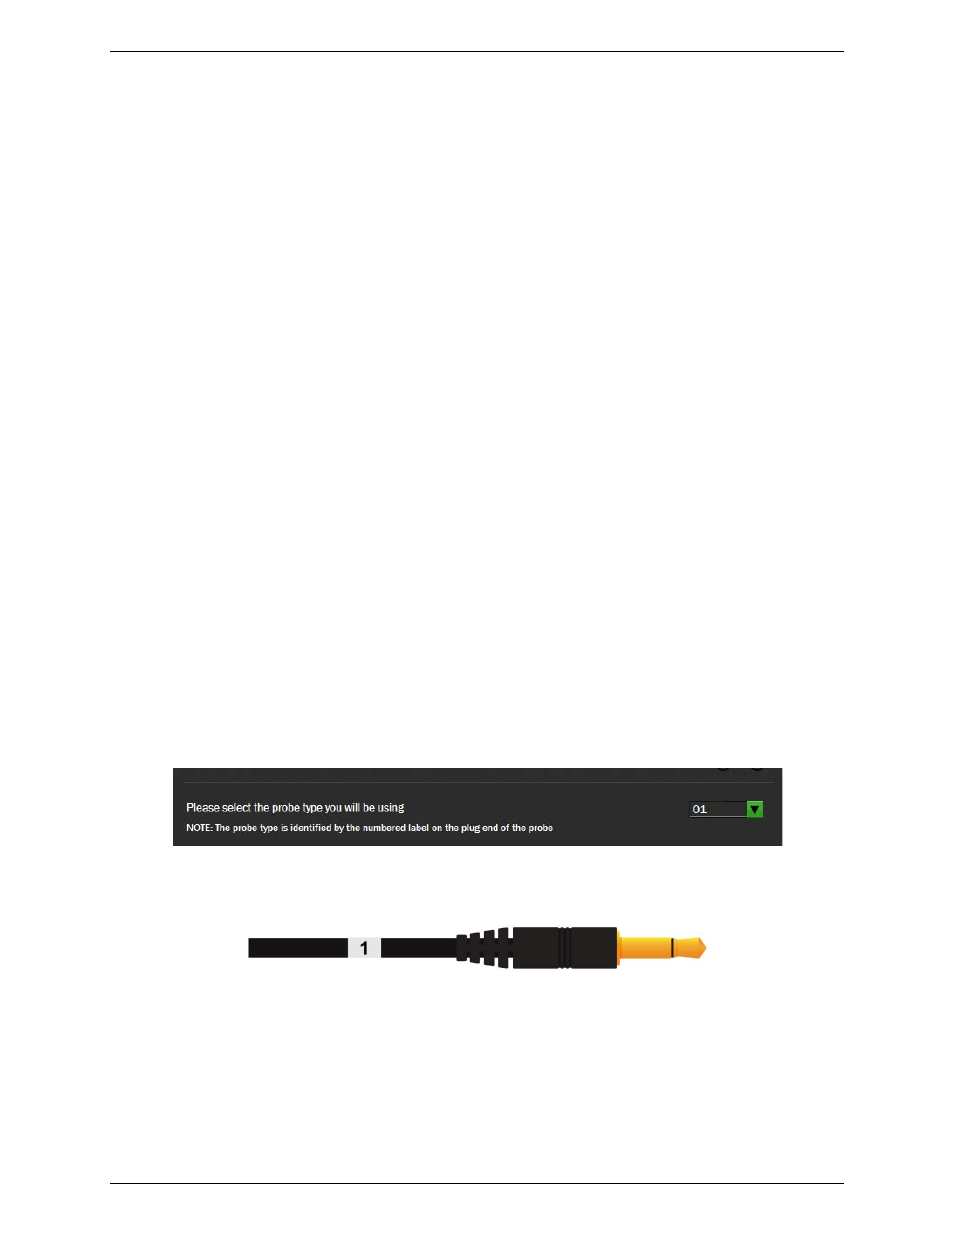
6. If you are setting up a device that includes a thermistor probe, select the probe type you are using from the
drop-down listbox.
Figure 4: Probe type list
Refer to the label attached to the probe cable for the probe number. Selecting an incorrect probe type causes
inaccurate measurements.
Figure 5: Probe type label