3 printer installation and setup, Printer installation and setup, Kip print pro user guide – KIP PrintPro User Manual
Page 31
KIP Print Pro User Guide
No part of this publication may be copied, reproduced or distributed in any form without express written permission
from KIP. 2015 KIP. v1
- 24 -
3.3 Printer Installation and Setup
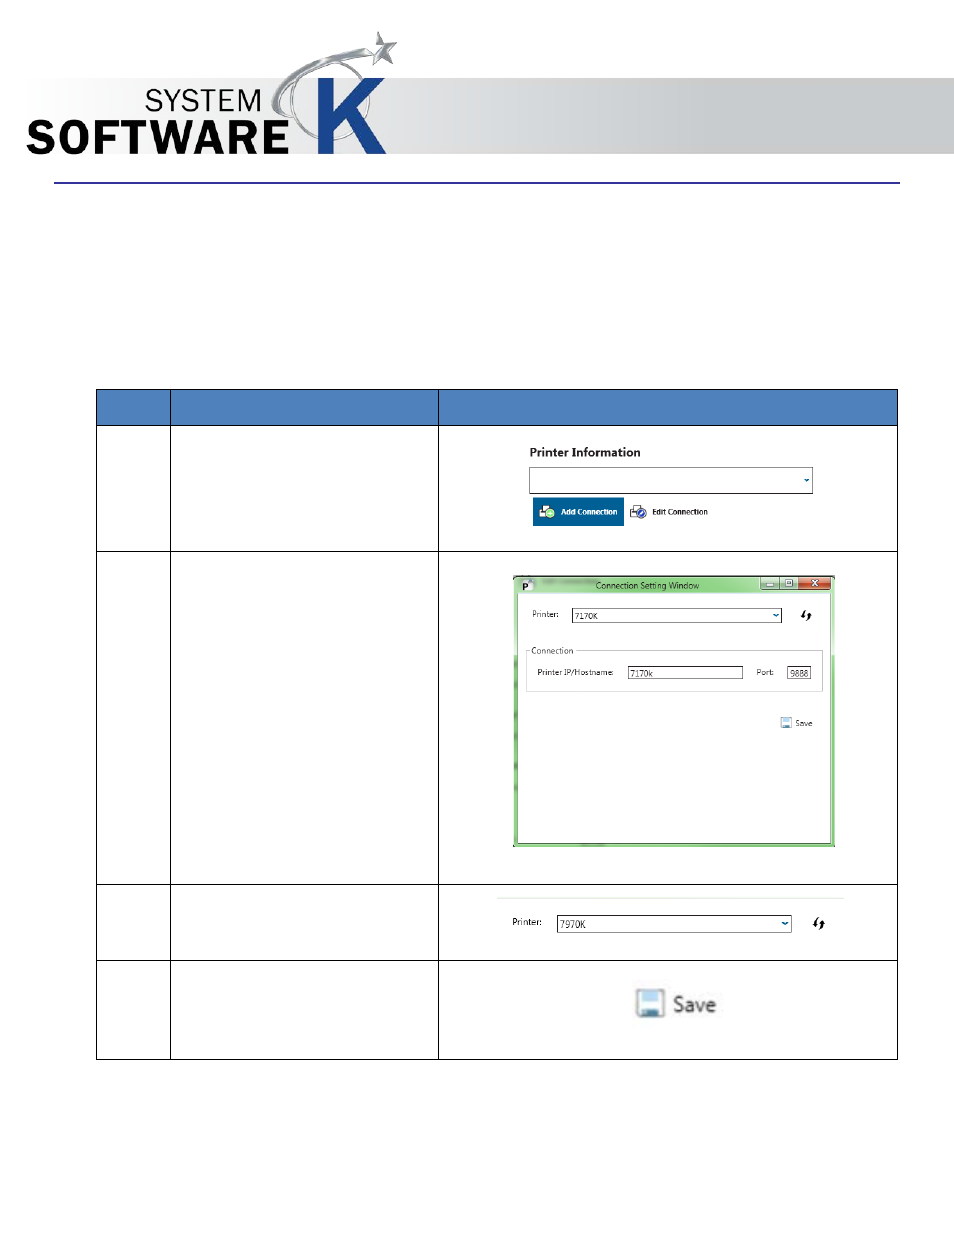
The first step is to add the KIP Printer. This has to be done to make the connection from the workstation to the KIP
Printer so that jobs can be sent to be printed.
KIP Print Pro can be installed using two different methods:
1. Standard Installation package (executable)
2. Installed by pulling the application from the KIP Printer via KIP Print Pro.Net
If the KIP Print Pro application is pulled from the KIP Printer, once installed it will already be connected to the KIP.
If however KIP Print Pro is installed via an install package, the following will be necessary.
Step
Action
Illustration
1. Select the Add Connection
button.
2. The Connection Setting Window
will open. This is where the
following information will be
entered:
Printer Name – The name given
to the KIP Printer during
installation.
Connection (IP/Hostname) – The
IP address or the Hostname set at
the Printer during Installation.
Port – Port Number that will be
used (default is 9888)
3. Printer is going to be set to the
Printer name given to the KIP
Printer during install.
4. Save – Select Save to set the new
connection. When connection is
made the Printer Information
screen becomes active.