Assembly – Harken 1093 Carbon Jib Reefing & Furling User Manual
Page 10
10
2/2.5 Carbon Furler
December 2001
ASSEMBLY
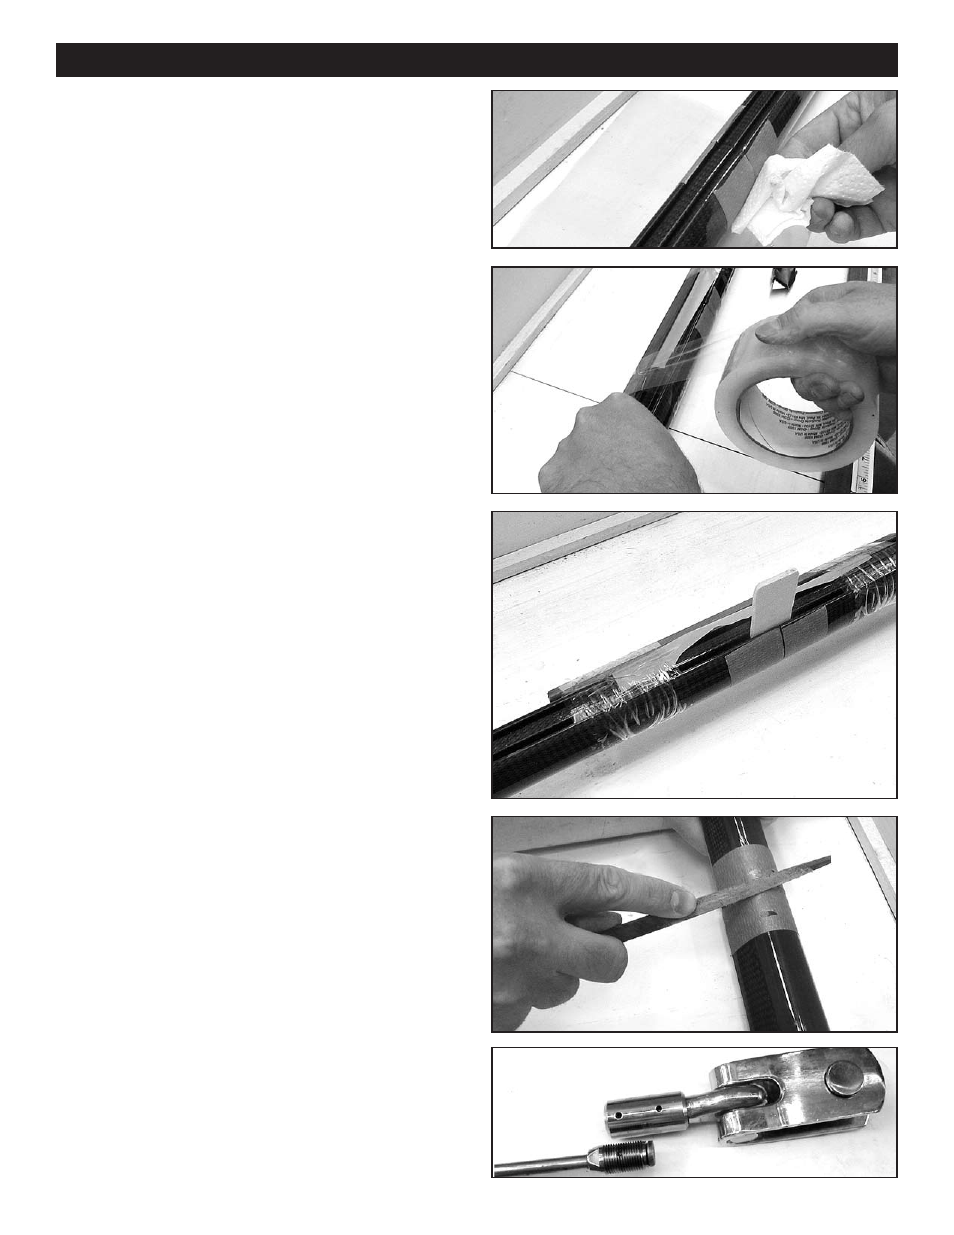
Lay plastic against foil and place splint against foil. Tightly
wrap clear packaging tape around splint near both ends.
Insert wood alignment stick between foil and feeder and
inspect to make sure that foil/feeder are aligned.
Coat bottom foil reinforcement (torque tube connector) with
epoxy and insert into foil as directed above.
Insert plastic bushings in top connector as directed above.
Coat outside of connector with epoxy as directed above and
insert into top foil. Clean up excess epoxy.
Slide halyard swivel onto foils. make sure swivel side is
towards top of stay!
Slide trim cap over threaded nosepiece. Heat cap in hot
water to help it slide over nosepiece. Attach trim cap using
Superglue
®
.
Make sure foils are straight and grooves are facing up.
Inspect lower unit to make sure that feeder and bottom foil
are aligned correctly. Allow to cure undisturbed overnight.
After curing overnight, remove splint. Use a small triangular
file to clean excess epoxy while tape remains in place.
Remove tape and use a razor knife to carefully remove any
excess epoxy. Make sure halyard swivel passes all points.
Install top rod eye using red Loctite
®
on locking screw or
with upset as per manufacturer's instructions.
Remove eight socket-head cap-screws located on underside
of lower unit and remove lower cap. Remove three set
screws located at top of torque tube.