Gasboy 900 Series User Manual
Page 6
Installing TopKAT Series 900 Replacement Report Printer Kit
Page 6
MDE-5061 TopKAT™ Series 900 Replacement Report Printer Kit (M11810K001) Installation Instructions · March 2013
8
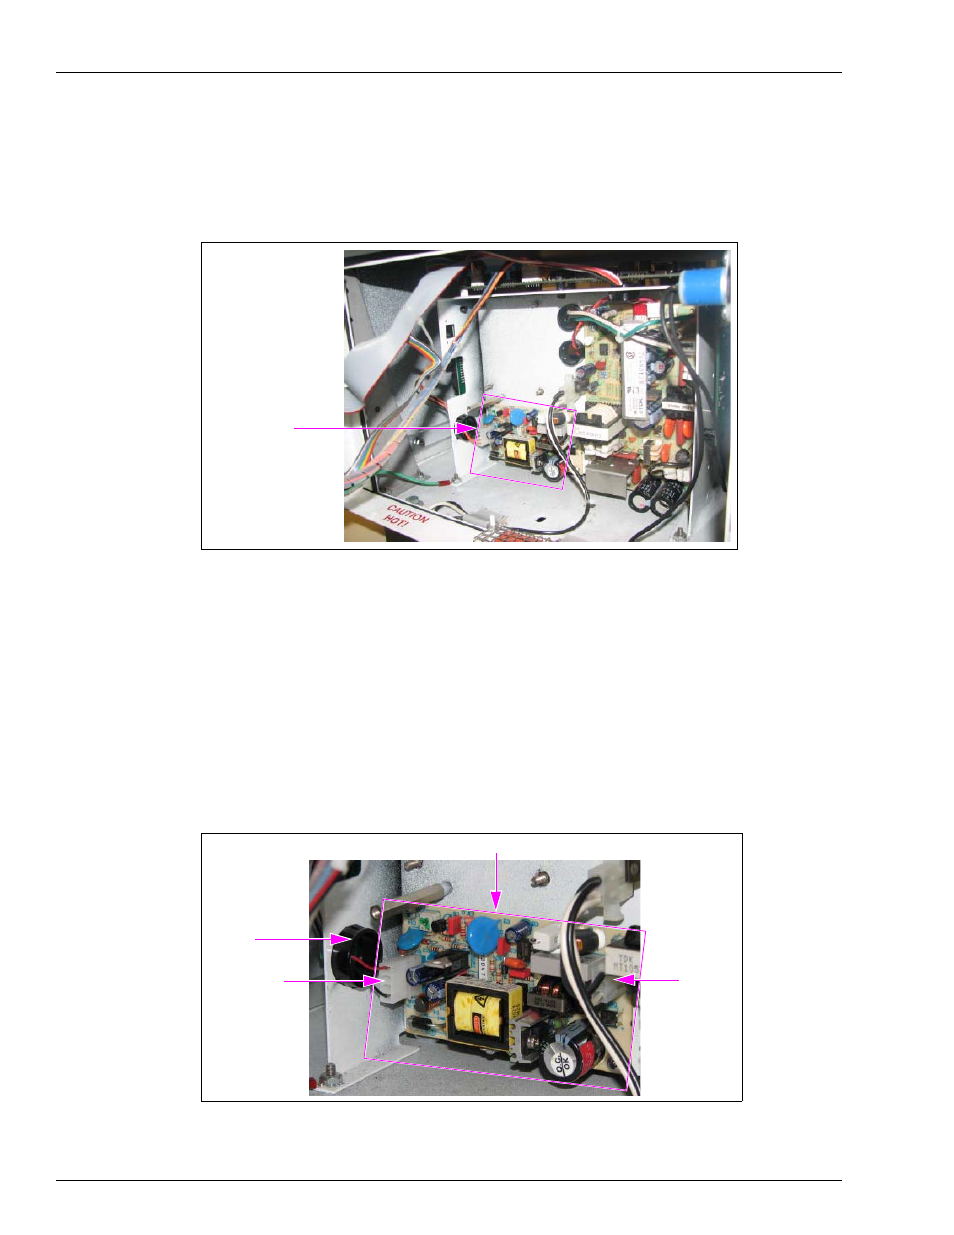
Disconnect the cables and remove the existing +5 V Printer Power Supply (C09370) located in
the lower left corner of the Power Supply Chassis Assembly (see
Figure 2: Existing +5 V Printer Power Supply
Existing Printer
Power Supply
9
Install the new 24 V Power Supply (C09837) into the lower left corner of the Power Supply
Chassis Assembly.
Notes: 1) Orient the 24 V Power Supply so that the 4-position Connector (DC) is to the left
and the 3-position Connector (AC) is to the right of the Power Supply Chassis
Assembly.
2) Secure the 24 V Power Supply with four screws removed in step
10
Connect the AC Power Cable to the Terminal Block (TB) 1 power input connector on the 24 V
Power Supply.
Figure 3: Connecting AC Power Cable
DC OUT/TB2
AC IN/TB1
Bushing
24 V Power Supply
- 216S (18 pages)
- Atlas Fuel Systems Site Prep Manual (42 pages)
- Atlas Technician Programming Quick Ref (2 pages)
- ATC M05819K00X Kits (28 pages)
- Atlas Fuel Systems Owner Manual (80 pages)
- Gilbarco Global Pumping Unit Operation Manual (42 pages)
- 26 (7 pages)
- Atlas Valve Replacement Kits (10 pages)
- Atlas Fuel Systems Installation Manual (100 pages)
- 9120K (8 pages)
- 9820K (6 pages)
- Atlas Single Std. Inlet Centering Kit (8 pages)
- 8800 Atlas (1 page)
- 9120K Series Service Manual (40 pages)
- 9800A Atlas (6 pages)
- 9800 Atlas (14 pages)
- 9800 Atlas (20 pages)
- M08400 (6 pages)
- 9100 Series (8 pages)
- 9820K Series Installation (62 pages)
- 9853K (8 pages)
- 9216KTW (36 pages)
- Recommended Spare Atlas (14 pages)
- DEF Atlas (28 pages)
- 9820K Series (12 pages)
- 9800Q (1 page)
- Q Series (3 pages)
- 8753E (2 pages)
- 9152AXTW2 (1 page)
- 8800E (2 pages)
- 8800E (1 page)
- 9820Q Series (1 page)
- Atlas Start-up (230 pages)
- 9800Q Front Load Vapor (2 pages)
- 215A (1 page)
- 9800A (4 pages)
- 9820A (1 page)
- 2600A (3 pages)
- 2600A (12 pages)
- 2600A (2 pages)
- 215A (2 pages)
- 9800Q Vapor (2 pages)
- 216A (31 pages)
- Lamp Kit (2 pages)
- 9120Q Pulser (1 page)