Insert position, Adjust the envelope insert fingers, Address position – Formax 6402 Series User Manual
Page 30
28
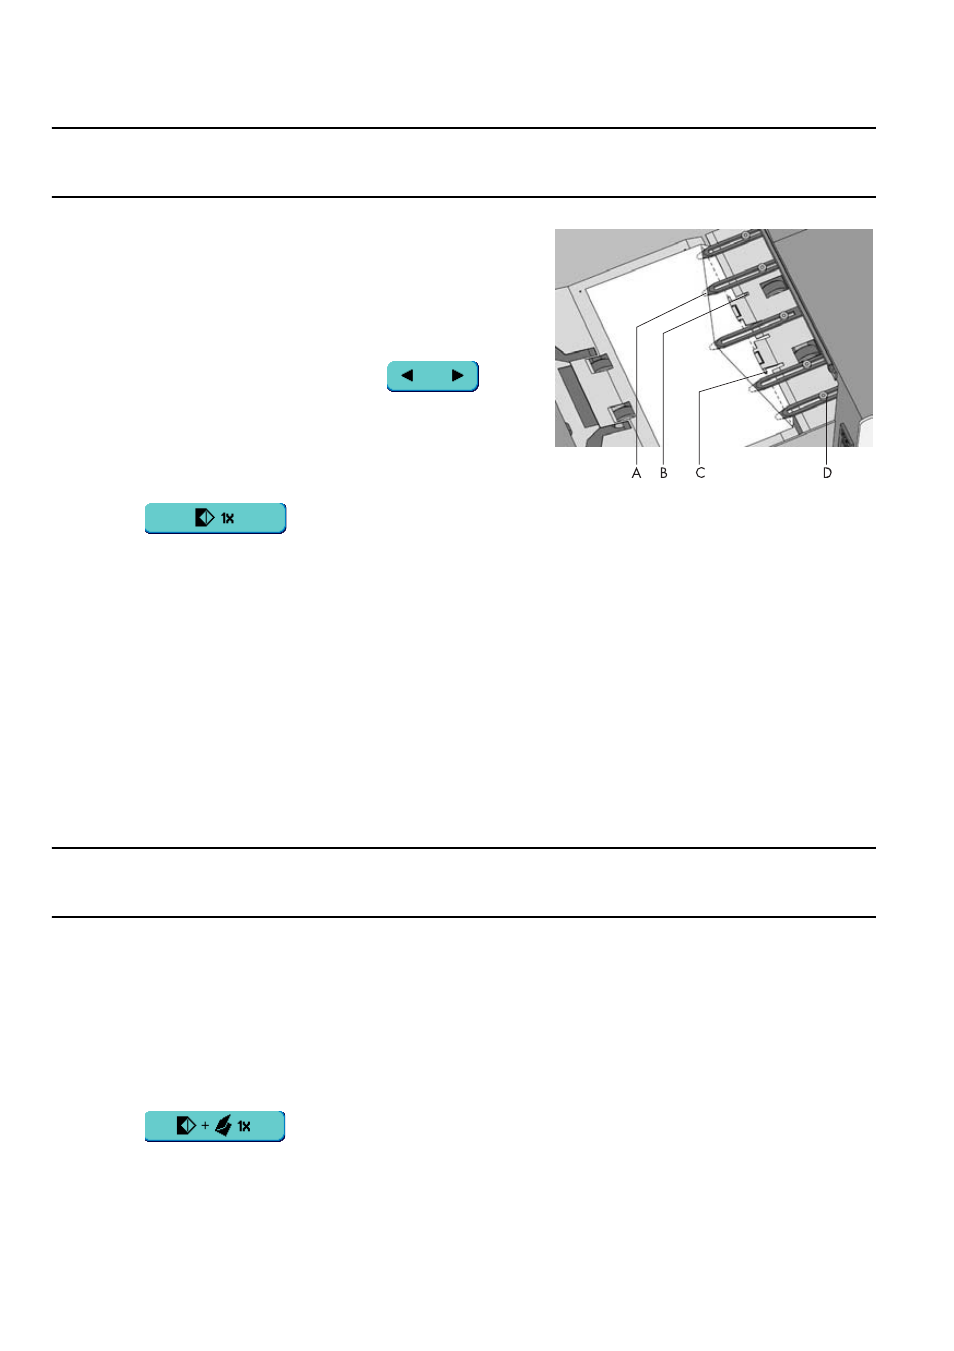
Insert Position
Note
This adjustment must only be checked in case of problems or when changing the envelope
type.
1. Lift the locking lever of the loc and pull the loc
into the vertical position.
The flap folding line must be positioned under
the green indicator C. If not, adjust the insert
position as follows:
2. Press on the left or right side of
to
adjust the insert position to the left or the right.
Each button stroke stops the next envelope
0.5 mm (0.02 inch) to the right (earlier) or to
the left (later).
3. Press
to load a new envelope into the insert position.
4. Recheck the insert position, and adjust as required.
If necessary adjust the envelope insert fingers, see ”Adjust the Envelope Insert
Fingers” on page 28.
Adjust the Envelope Insert Fingers
To adjust the envelope insert fingers:
1. Loosen the knurled knob D on top of each finger.
2. Adjust each finger so that the tip enters about 5 mm (0.2 inch) into the envelope.
3. Re-tighten the knurled knob.
The fingers can be moved sideways to the desired position.
Caution
When adjusting the fingers sideways, be sure that finger A is not positioned over sensor
B. When an incorrect finger position is adjusted the display shows an error screen.
4. Place the outer fingers about 5 to 10 mm (0.2 to 0.4 inch) from the edges of the
envelope.
Check the position of the insert fingers when changing to a different type of envelope.
Address Position
When the envelope position and the position of the fingers is correct:
1. Press
to load a folded sheet into the envelope.
The envelope will be sealed (when enabled, refer to 3.6 ”Sealing Envelopes” on page
26) and ejected to the conveyor stacker.
2. Check the position of the address in relation to the address window in the envelope.