Sending emails via mail designer pro 2, Adding attachments to your message – equinux Mail Designer Pro 2 User Manual
Page 33
In addition to the account specific information you will now also need to
enter the address for the outgoing server, the port that must be used and
the authentication method.
Most services provide these information on their websites so you can easily
paste them in to the settings of Mail Designer Pro 2.
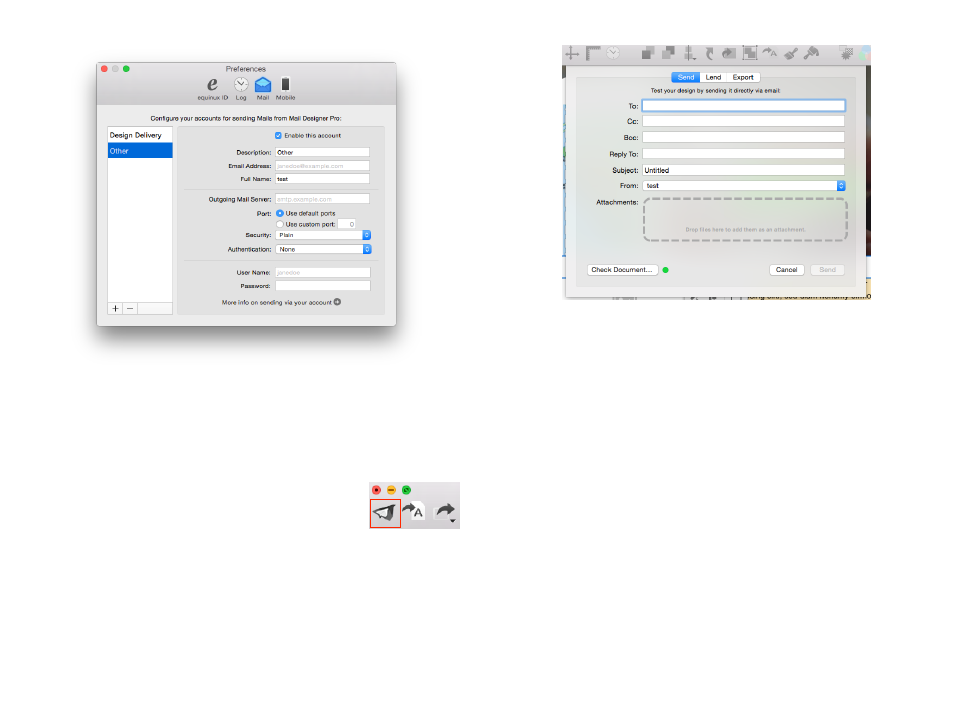
Sending emails via Mail Designer Pro 2
With the final graphical touches added, our email design
is ready to be sent. To do so, click ”Send” in the toolbar.
You can now enter the email addresses and the subject line for your mes-
sage. Enter the name of recipients and Mail Designer Pro 2 will display the
email address available for this name from the address book.
If you configured several email services you can choose the send service you
want to use from the drop down menu.
Adding attachments to your message
When sending your design via Mail Designer Pro 2 you can attach additional
files to your message. This allows you to send a PDF file or a zipped folder
along with your message.
To do so, drag the file you want to attach into the attachment area. Mail De-
signer Pro 2 will check your attachments and will send it together with your
message.
Mail Designer Pro 2 shows you the name of the file you‘ve attached and its
size. You can also click the little red button at the end of the line to remove
the file and attach another one.
33