Exchanging the printhead / ttx 67x – Avery Dennison TTX 450 User Manual
Page 28
User Manual
TTX 450/650/950/1050 – Puma/Lion/Tiger/Tiger XXL – TDI/STDI/XXtreme –
S45/65/95/105
05/08 Rev.
2.14
28
Production tolerances at printhead may cause to move the printhead in or versus
print direction. This is performed by twisting the little screws at the guiding tooth
when fixing screws are loose (tools are supported with printer)
Note: The optimal position can be found by print only !
Exchanging the printhead / TTX 67x
The print head is adjusted to the print head mounting during manufacture. As a
result the print head can only be replaced in conjunction with the print head
mounting.
1. Switch off the device.
2. Pull out the mains plug.
3. Remove material and ribbon.
4. Pull out both plugs in a horizontal direction from the print head.
Note: Wait at least 3 minutes after switching off the device before removing the
print head cable from the print head. Mark the position of an axially
adjusted print head.
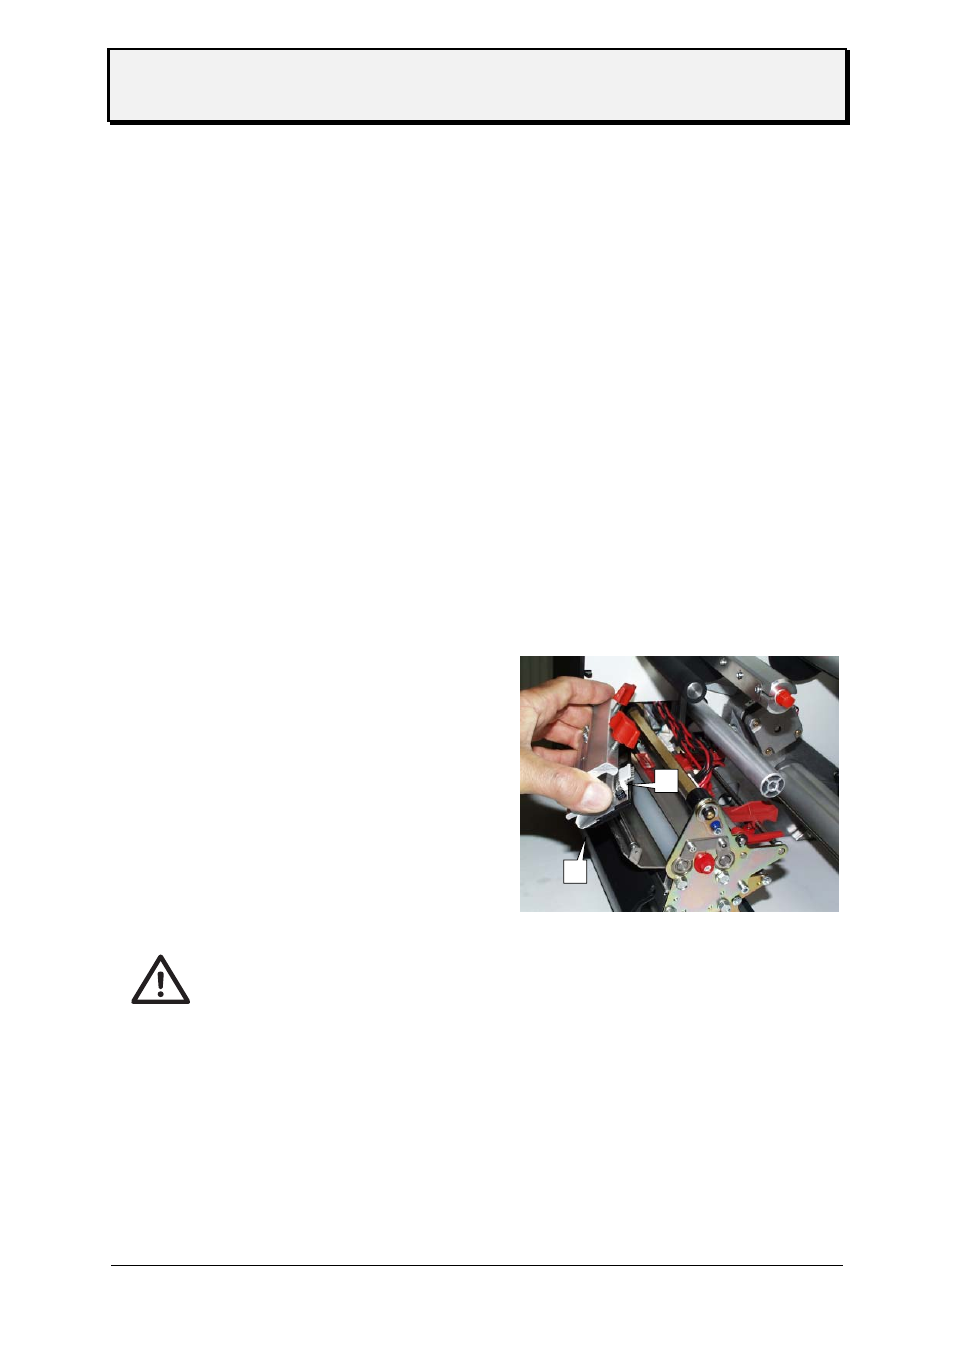
6. Unscrew the two thumb screws on the print head mounting until the entire print
head mounting can be removed from the contact shaft (see Fig. 1:).
Fig. 1: Take care not to touch the connector contacts (1) or
the thermal edge (2) when removing the printhead!
Attention: The print head is a sensitive electronic component and can be damaged by
electrostatic charges. Therefore, discharge any bodily static electricity before
coming into contact with the print head by touching the base plate of the printer.
The print head may not be touched on the print bar or on the plug-in contacts.
8. To install, move the new print head mounting to the old position and tighten the
thumb screws.
Note: Before doing this make a note of the resistance value of the print head
(read off from the print head). When placing the print head on the print
head mounting, ensure that the print head is lying flat.
2
1