Installation, Elbows (top vent configuration), Measuring vent lengths (top vent configuration) – Avalon Firestyles DVL Fireplace-1999 to 2002 User Manual
Page 26
2 4
Installation
(for qualified installers only)
Travis Industries
4 0 2 0 8 1 2
9 3 5 0 8 1 1 0
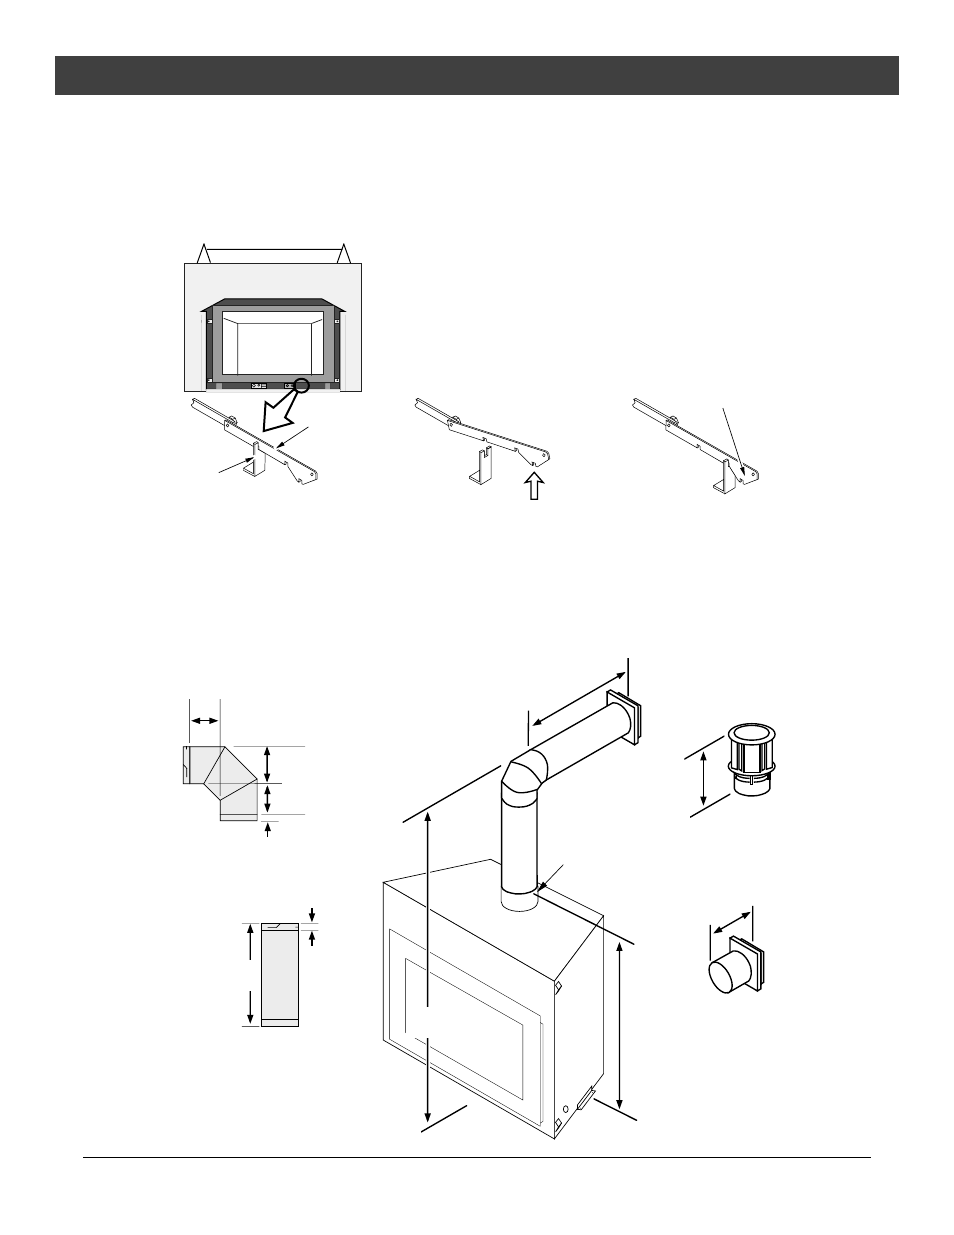
Restrictor Position (Top Vent Configuration)
•
In 99% of DVL Fireplace installations, restrictor adjustment is not necessary. Only those installations
determined to be over-drafting require this adjustment. The best indication of over-drafting is a hyper-
active flame pattern (flames that move too quickly). If the air shutter is constricted, the flames become
short and yellow, yet still very active. If over-drafting is determined, follow the directions below to
adjust the restrictor. Try position two first. If still over-drafting, try position three.
With the fireplace cool,
reach behind the gas
control valve.
To Access the Restrictor:
NOTE: The fireplace is shipped with the
restrictor in position #1 (fully open).
This restrictor is in position 1
(fully open - factory setting).
This restrictor is in position 2.
Adjustment
Bracket
Position #3 is
this notch.
Adjustment
Plate
To adjust, lift up on the adjustment
plate and push it back.
WARNING: Use a glove to protect
your hand from burns.
Elbows (Top Vent Configuration)
•
See the vent configurations for details on the maximum number of elbows.
Measuring Vent Lengths (Top Vent Configuration)
NOTE:
All measurements
are for 8" diameter
vent.
Vent
Horizontal
Run
EXAMPLE:
Two 4' lengths are 7' 10-1/2"
long, but when attached to
the vent system add 7' 9" to
the vent height.
Vent
Height
Elbows add 3-1/2" to the
length of the vent system.
3-1/2"
Side
View
1-3/4"
1-1/2"
Vent Length
(2', 3', etc.)
Vent sections overlap
each other by 1-1/2"
42-1/8"
10-3/4" wide with
1-1/2" to
3-3/8" of overlap
Starter
Section
12-3/8" tall
with 1-1/2"
of overlap
3-1/2"
8"