3) adjusting the picture size and position, ᕣ adjusting the picture size and position, Projecting an image (basic operation) – Dukane 8768 User Manual
Page 33: Adjust the tilt foot
33
3. Projecting an Image (Basic Operation)
Place your projector on a flat level surface and ensure that the projector is
square to the screen.
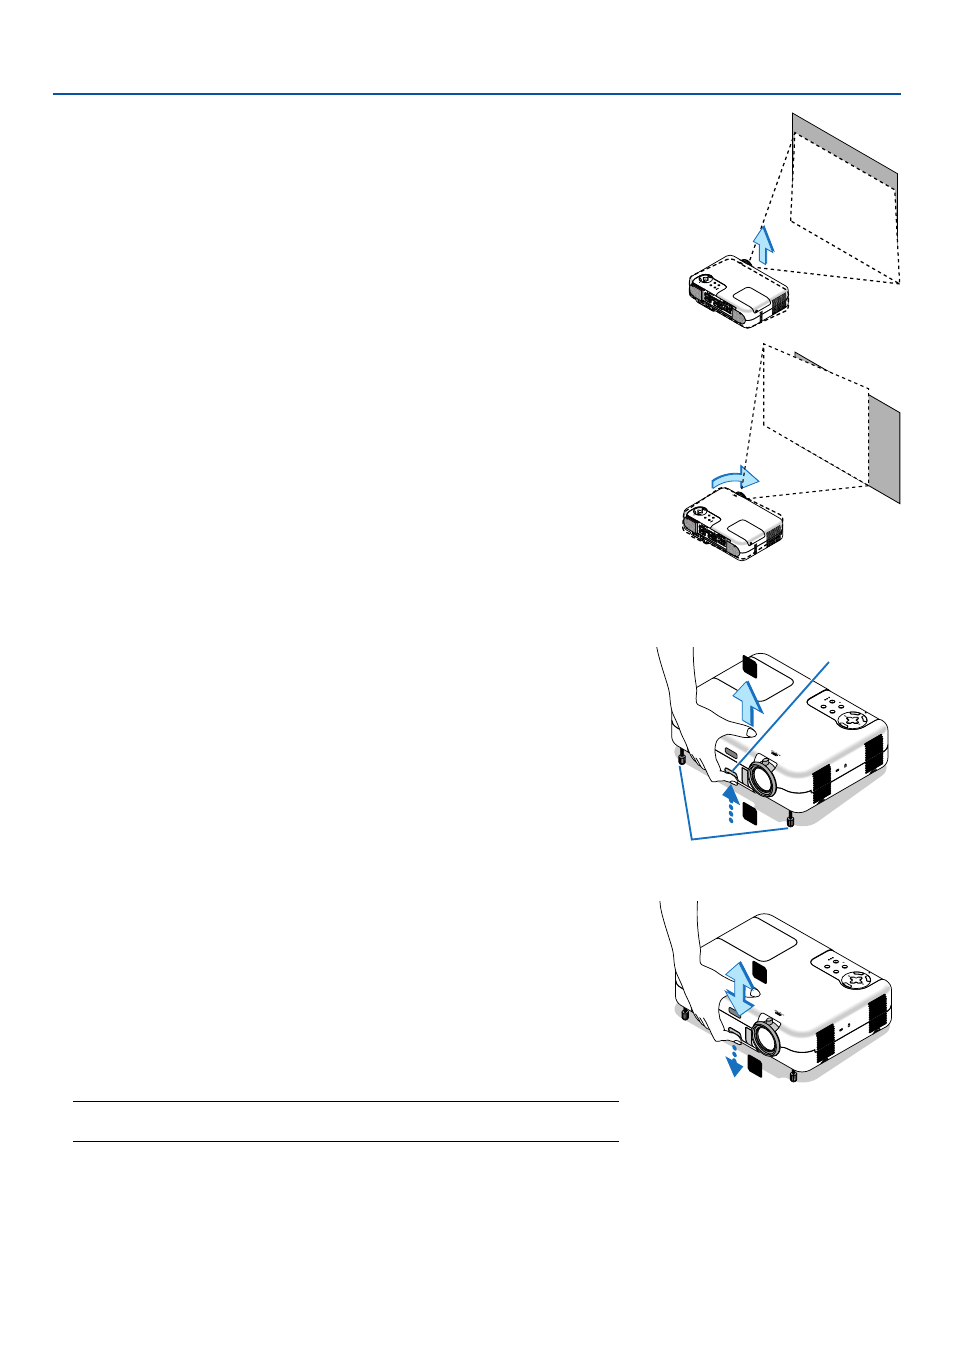
Lift the front edge of the projector to center the image vertically.
If the projected image does not appear square to the screen then use the
Keystone feature for proper adjustment. See pages 35 and 44.
ᕣ Adjusting the Picture Size and Position
Adjust the Tilt Foot
1. Lift the front edge of the projector.
2. Push up and hold the Adjustable Tilt Foot Button on the front of the
projector to extend the adjustable tilt feet (maximum height: 30mm/
1.2”).
3. Lower the front of the projector to the desired height.
4. Release the Adjustable Tilt Foot Button to lock the Adjustable tilt
foot.
There is approximately 10 degrees of up and down adjustment for
the front of the projector.
Adjusting the height of a projected image or changing projection
angle will run the Auto Keystone correction function to quickly
correct the vertical distortion. The "Keystone" screen will be dis-
played.
For operating the "Keystone" screen, see "
ᕤ
Correcting Vertical
Keystone Distortion" on page 35.
NOTE: Your "Keystone" correction data can be reset by pressing and holding the 3D
REFORM button for a minimum of 2 seconds.
CAUTION
Do not use the tilt-foot for purposes other than originally intended.
Misuses such as gripping the tilt-foot or hanging on the wall can cause dam-
age to the projector.
Adjustable Tilt
Foot Button
3D
RE
FO
RM
SO
UR
CE
SE
LE
CT
STA
TU
S
LAM
P
PC
CA
RD
PO
WE
R
ON
/ST
AN
D B
Y
AU
TO
AD
JU
ST
ME
NU
EN
TE
R
CA
NC
EL
ZOO
M
FOC
US
1
2
3D REFORM
SOURCE
SELECT
STATUS
LAMP
PC CARD
POWER
ON
/STAND BY
AUTO AD
JUST
ME
NU
EN
TE
R
CA
NC
EL
ZOO
M
FOCUS
4
3
Adjustable Tilt Foot
Rotate the projector's front right or left (to the right in this example) to center
the image horizontally on the screen.