UVP 81-0345-01 ChemiDoc-ItTS2 Imager User Manual
Page 18
GelDoc-It
TS2
and ChemiDoc-It
TS2
Imagers
18
Save After Capture function is enabled in Preferences,
the image will automatically be saved to the preset location
(see “Saving Tab” under Setting User Preferences in this
manual).
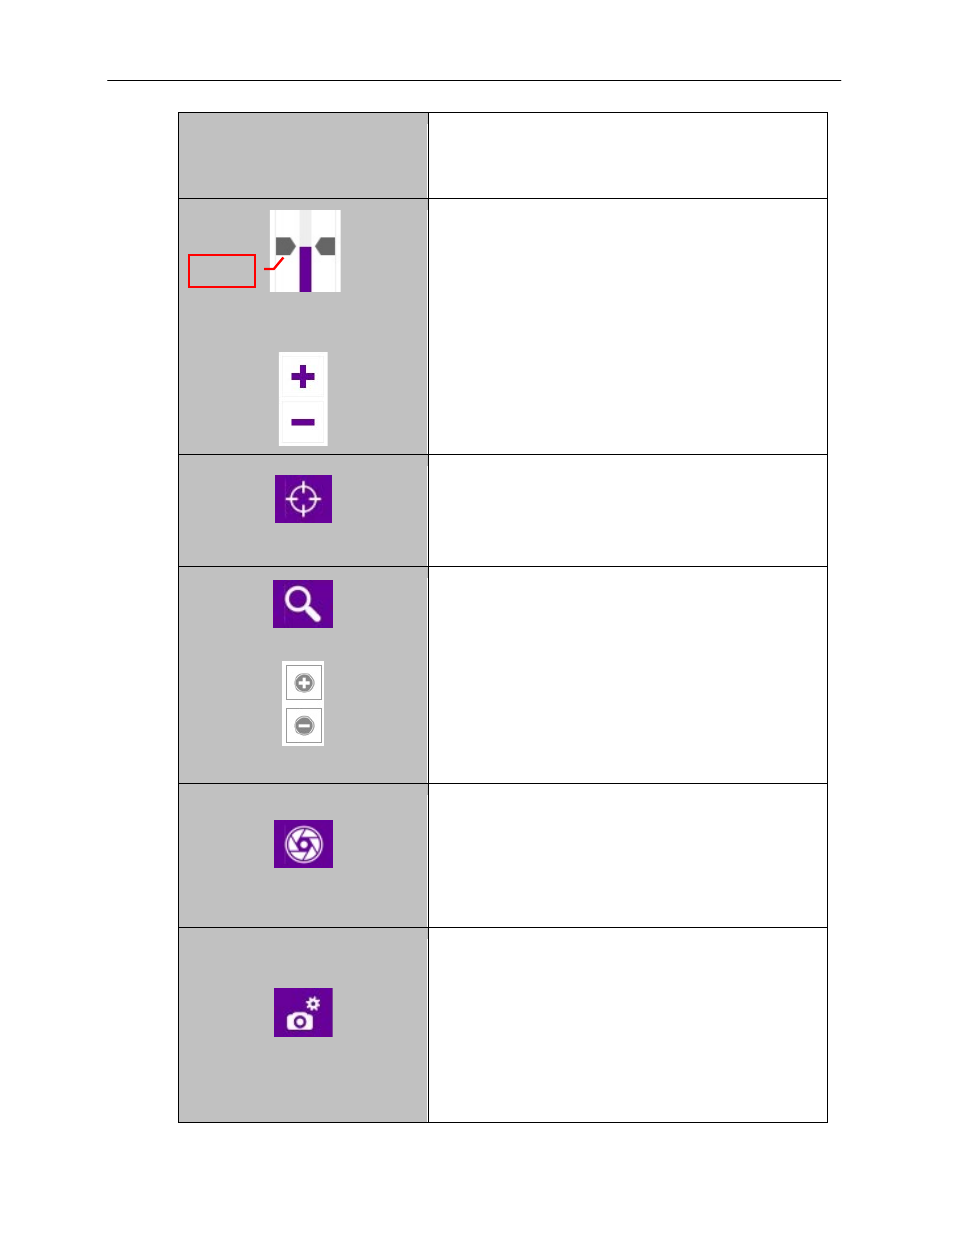
Slider Bar
Use the slider bar to adjust various settings, including
Exposure, Aperture, Histogram, Focus and Zoom (if
applicable). To adjust the settings, do one of the following:
• Press and drag the marker (small triangle) to the
desired position;
• Touch anywhere along the gray slider bar and the
marker will automatically “snap” to that position (not
applicable to Histogram);
or
• Press the “+” and “–” buttons to make fine
adjustments to the settings (not applicable to
Histogram).
Focus
Press the Focus button to access lens focus adjustment.
Use the vertical slider bar and/or the “+” and “–” buttons
below the slider to make adjustments to this setting.
The current focus setting will be indicated above the slider
bar.
Zoom
Digital Zoom Buttons
Press the Zoom button to access lens optical zoom
adjustment (if available). Use the vertical slider bar and/or
the “+” and “–” buttons below the slider to make
adjustments to this setting. Note that the higher the zoom
percentage is, the larger the image will appear.
The current zoom setting will be indicated above the slider
bar.
NOTE: Optical zoom functionality is not available on all
systems. To digitally zoom in on previewed or captured
images, use the Digital Zoom Buttons (“+” and “–”)
located to the right of the active image.
Aperture
Press the Aperture button to access lens aperture
adjustment. Use the vertical slider bar and/or the “+” and
“–” buttons to make adjustments to this setting. Note that
the lower the aperture setting (the lower the f-number), the
more light will pass through to the camera’s sensor.
The current aperture setting will be indicated above the
slider bar.
Capture Mode
Press the Capture Mode button to access exposure time
adjustment for live image preview and capture, as well as
to select modes for image capture.
Use the vertical slider bars and/or the “+” and “–”
buttons to make adjustments to the desired portion of the
exposure time (min, sec, ms or microseconds).
To adjust capture modes, select the desired mode from the
drop-down menu. Capture modes include:
Marker