Step 7, Français stade 7. test de contrôle – ParkZone PKZ1600 User Manual
Page 14
14
Control Test
Warning: Keep everything clear of the propeller before
starting the control test in the event that you accidentally
turn on the motor.
1. Be certain that the throttle slider is in the “off”
position and that both trim levers are centered.
2. Switch on the transmitter and check to make sure
the LED is lit, indicating the transmitter has power.
3. Install the flight battery into the fuselage and plug it
into the battery connector.
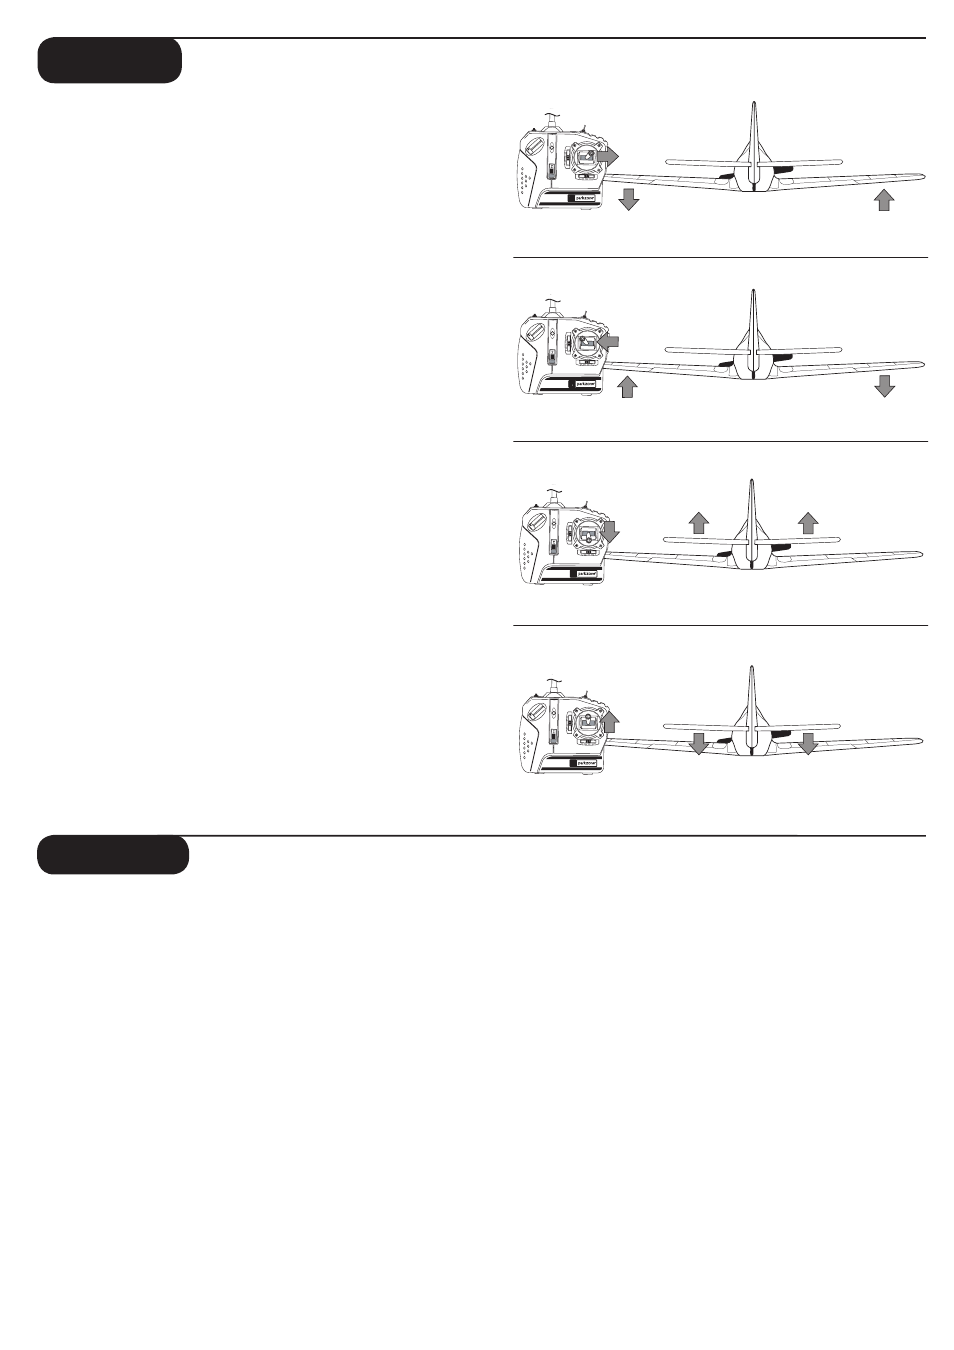
4. Move the stick from side to side. The ailerons on
the trailing edge of the wings should move per your
transmitter input. When the stick is pushed to the
right, the right aileron should deflect upward and the
left aileron downward, and vice versa.
5. Pull the stick back and the elevator control surface
should move upward (as shown).
6. Move the stick full forward. When this is done, the
elevator control surface should move down (as
shown).
7. When the test is complete, be sure to disconnect
the flight battery first, and then turn off the trans-
mitter. This should be done each time you turn off
the airplane.
If your airplane is not responding correctly to the transmitter
input, do not fly! Some correction is needed. Contact the
store where you made your purchase.
Note: It is very important to make sure that the control
surfaces are at 0 degrees when the transmitter control
stick and trim levers are centered. (See Steps 4 and 8
for making needed adjustments to control surfaces.)
Step 7
Français
Stade 7. Test de Contrôle
ATTENTION : Vérifier que la zone de rotation de l’hélice est libre de tout obstacle sous peine de causer des dommages
ou de blesser quelqu’un.
1. Vérifier que la commande des gaz est sur Off. Vérifier que les leviers de trim sont au neutre.
2. Mettre l’émetteur sous tension et vérifier que la Led s’éclaire.
3. La batterie de l’avion étant dans son logement, la connecter à la prise blanche à l’intérieur du fuselage.
4. Bouger le manche d’un côté à l’autre. Les ailerons doivent suivre le mouvement du manche (quand le manche est vers la droite, l’aileron droit se
lever et le gauche se baiser et inversement avec le manche à gauche).
5. Tirer le manche vers l’arrière et vérifier que la gouverne de profondeur se lève (voir dessin).
6. Pousser le manche vers l’avant. La gouverne de profondeur soit se baisser (voir dessin).
7. Quand le test est terminé, débrancher la batterie de l’avion en premier, avant de mettre l’émetteur hors tension.
Si le modèle ne répond pas correctement aux ordres de l’émetteur, ne pas voler !
Note : Il est très important de vérifier que les gouvernes (ailerons et profondeur)
soient au neutre quand le manche et les leviers de trim sont centrés.