Hanna Instruments PCA 310 User Manual
Page 21
21
the protective cap from electrodes and electrodes connectors.
Screw the pH probe (HI 1005
HI 1005
HI 1005
HI 1005
HI 1005) in the lower position and the ORP probe
(HI 2008
HI 2008
HI 2008
HI 2008
HI 2008) in the higher position and assure that no leakage occurs.
Only after the probe is in final position connect the probe to the
dedicated connector. Lock the connector with the built in nut.
Warning::::: Never connect or disconnect the probes when the analyzer is
powered on.
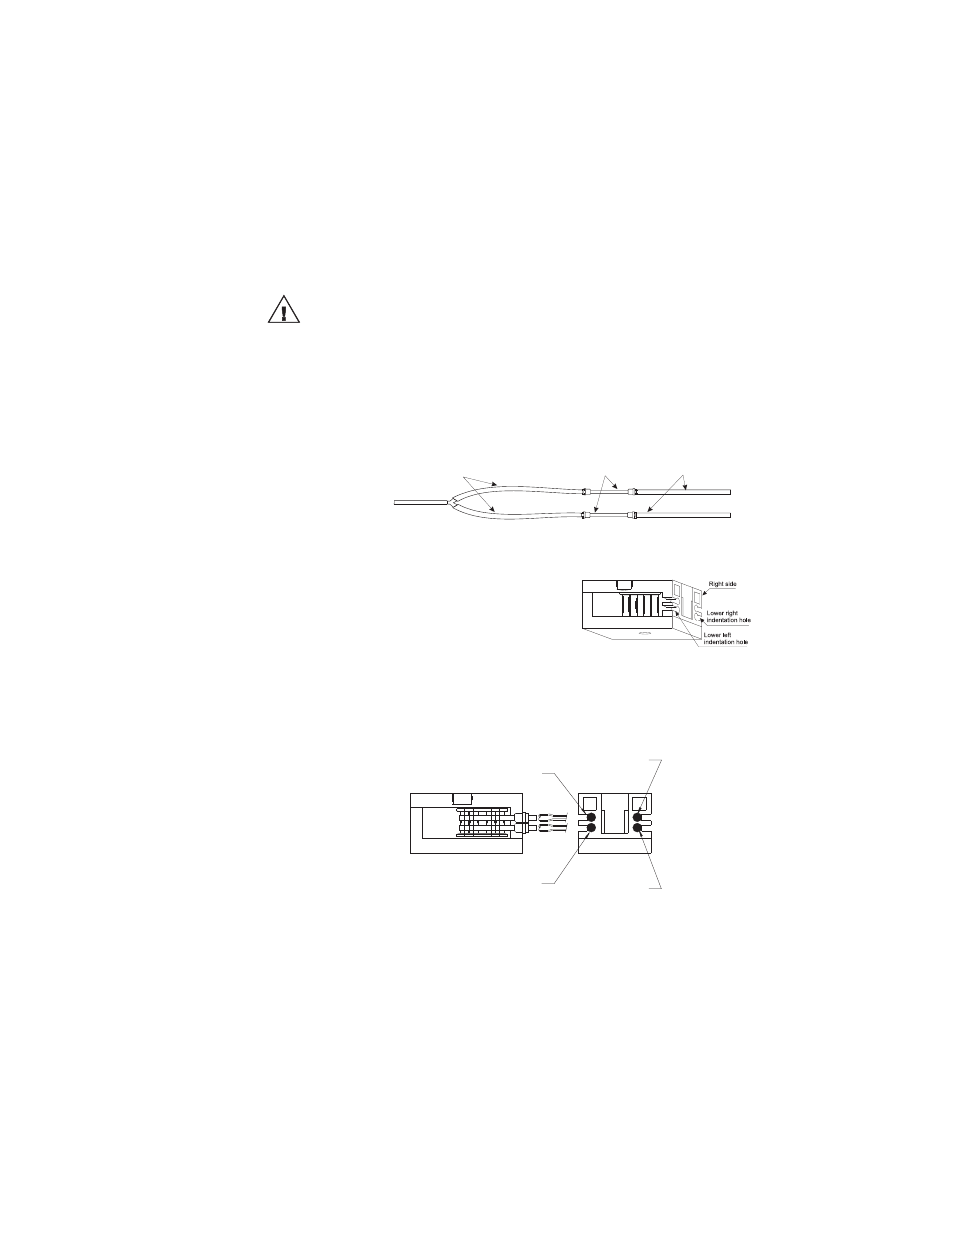
INSTALLING THE PUMP TUBES
Locate the analyzer reagent tubes in the accessory kit. Each
tube is composed of three sections. The sections are joined
together by plastic connectors with plastic collars at the ends
of the center section.
Locate the peristaltic pump.
Feed one tube from the shorter
end section behind the pump
rollers from the right side of the
pump. Seat the plastic collar at
the right end of the center section
of tubing into the lower right in-
dentation hole of the pump face.
Grasp the other plastic collar and pull, stretching the center
section, and place the grommet in the lower left indentation
hole.
HI 70479
HI 70473
HI 70474 or HI 70475
From Buffer Bottle
From Buffer Bottle
From Indicator Bottle
From Indicator Bottle
To "Y" Connector
To "Y" Connector
and Measuring Cell
and Measuring Cell
To "Y" Connector
To "Y" Connector
and Measuring Cell
and Measuring Cell
Repeat this process with the second pump tube, placing it in
the upper indentation holes.
Separate reagent caps are provided in the accessory kit. Put
the supplied caps onto each reagent bottle prior to installing