Parts needed for, Step 3, Roof beam assemblies – Arrow Storage Products KM1010 User Manual
Page 16
Attention! The text in this document has been recognized automatically. To view the original document, you can use the "Original mode".
Step 3
• Parts Needed For •
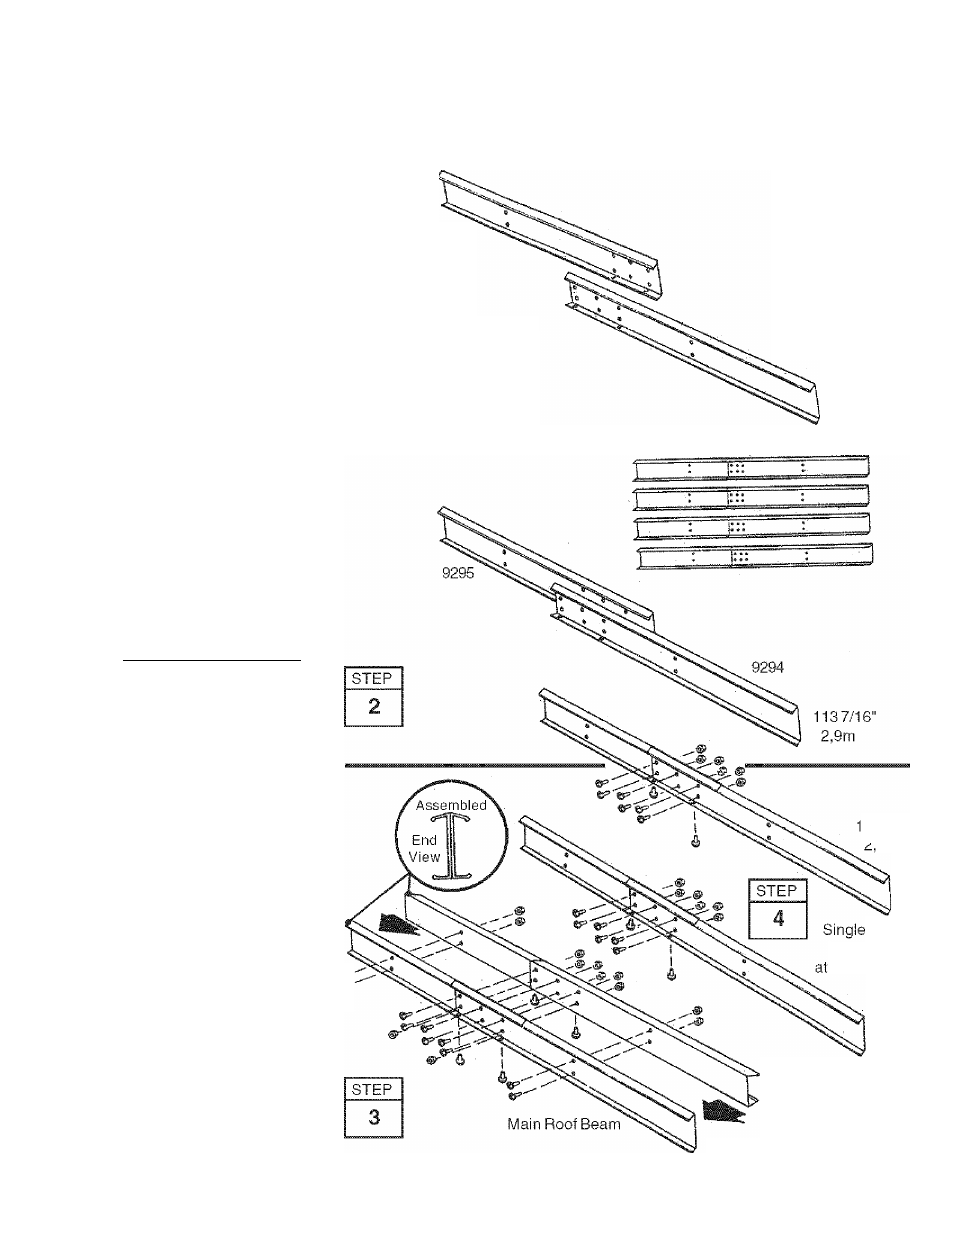
Roof Beam Assemblies
• 9294 Right Roof Beam (4)
• 9295 Left Roof Beam (4)
The roof beams join the two gables
andsupportthe roof panels. The main
roof beam is made up of four pieces
overlapped, back to back at the cen
ter. The left and right roof beam as
semblies are made up of two pieces.
Hint;
These pieces are force-fitted,
so you may have to press hard to join
them together.
1
The figure shows how to identify a
left
and a
right roof beam.
As you
will note, the difference is only which
end of each beam has the six holes
for joining the beams at the center.
2
Place the end of a right roof beam
inside a left roof beam so that the six
holes in each piece align. Make four
sets of roof beams by repeating this
procedure.
Do not insert bolts yet.
3
Take two of the pressed-together
roof beams and join them as shown
to form the main roof beam assembly.
Hold the assembly together and fas
ten with 14 bolts and nuts.
4
Fasten the other two pressed-
together roof beams with 8 bolts to
make the left and right roof beam
assemblies.
5
Set these pieces aside for later
assembly.
Left
9295
STEP
How To Identify Left and
Right Roof Beams
Right
9294
1137/16"
2,9m
137/16"
9m
Beam
Assembly
Side of Roof
1137/16"
2,9m
Doubled Beam Assembly at Peak
1137/16"
2,9m
16