Attaching and assembling table extensions – Sears 113.241591 User Manual
Page 18
Attention! The text in this document has been recognized automatically. To view the original document, you can use the "Original mode".
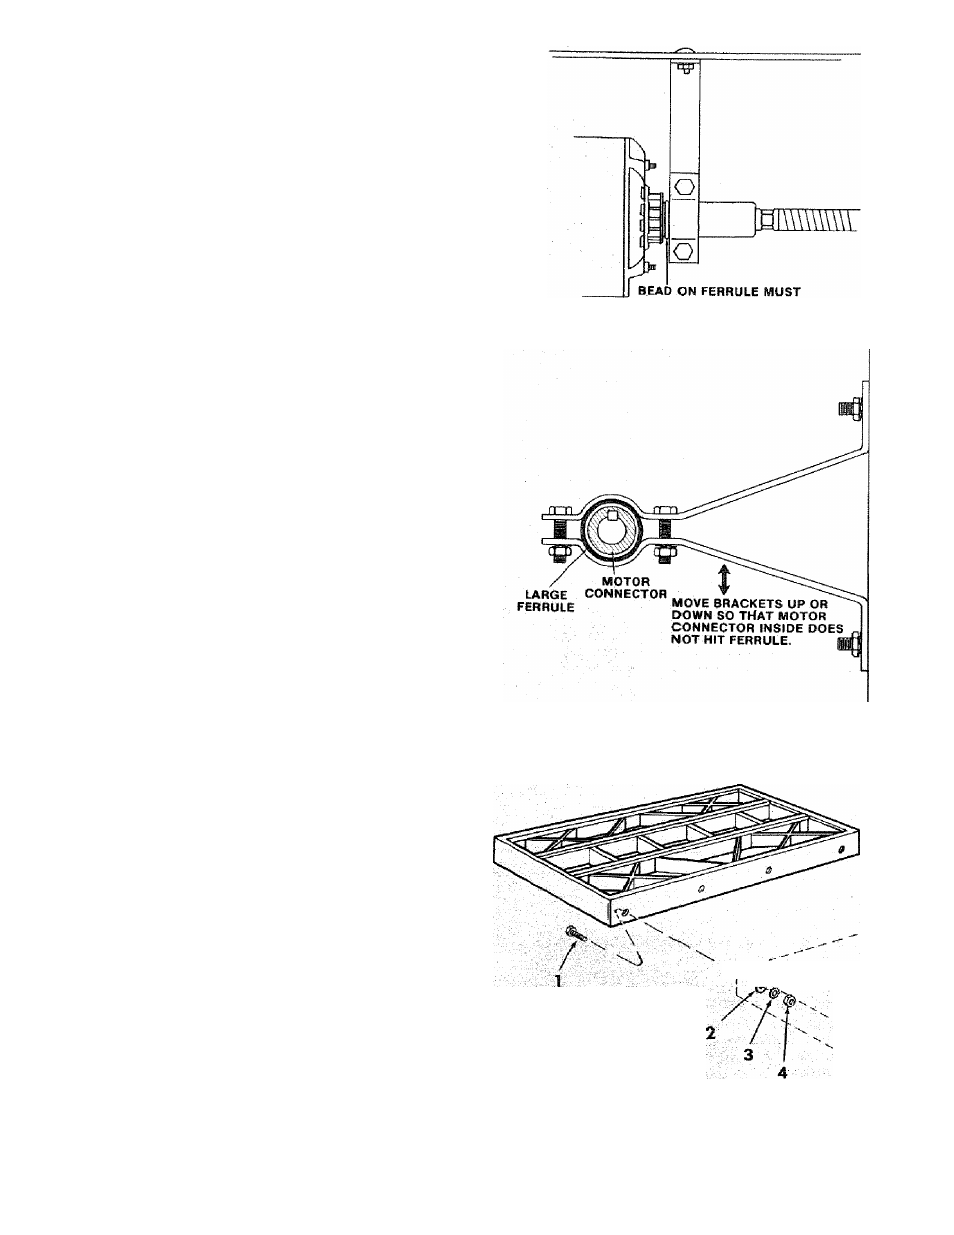
14. With end of LARGE FERRULE inserted into
recess in motor end cap tighten 2 Hex Head nuts
on shaft brackets. LARGE FERRULE must be
pushed against the motor end capasfaras it will
go. Tighten nuts but do not OVERTIGHTEN,
The shaft brackets hold the LARGE FERRULEin
place. Nuts should be securely tightened to
prevent movement. Overtightening may cause
damage to the LARGE FERRULE,
CONTACT MOTOR END CAP
IMPORTANT: The LARGE FERRULE should be
centered over the MOTOR CONNECTOR (now
located inside of LARGE FERRULE), to prevent
the MOTOR CONNECTOR Ironi contacting the
LARGE FERRULE.
15. Carefully turn saw blade by hand to make sure
MOTOR CONNECTOR does not hit LARGE
FERRULE. If they are in contact, it will cause a
noise and cause resistance to rotation.
16.
If the MOTOR CONNECTOR does hit the
LARGE FERRULE loosen the nuts holding the
shaft brackets to the saw base, and the nuts
holding the LARGE FERRULE In the shaft
brackets. Adjust the brackets and the LARGE
FERRULE
until
the
LARGE
FERRULE
is
centered and is not hit by the MOTOR
CONNECTOR.
NOTE: It may be necessary to raise or lower
motor on motor mount slightly. Be sure to
reposition shaft brackets as required.
17. Tighten nuts.
ATTACHING
AND
ASSEMBLING
TABLE EXTENSIONS
From among the loose parts find the following
hardware: (Quantity indicated is for 2 extensions)
HARDWARE FOR INSTALLING
EXTENSIONS TO SAW TABLE
Ref.
No. Description
Qty.
1
Hex Hd. Screw, 5/16-18 X 1-1/4 ........................ 8
2
Flat Washer (Dia. of Hole 11/32) ...................... 8
3
External Lockwasher, 5/16 .............................. 8
4
Hex Nut, 5/16-18 ............................................. 8
1. Insert four (4) 5/16-18 X 1-1/4 in. Jong screws
through holes in each EXTENSION.
2. Position extension against table so screws
extend through holes in table.
3. Install fiat washer, iockwashers, and nuts on the
screws . , . DO NOT TIGHTEN.
SAW TABLE
' 'ÍVEí^ (REF)
18