Assembl – Sears 917.25446 User Manual
Page 8
Attention! The text in this document has been recognized automatically. To view the original document, you can use the "Original mode".
ASSEMBL
FIGURES
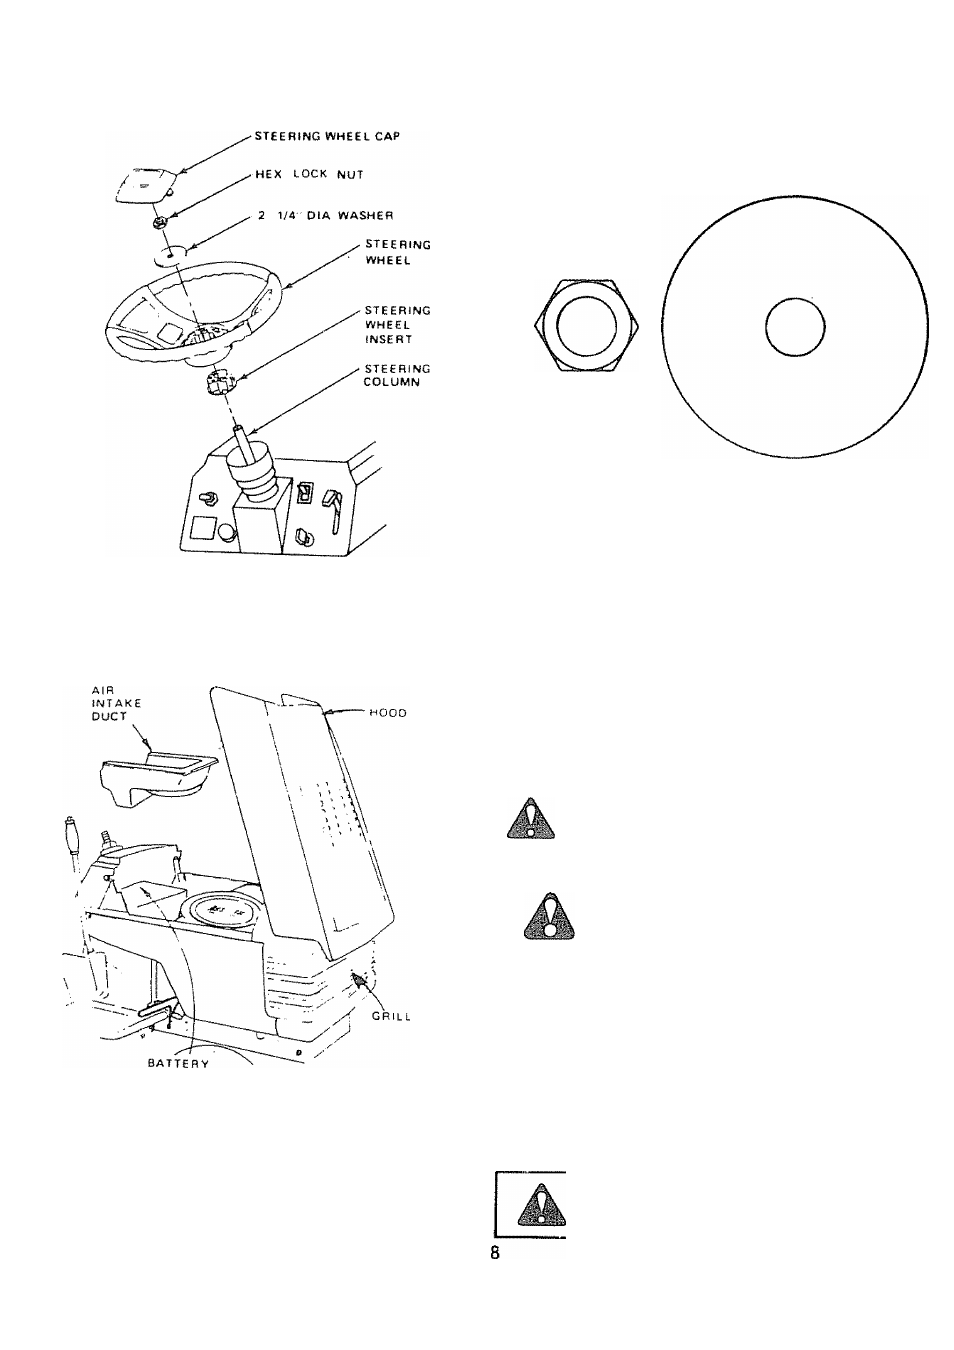
FIGURE 4
COMPARTMENT
NOTE POSITION FRONT WHEEL FORWARD,
a Use a 3/4' wrench to remove lock nut. and
2 - 1/4 ' diameter washer (shown full size below)
from steering column (Fig 31
3. Install Steering Wheel
b. Position steering wheel over steering wheel insert (Fia
3).
BARS OF STEERING WHEEL SHOULD POINT
STRAIGHT ACROSS TRACTOR
c
Secure steering wheel to steering column using
2 U4 diameter washer and lock nut (Fig 3)
Torque to
68 N-m (50 Ft Lbs.)
d Snap steering wheel cap in place on steering
wheel Steering v\heel cap found in bag of parts
4. Check Tires
Reduce tire pressure to 1 Kg/cnf (14 PSI) in front tires
and0-71 Kg/cnf (10 PSI) in rear tires. (Tires were
overinftated for shipping purposes.)
5 Install Battery
DO NOT SHORT BATTERY TERMINALS
BEFORE
INSTALLING
BATTERY.
REMOVE
METAL
BRACLETS,
WRISTWATCH
BANDS,
RINGS, ETC.
It= BATTERY IS REMOVED, DO NOT
OPERATE ENGINE. SPARKING MAY
OCCUR,
a
Lift hood from rear sides (Fig 41
b Make sure drain tube (Fig 5) is fastened to drain
hole in battery tray and battery tray is position
ed in hole of battery support.
c Place battery in plastic tray (battery terminals to
front of tractor) (Fig 5)
POSITIVE
TERMINAL
MUST
BE
CONNEC
TED
FIRST
TO
PREVENT
SPARKS
FROM
ACCIDENTAL GROUNDING