Tìon, Opera – Sears 917.25446 User Manual
Page 14
Attention! The text in this document has been recognized automatically. To view the original document, you can use the "Original mode".
OPERA
TÌON
b Drive so that dippings are discharged onto the area
that has been cut. Have the cut area to the right of
the machine. This will result in a more even distri
bution of dippings and more uniform cutting,
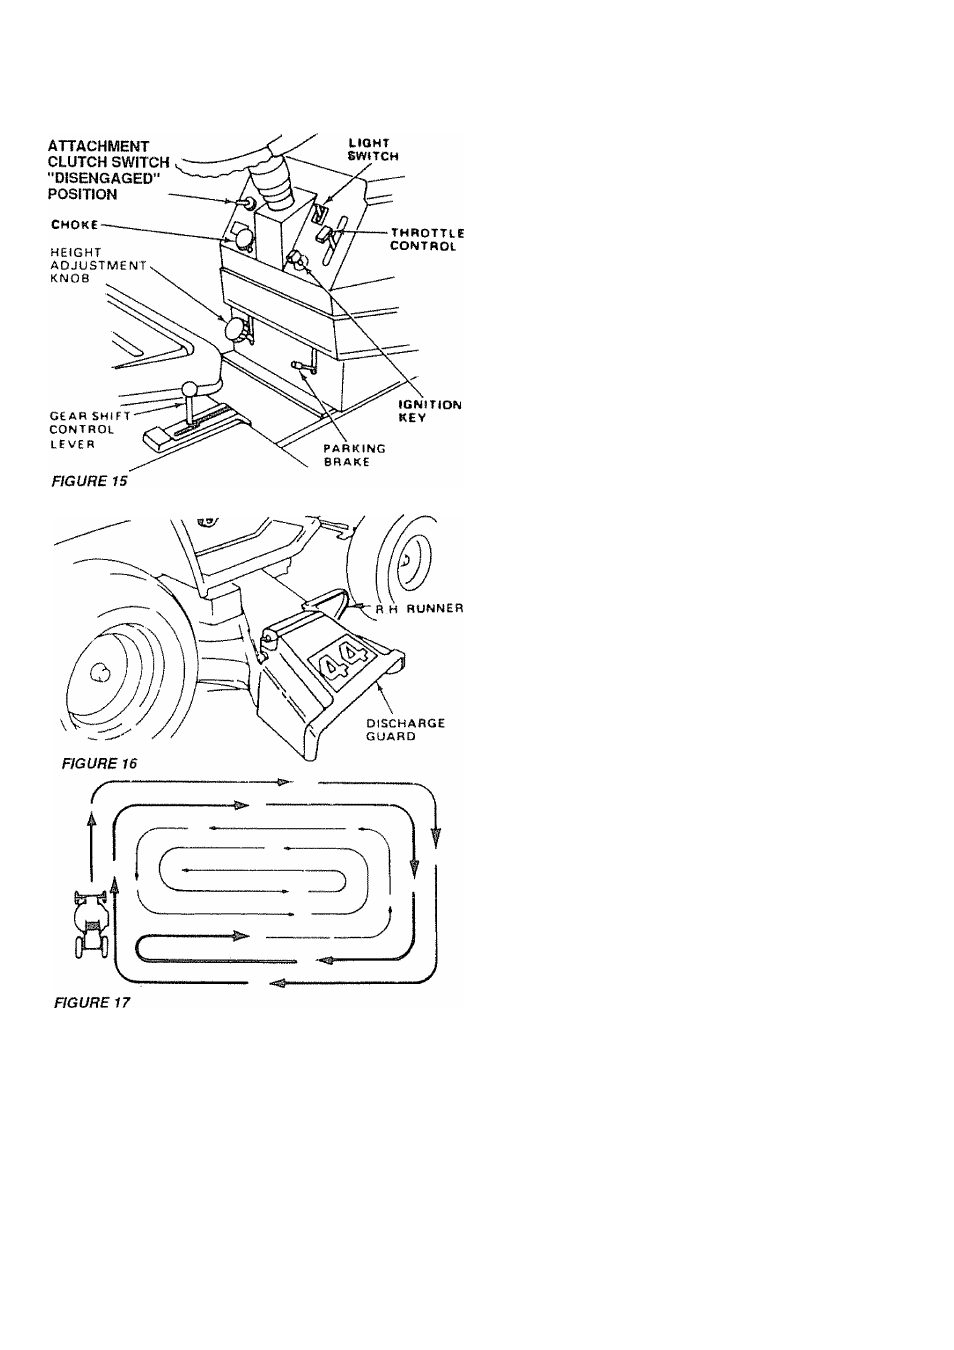
c When mowing large areas ¡Ftg 17). start by turning
to the right so that the dippings will discharge away
from shrubs, fences driveways etc After one or
two rounds mow m the opposite direction making
fell hand turns until finished
d If grass is ex tremely tall, it should be mowed twice
The first time cut relatively high, the second time
to the desired height
e The left hand side of mower should be used for
trimming
f Do not mow tall, dry grass over 15..25 cm (6 inches)
tall. It is a fire hazard.
5 Operating The Tractor On Hills
A
DO NOT DRIVE UP OR DOWN HILLS WITH
SLOPES
GREATER
THAN
15“
AND
DO
NOT
DRIVE
ACROSS
ANY
SLOPE
REFER
TO PAGE 55.
a
Move gear shift lever to
‘
1ST" gear before starting
up or down hills
b AVOID STOPPING OR SHIFTING ON HILLS
c If slowing IS necessary, move throttle control lever
to slower position.
A
LEAVE
ENOUGH
ROOM
WHEN
STOP
PING
AND
STARTING
TO
ALLOW
SLIGHT
TRACTOR
ROLL
DOWNHILL
AS
CLUTCH/
BRAKE
PEDAL
MOVES
THROUGH
CLUTCH
POSITION.
d If stopping is absolutely necessary push dutch/brake
pedal quickly to brake position and engage parking
brake
e To restart tractor movement, make sure tractor is in
the lowest speed range I" 1ST" Gear) and that you
have allowed room to roll slightly downhill Depress
dutch/brake
full
Disengage
parking
brake
and
release dutch/brake pedal SLOWLY to start tractor
movement
f Make all turns gradually
4
Mowing Tips
NOTE: TIRE CHAINS CANNOT BE USED WITH THE
MOWER HOUSING ATTACHED.
A
READ
THE
SAFETY
RULES
'
CAREFULLY
BEFORE
OPERATING
YOUR
MOWER
REFER TO PAGE 2
Use the runner on the R.H side as a guide; the blade
cuts approximately 2,54 cm (1 inch) outside the runner
(Fig 16)
6 Flip-Up Discharge Guard
Your mower has a flip-up discharge guard (Fig. 161 for
door or gate clearance when held in raised position
14
A
MAKE
SURE ATTACHMENT CLUTCH SWITCH
IS
IN
‘DISENGAGED”
POSITION
AND
BLADES HAVE STOPPED BEFORE RAISING
DISCHARGE GUARD (DEFLECTOR). NEVER
OPERATE MOWER WITHOUT DISCHARGE
GUARD IN OPERATING POSITION.