Repair & adjustments – Sears 917.25446 User Manual
Page 20
Attention! The text in this document has been recognized automatically. To view the original document, you can use the "Original mode".
REPAIR & ADJUSTMENTS
A
LEAD-ACID
BATTERIES
GENERATE
EXPLOSIVE GASES. KEEP SPARKS,
FLAME
AND
SMOKING
MATERIALS
AWAY
FROM
BATTERIES.
ALWAYS
WEAR
EYE
PROTECTION
WHEN
AROUND BATTERIES.
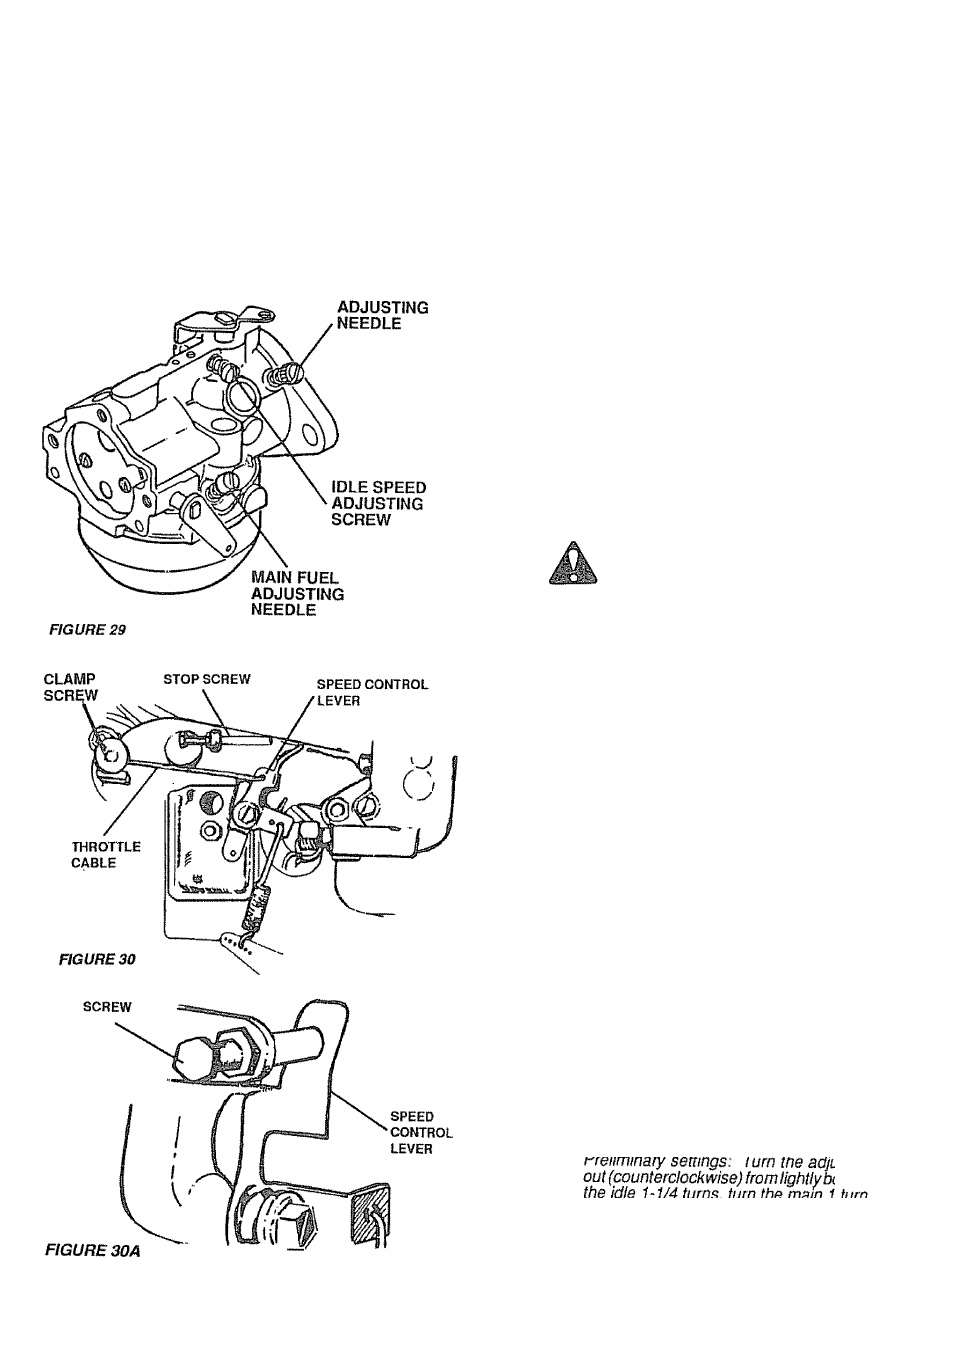
IDLE FUEL
CASING
STOP
1, Starling your Tractor With a Weak Battery
If your battery is too weak to start the engine, it should be
recharged. If "jumper cables" are used for emergency
starting, follow this procedure:
NOTE: YOUR TRACTOR iS EQUIPPED WITH A 1 2 VOLT
NEGATIVE GROUNDED SYSTEM, THE OTHER VEHICLE
MUST ALSO BE A 12 VOLT NEGATIVE GROUNDED
SYSTEM
a .
Connect each end of the
RED
jumper cable to the
POSmVE(+) terminals of each battery (taking care
not to short against chassis) . (Fig. 28)
b Connect one end of the BLACK jumper cable to the
NEGATIVE (-) terminal of fully charged battery.
c Connect the other end of the BL A CK jumper cable
to the L.H. side panel boll (Fig. 14) NOTE: KEEP
AWAY FROM GAS TANK AND BATTERY
d Disconnect cablesrin reverse order:
1 L..H. side panel bolt (Fig. 14)
2
Negative terminal of fully charged battery
3
Positive terminals
DO NOT USE YOUR TRACTOR BAT
TERY TO START OTHER VEHICLES
2
Throttle Control Cable Adjustment
Never attempt to change maximum engine speed
This is preset at the factory (3600 rpm± 75 rpm) and
should only be changed by a qualified service techni
cian who has the necessary equipment
a. Remove hood (Fig. 32).
b. Loosen casing clamp screw (Fig. 30) until throttle
cable is free to move.
Move throttle control (on dashboard) to "FAST"
position.
Pull throttle cable tight (until speed control lever
(Fig. 30A) is against stop screw (Fig.. 30A). Re-
tignten casing clamp screw.
c.
d
A
REFER TO
PAGE 12
-STARTING THE ENGINE
a.
20
3
Carburetor Adjustment
In general, turning the adjusting needles (Fig. 29) in (clock
wise) decreases the supply of fuel to the carburetor. This
gives a leaner fuel/air mixture. Turning the adjusting
needles (Fig. 29) out (counterclockwise) increases the
supply of fuel to the carburetor. This gives a richer fuel/air
mixture. Setting the needles midway between the lean and
rich positions will usually give the best results.
Adjust the carburetor as follows:
With the engine stopped, turn the idle fuel adjust
ing needle in (clockwise) until it bottoms lightly.
NOTE: The tip of the idle fuel and main fuel
adjusting needles are tapered to critical dimen
sions. Damage to the needles and the seats in
carburetor body will result if the needles are forced.
”
"
......
' ¡sting needles
Jttomed.. Turn
d
Start the engine and run at half throttle for five to ten
minutes to warm up. The engine must be warm
before making final settings (Steps d, e, f, andg).
Place the throttle into the 'fast" position.