Assembly – Sears 917.25446 User Manual
Page 7
Attention! The text in this document has been recognized automatically. To view the original document, you can use the "Original mode".
ASSEMBLY
WEAR EYE AND FACE SHIELD.
WASH HANDS OR CLOTHING IMME
DIATELY IF ACCIDENTALLY IN CON
TACT WITH BATTERY ACID.
DO
NOT
SMOKE,
FUMES
FROM
CHARGED BATTERY ACID ARE EX
PLOSIVE.
CUT AWAY VIEW
NOTE; THIS TRACTOR IS EQUIPPED WITH AN OP
ERATOR PRESENCE SENSING SWITCH. ANY AT
TEMPT BY THE OPERATOR TO LEAVE THE SEAT
WITH THE ENGINE RUNNING AND ATTACHMENT
CLUTCH ENGAGED WILL SHUT OFF THE ENGINE
1. Prepare Battery
READ INSTRUCTIONS INCLUDED WITH THE BATTERY
VENTCAPS FOUND IN BAG OF PARTS. ALWAYS WEAR
GLOVES, CLOTHING AND GOGGLES TO PROTECT
YOUR HANDS. SKIN AND EYES
a
Fill and charge battery (before installing).
NOTE:
SEE DETAILED INSTRUCTIONS PACKAGED
WITH BATTERY VENT CAPS IN BAG OF PARTS
NOTE: OVERCHARGING WILL SHORTEN BATTERY
LIFE,
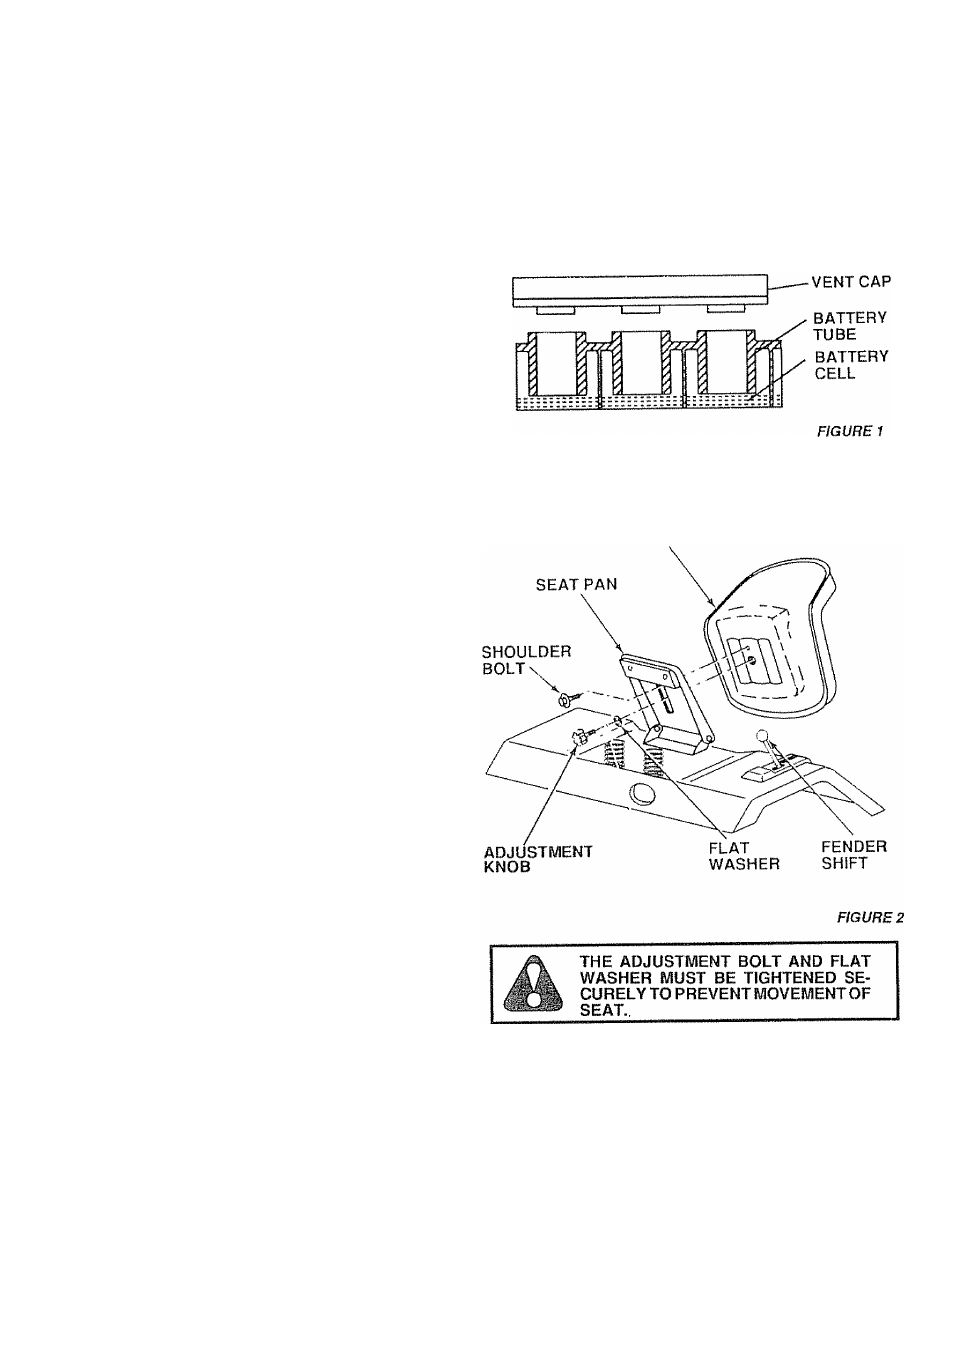
b Fill battery with battery acid to bottoms of tubes in
cells (Figl).
DO NOT OVERFILL. OVERFILLING
WILL RESULT IN DAMAGE TO TRACTOR.
c
Check level of battery acid after 30 minutes. Add
additional battery acid if necessary.
NOTE: PRESS
VENTCAPS INTO BATTERY UNTIL FASTENED
SECURELY
NOTE: OBSERVE SAFETY PRECAUTIONS, LISTED
IN BOX ABOVE, REQUIRED FOR BATTERY CHARG
ING
d Charge battery at a rate of six amperes for one
hour.
e. Neutralize excess battery acid (from filling battery)
for disposal by adding it to 7.4 litres (2 gallons) of
water in a 19 litres (5 gallon) plastic container. Stir
with a wooden or plastic paddle while adding
baking soda until the addition of more soda causes
no more foaming
2. Install Seat
Seat position should be adjusted forward or backward so
that the operator can comfortably reach Clutch/Brake Pedal
and safely operate the tractor (Fig. 14).
a . Remove cardboard from seat pan.
b Place seat on seat pan. Screw adjustment knob
and flat washer into seat (Fig. 2) Screw shoulder
bolt into seat (Fig. 2). Adjustment knob, shoulder
bolt and washer found in bag of parts.
SEAT
c.
Tighten shoulder bolt using a 1/2" wrench. NOTE:
THE SHOULDER BOLT WILL BE LOOSE IN THE
SEAT PAN SLOT
d. Tighten adjustment knob finger tight
e. Place seat in operating position. Sit on the seat and
press clutch/brake pedal all the way down If operat
ing position is not comfortable, adjust seat.
f.
To adjust: raise seat. Loosen adjustment knob.
Slide seat to desired position Tighten adjustment
knob securely