Sears 385.4052LX200 User Manual
Page 52
Attention! The text in this document has been recognized automatically. To view the original document, you can use the "Original mode".
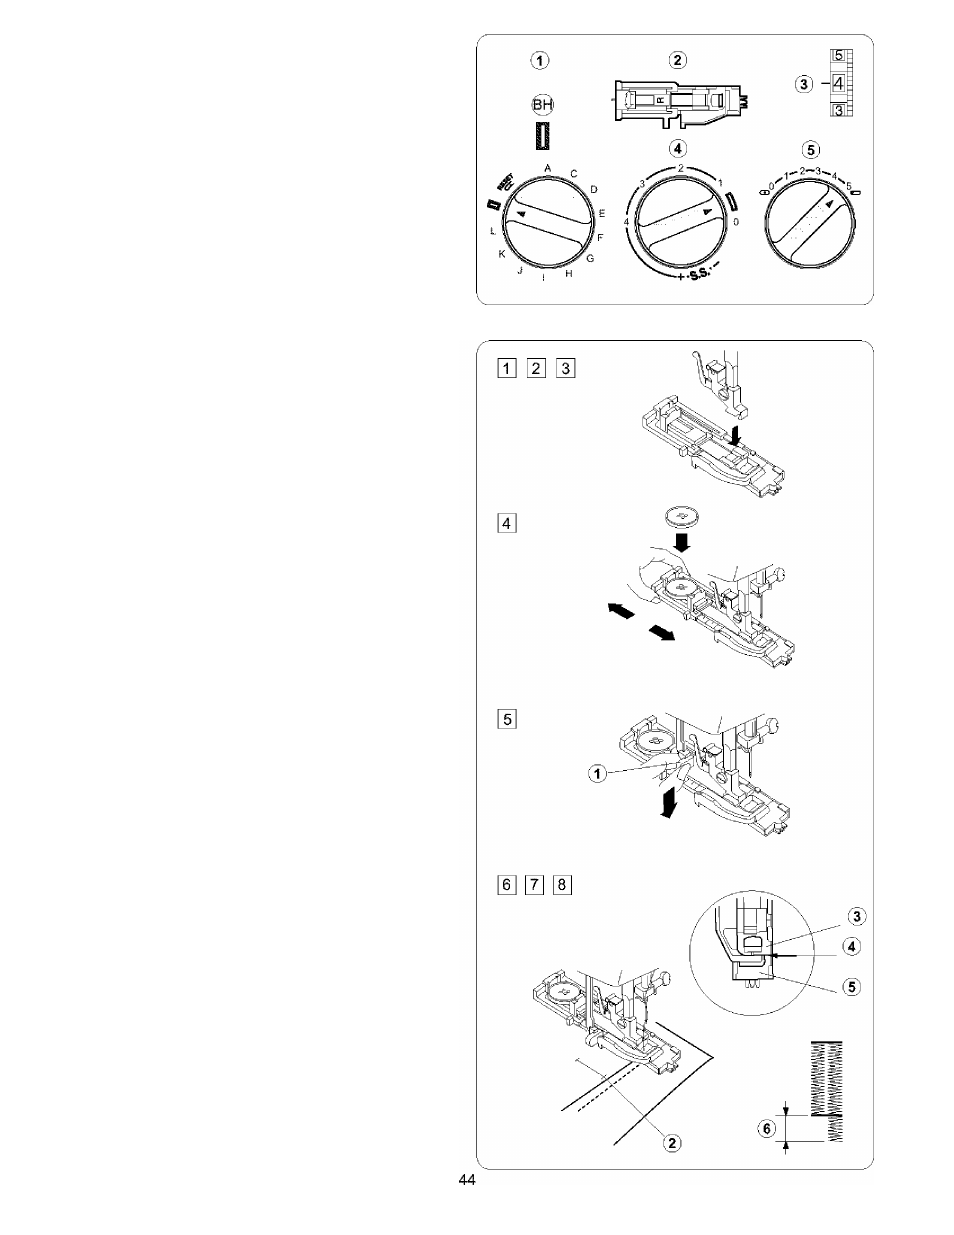
Buttonhole
(T)
Pattern selector;
(D
Presser foot;
CD
Thread tension:
CD Stitch length:
CD
Stitch width:
D
(BH)
Automatic buttonhole foot
1-5
1=3 (0.25-1)
5
The size of buttonhole is automatically set by placing the
button in the automatic buttonhole foot.
The button holder of the foot takes a button size up to
2.5 cm (1") in diameter.
Make a test buttonhole on a sample duplicating the fabric,
interfacing and seams of the actual garment.
Place the button on the fabric sample and mark the top and
bottom to determine the position of buttonhole.
Use interfacing on stretch fabrics.
Turn the handwheel toward you to raise the needle to
its highest position.
Raise the presser foot lifter.
Select the pattern “BH” by turning the pattern selector
dial.
If the BH pattern is already selected, reset the dial once
according to the procedure in
111
.
Attach the automatic buttonhole foot.
Pull the button holder to the back, and place the button
in it. Push back the button holder toward you as far as
it will go.
Pull the buttonhole lever downward as far as it will go.
CD
Buttonhole lever
Insert fabric under the foot.
Turn the handwheel slowly towards you with your right
hand until the needle goes down and continue turning
handwheel until the take-up lever is at its highest position.
Zi Remove the fabric to the left to draw both threads to
the left.
f] Insert the garment under the foot, and lower the needle
at the starting point.
Then lower the automatic buttonhole foot.
Note:
Make sure there is no gap between the slider and the spring
holder. If there is a gap, the length of the rows will be different,
as shown.
(2) Starting point
CD
Slider
(iD
There should be no gap
(D Spring holder
(D Difference