Section 3. basic sewing, Straight stitch sewing, To change sewing direction – Sears 385.4052LX200 User Manual
Page 40
Attention! The text in this document has been recognized automatically. To view the original document, you can use the "Original mode".
SECTION 3. BASIC SEWING
Straight Stitch Sewing
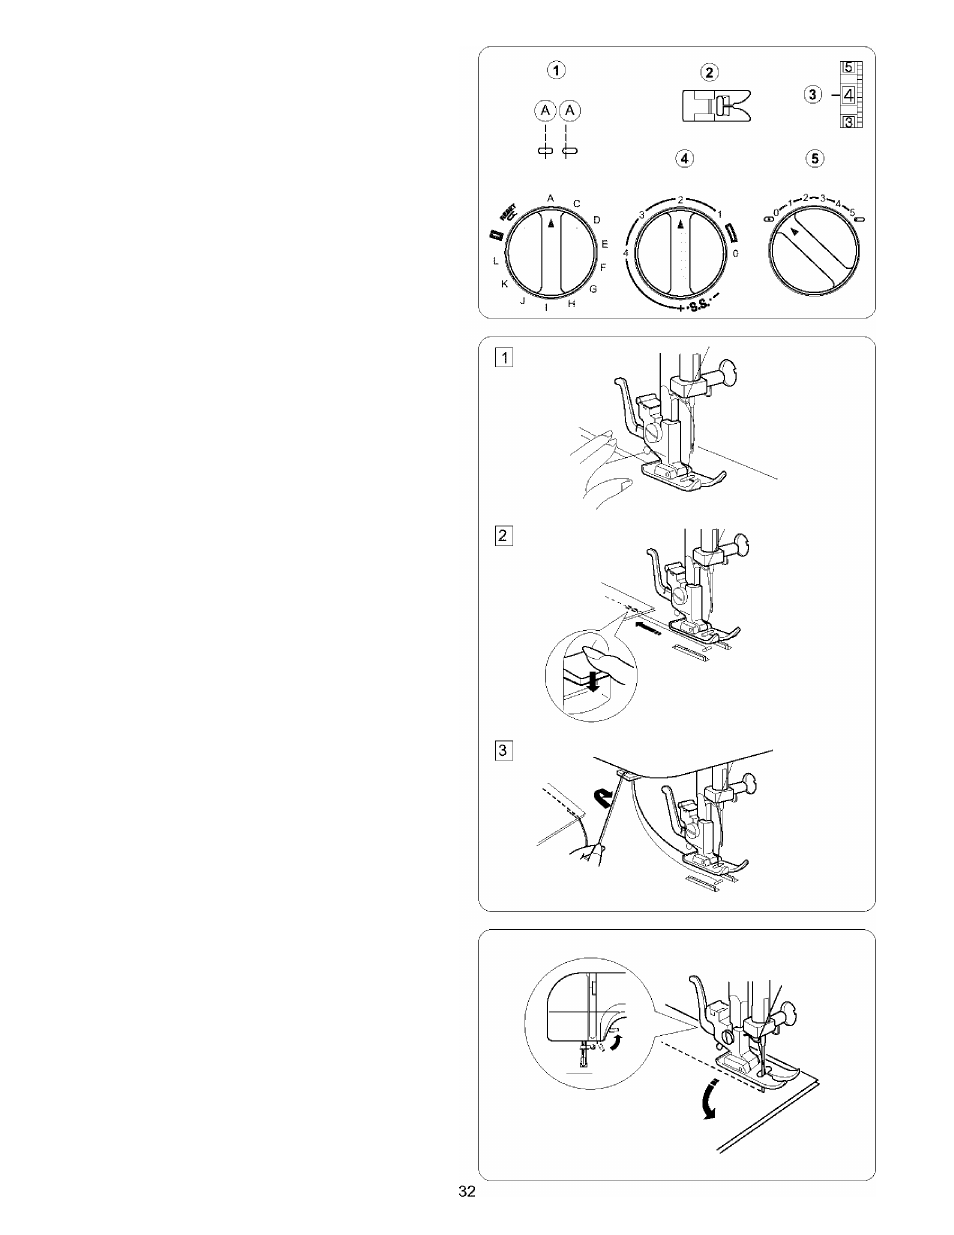
© Pattern selector;
© Presser foot;
CD
Thread tension:
© Stitch length:
CD
Stitch width:
A
Zigzag foot
2-6
1.5-4
CED
(0) or
CD
(5)
Raise the presser foot and position the fabric with its edge
lining up with a seam guide line on the needle plate.
Lower the needle into the fabric.
Lower the presser foot and smooth the threads toward
the back. Depress the foot control.
Gently guide the fabric along the guide line letting the fabric
feed by itself.
For fastening the end of seams, press the reverse stitch
button and sew several reverse stitches.
Raise the presser foot and remove the fabric, drawing
the threads to the back.
Draw the threads up and into the thread cutter.
The threads are cut the proper length for starting the next
seam.
To Change Sewing Direction
Stop the machine and turn the handwheel toward you to bring the
needle down into the fabric.
Raise the presser foot.
Pivot the fabric around the needle to change sewing direction as
desired. Lower the presser foot and continue sewing.