Connecting the machine to the power supply, Foot control, Caution – Sears 385.4052LX200 User Manual
Page 16: Polarized plug, Sewing light
Attention! The text in this document has been recognized automatically. To view the original document, you can use the "Original mode".
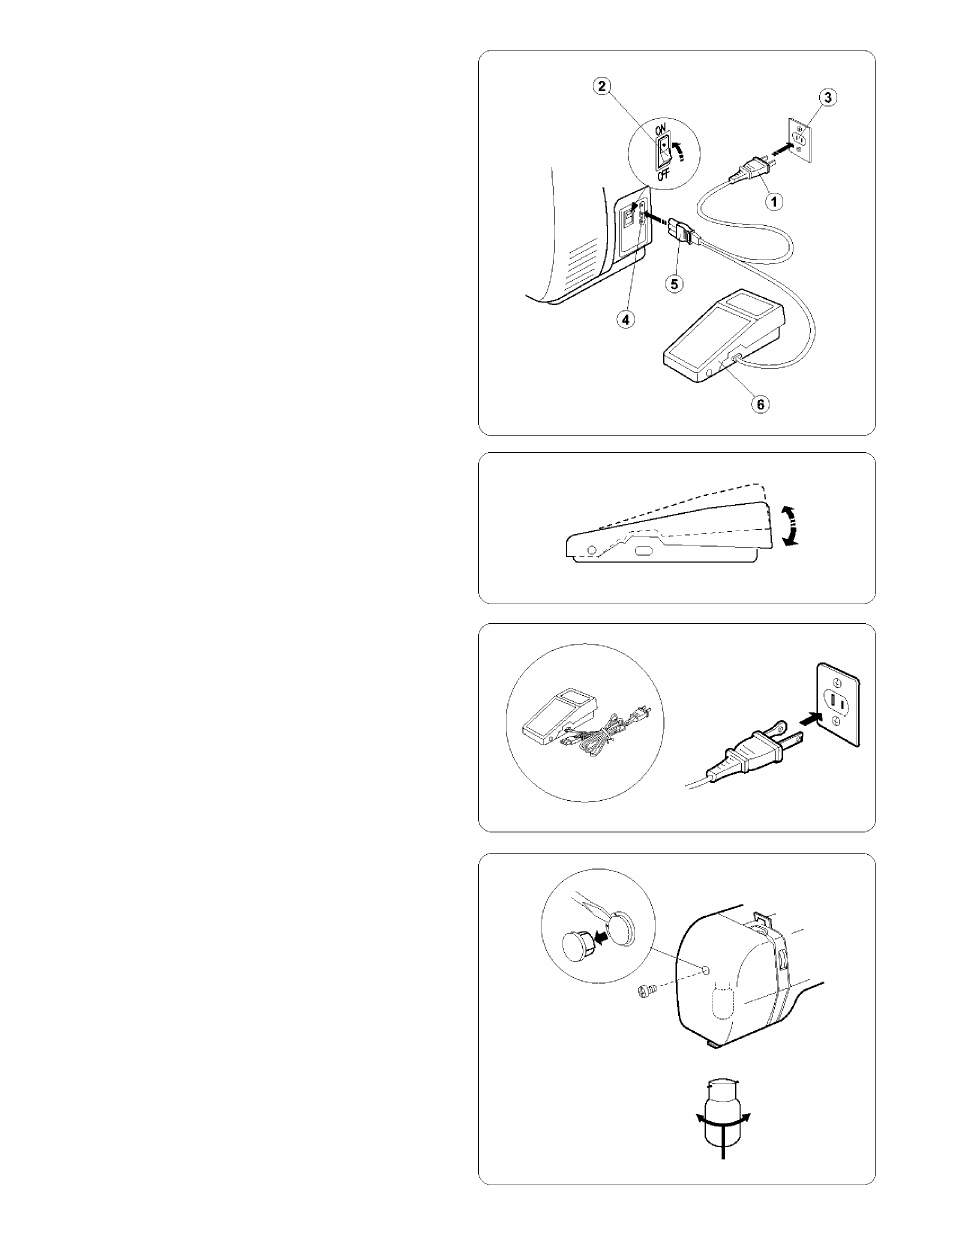
Connecting the Machine to the Power Supply
Before connecting the power cord, make sure the voltage and
frequency shown on the machine conform to your electrical
power.
1. Turn off the power switch,
2. insert the machine plug into the machine socket.
3. Insert the power supply plug into the outlet.
4. Turn on the power switch to turn on the power and sewing
light.
® Power supply plug
(2) Power switch
CD
Outlet
(4) Machine socket
CD
Machine plug
(D Foot control
Foot control
Sewing speed can be varied by the foot control.
The harder you press on the control, the faster the machine runs.
Caution:
Do not place anything on the foot contorol, otherwise the
machine will start advertently.
Polarized Plug
This appliance has a polarized plug (one blade wider than the
other). To reduce the risk of an electric shock, this plug is
intended to fit in a polarized outlet only one way. if the plug
does not fit in the outlet, reverse the plug. If it still does not fit,
contact a qualified electrician to install the proper outlet. Do not
modify the plug in any way.
Foot Controller Model YC-482J-1 or TJC-150 is used with
Sewing Machine Model 385.2049LXxxx (xxx represents
numbers 000 through 999).
Sewing Light
The sewing light is located behind the face plate.
To change the bulb, take the face plate off the sewing machine by
removing the setscrew.
* Unplug the power supply before changing the bulb.
* Do not dismantle the machine other than explained in this
manual.
* To remove................................. Turn to the left.
* To replace................................. Turn to the right.
Waning:
The bulb could be HOT. Protect your fingers when handle it.