Tuffy Security 048 User Manual
Page 4
Page 4 of 5 - 1/23/2012 – Rev122006
STEP 16
STEP 16
4. Important- Read through the next couple of steps and have all of the following items ready and
near-by before you continue.
Torx wrench and (2) bolts you removed.
Main and sliding assemblies.
The three U-bolts supplied along with 5/16-18 locknuts and 5/16 SAE washers.
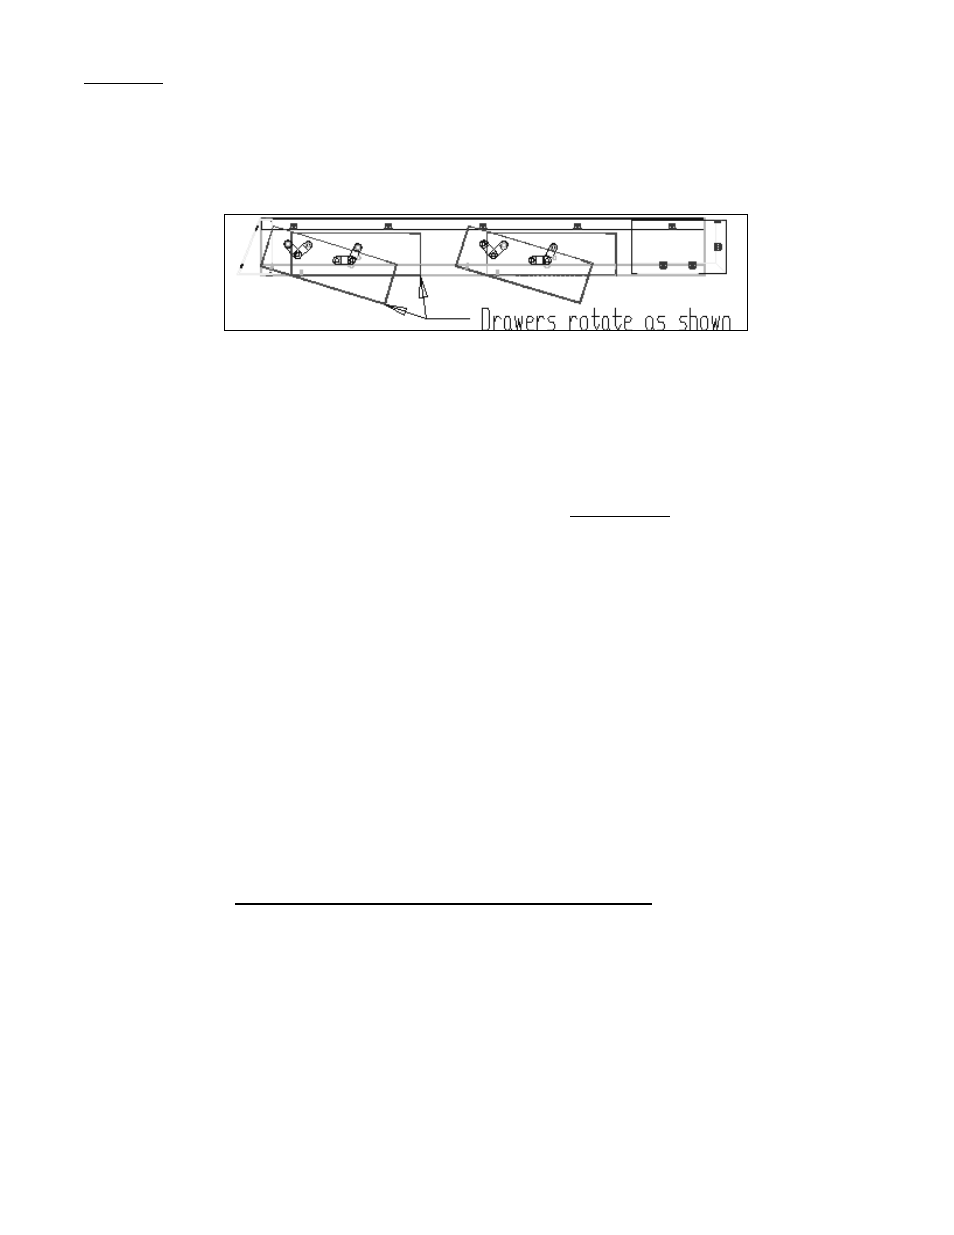
Figure 1 Side view of 048 console
5. It is recommended that two people complete the following steps:
Hold the main body assembly in place and bolt it to the windshield using the original (2) torx
bolts previously removed.
NOTE: If you were unable to remove the footman loop attached to your windshield slide
the Loop Bracket provided behind the footman loop from the top and attach it the main
body assembly with (2) ¼-20x3/8” socket head cap screws and (2) ¼” washers, this will
sandwich the footman loop between the Loop Bracket and the main body.
NOTE: If your Jeep has a full cage you will need to purchase three 2” pipe x 5/16” U-bolts
and use them to bolt the front of the main assembly to the cage in a similar fashion to the
rear mounting system.
Use the (3) U-bolts, 5/16 washers, and locknuts provided to fasten the rear sliding
assembly (now slid partially inside main body) to the rollbar.
Tighten the torx bolts in the front and U-bolts in the rear, and then tighten the carriage bolts
holding the rear sliding assembly to the main body assembly
Check to make sure the console feels secure.
6. Mount the drawers into the openings in the main body assembly. Be sure that the links inside the
console are “resting” so that the holes line up with the holes in the body. It is important to place a
piece of cardboard under the drawer to prevent scratching during installation. If the drawer is
pushed up into the opening in the main body assembly in the approximate orientation of the open
drawer in Figure 1, the holes in the body, link, and drawer will line up and (4)¼-20x1/2” socket
head cap screws can be installed using the 3/16” Allen wrench. Note, only fasten each drawer
with the two links toward the front of the vehicle, DO NOT fasten the links toward the rear of the
vehicle.
7. Mount stereo, CB, and/or speaker in drawer(s). Be sure to secure wires to side holes on the rear
side of the drawer with (1)zip tie per drawer(provided) to ensure wires will not snag onto anything.
8. Attach the stereo to the drawer using the stereo support strap and (1) 10-32 flat washer and
(1) 10-32 locknut.