Tuffy Security 287 User Manual
Page 2
Page 2 of 3 - 9/27/2011 – Rev091211
PLEASE READ ALL INSTRUCTIONS THOROUGHLY BEFORE STARTING INSTALLATION.
1. Flip both rear seats up so they are secured in the upright position.
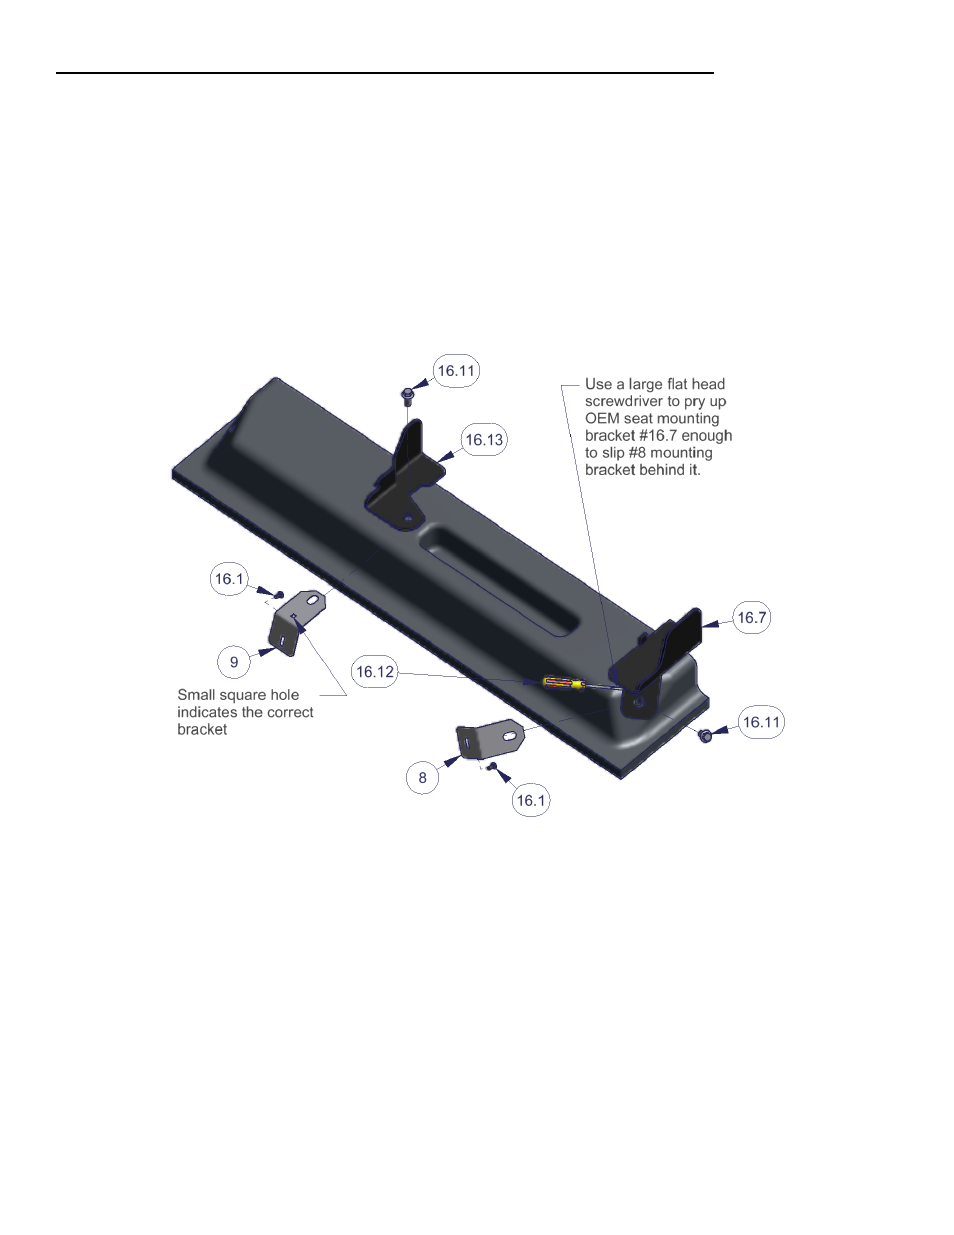
2. Remove the #16.11 OEM original seat mounting bracket bolts from the vehicle, you will reuse these. (See Figure 1)
3. Use a large flat head screwdriver #16.12 to pry the OEM original #16.7 seat mounting bracket up to create a gap large enough to
insert the #8 Tuffy mounting brackets behind them. (See Figure 1)
4. Use a large flat head screwdriver #16.12 to pry the OEM original #16.13 seat mounting bracket up to create a gap large enough to
insert the #9 Tuffy mounting brackets behind them. (See Figure 1)
5. Insert the #16.1 carriage bolts, from the backside, in the rectangle slot on #8 and #9 mounting brackets. (See Figure 1)
6. Insert the #8 and #9 mounting brackets as deep as possible so the head of #16.1 Carriage bolt is sandwiched snuggly between the
vehicle carpet and the mounting brackets so it can be easily positioned and remain in the desired location within the slot. This
will help when aligning the holes in the lockbox with the bolt. (See Figure 1)
7. Place the lockbox in the vehicle. Check that the #16.1 Carriage bolts are at the same height as the corresponding slots in the
backside of the lockbox then reinstall the #16.11 OEM original seat mounting bracket bolts and tighten. (See Figure 1)
Figure 1