Figure 2 – Tuffy Security 144 User Manual
Page 2
Page 2 of 2 - 01/28/2008 – Rev02152006
2. On the original OEM console #6.1 pull out the rubber floor insert in the tray and unscrew the (2) original 6MM screws.
OPTIONAL ADDITIONAL SECURITY STEP
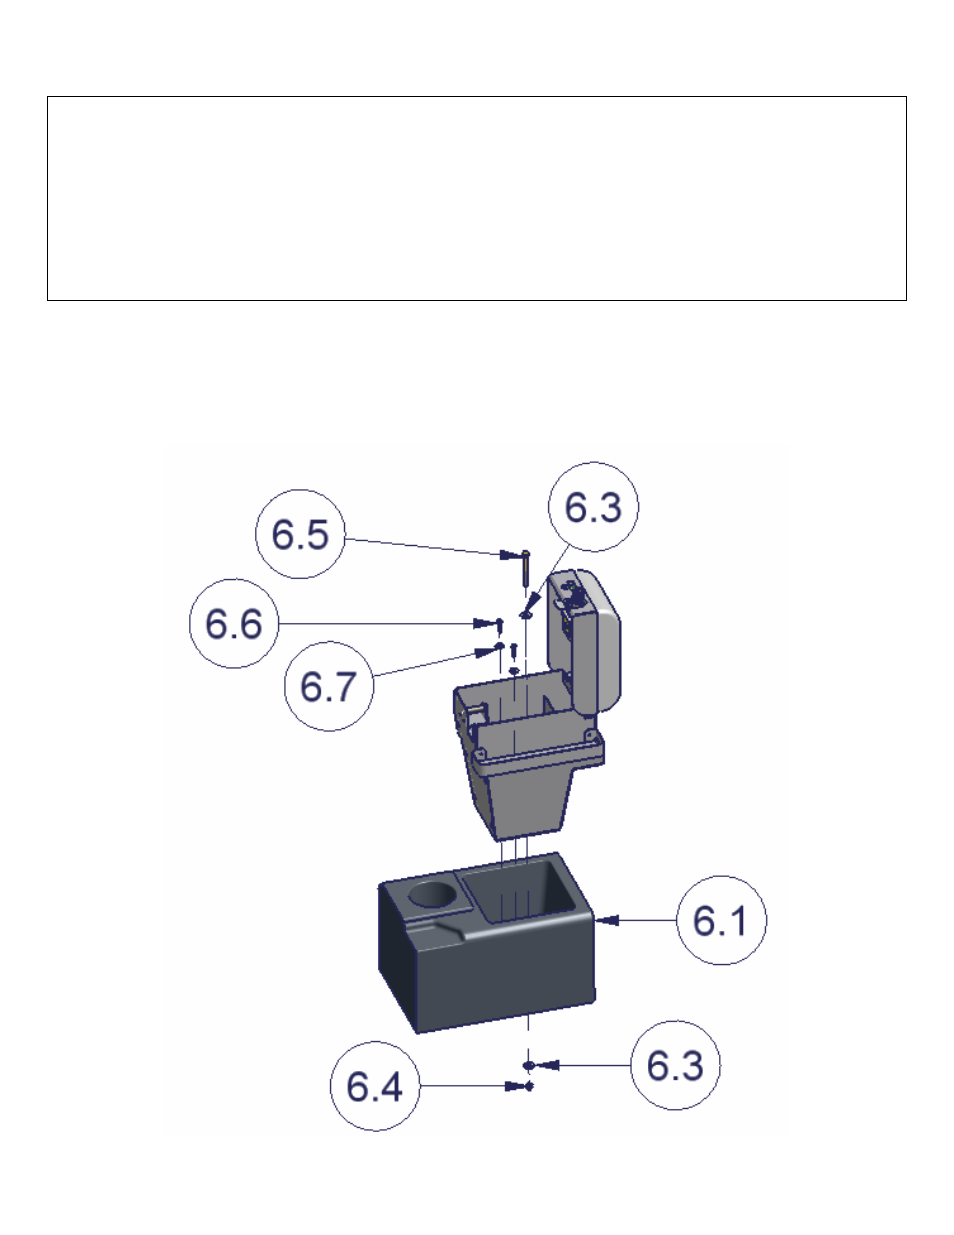
3. Place the Tuffy console in the original OEM console tray #6.1 and line up all the mounting holes with the (2) threaded holes in
the bottom of the tray. Mark the spot on the original console under the 3/8” hole in the bottom of the Tuffy console for drilling.
(See Figure 2)
WARNING! Make sure that there is nothing under/on the vehicle that will be damaged by the drill bit when drilling,
the emergency brake cables are close so don’t push the drill bit through past ¼”.
4. Remove the Tuffy insert and drill a ¼” pilot hole in the marked spot then drill it out to 3/8”. Use touch up paint or silicone
sealant in any drilled holes to prevent rusting.
5. Fasten the console assembly down using the (2) provided 6MM x 25MM screws #6.6 and (2) ¼” Washers #6.7. (See Figure 2)
6. If the optional additional security step was done fasten down the Tuffy console using a 5/16-18 x 3” Hex cap screw #6.5, a 5/16”
Locknut #6.4, & (2) 5/16” washers #6.3 through the hole previously drilled. Do not over tighten. (See Figure 2)
FIGURE 2