Figure 2, Appendix a instructions – Tuffy Security 137 User Manual
Page 2
Page 2 of 2
– Rev 030712
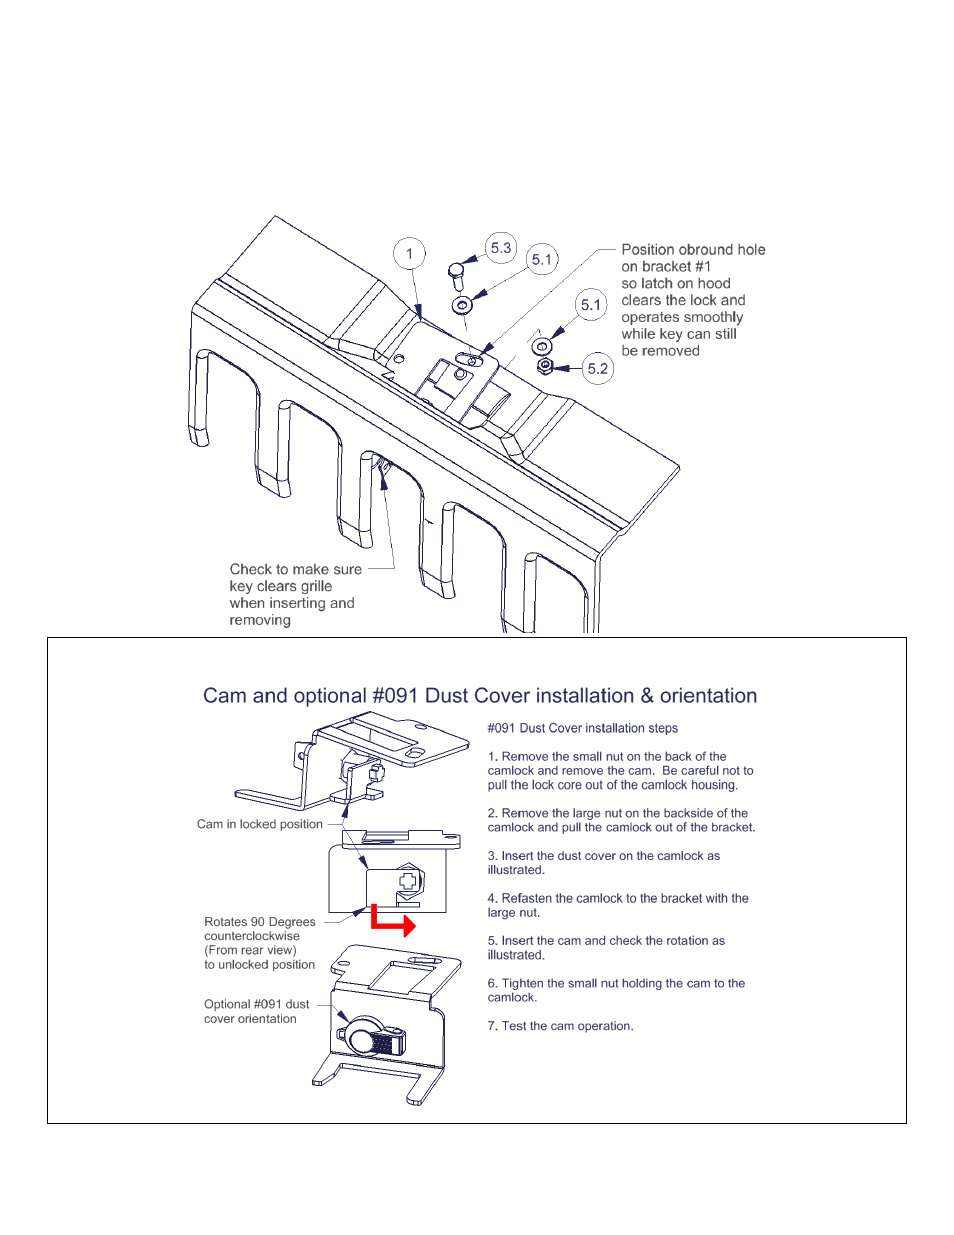
5. Fasten the flange on the #1 bracket to the top of the grille as illustrated using the hardware provided. Before
completely tightening the hardware check that the latch in the hood will clear the #1 bracket hood lock assembly when
the hood is closed and that the key can be removed in the locked and unlocked position. Rotate the key clockwise to
the unlocked position and counterclockwise to the locked position to test. Reposition the #1 bracket as needed for
clearance then tighten the hardware. (See Figure 2)
FIGURE 2
Appendix A instructions
Call (970)564-1762 for Technical Support
See also other documents in the category Tuffy Security For the car:
- 082 (2 pages)
- 089 Manual (3 pages)
- 089 Installation Manual (1 page)
- 101 (2 pages)
- 073 (3 pages)
- 198 (2 pages)
- 189 (1 page)
- 292 (2 pages)
- 282-BTL (1 page)
- 295 (3 pages)
- 862 (2 pages)
- 863 (3 pages)
- 311 (2 pages)
- 312 (2 pages)
- 046 (3 pages)
- 145 (4 pages)
- 131 (2 pages)
- 297 (3 pages)
- 296 (3 pages)
- 240 (10 pages)
- 238 (2 pages)
- 058 (3 pages)
- 219 (2 pages)
- 195 (2 pages)
- 144 (2 pages)
- 274 (10 pages)
- 139 (3 pages)
- 157 (10 pages)
- 052 (2 pages)
- 164 (1 page)
- 104 (1 page)
- 043 (1 page)
- 027 (2 pages)
- 035 (2 pages)
- 108 (2 pages)
- 149 (2 pages)
- 049 (2 pages)
- 036 (2 pages)
- 160 (3 pages)
- 289 (2 pages)
- 287 (3 pages)
- 283 (3 pages)
- 309 (2 pages)
- 182 (2 pages)