NORAC UC4+BC+AN2 User Manual
Page 34
31
4.8.1 Cable Installation: Electrically
teed Installation
For Electrically Teed Installation, there are
two different methods of cable installation
to tee in to the sprayer’s control system.
The first is teeing the NORAC system in to
the sprayer’s wiring inside the cab (Section
Error! Reference source not found.). The
second is teeing the NORAC system in to
the sprayer’s wiring at the valve block
(Section Error! Reference source not
found.). Choose one of the two methods,
whichever is suitable for your sprayer.
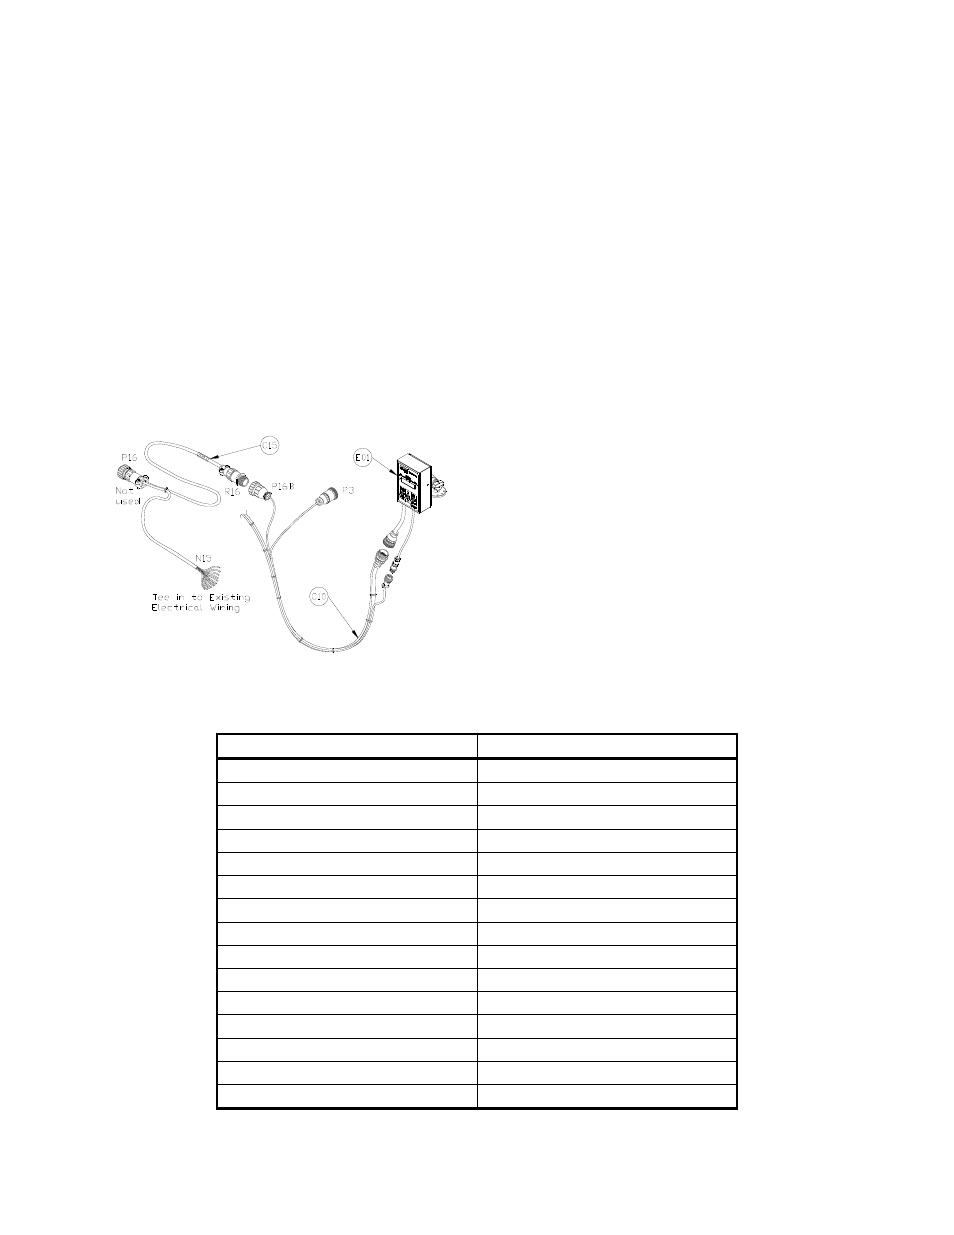
Figure 36: Cable Configurations: C10
and C15
1. Connect the 16-pin AMP plug (P16B)
of C10 to R16 of C15
2. String the cable jacket of the pigtail
(N15) on C15 (Figure 36).
3. Splice the wires (N15) of C15 into the
existing wiring to tee into appropriate
functions of the sprayer’s control
system. The wire colors and functions
are shown below. Some wires may not
be used for this installation. Before
connecting the wire of N15, check each
sprayer wire you will be splicing to.
4. Disconnect the electrical connections of
the left/right boom tilt functions: Left
Up, Left Down, Right Up and Right
Down, from the sprayer’s existing
valves.
Table 6: N15: Wire Colors and Functions
COLOR FUNCTION
Green / White
Main Up
Blue / White
Main Down
Green Left
Up
White Left
Down
Green / Black
Right Up
White / Black
Right Down
Orange / Black
Bypass
Blue Remote
Manual
Blue / Black
Remote Auto
Orange Motion
Inhibit
Red / White
Bias Down
Red / Black
12 V
Black Bias
Up
Red N/A
Black / White
N/A