Getting started, Installing the hard disk drive – KGUARD Security AR 1621-2CKT001 User Manual
Page 11
ENGLISH
Aurora Series: Getting Started
DVR User’s Manual
11
Getting Started
Installing the Hard Disk Drive
Depending on the package you have purchased, the hard disk drive may be included in the full package. If it is not
pre-installed, follow the installation instructions on this user manual.
DO NOT install or remove the hard disk drive while the device power is turned on.
The DVR supports one 3.5” SATA hard disk drive. To install the HDD, follow the steps below.
Note:
The illustrations below show an 8-channel DVR, same procedures apply to a 4/16-channel DVR.
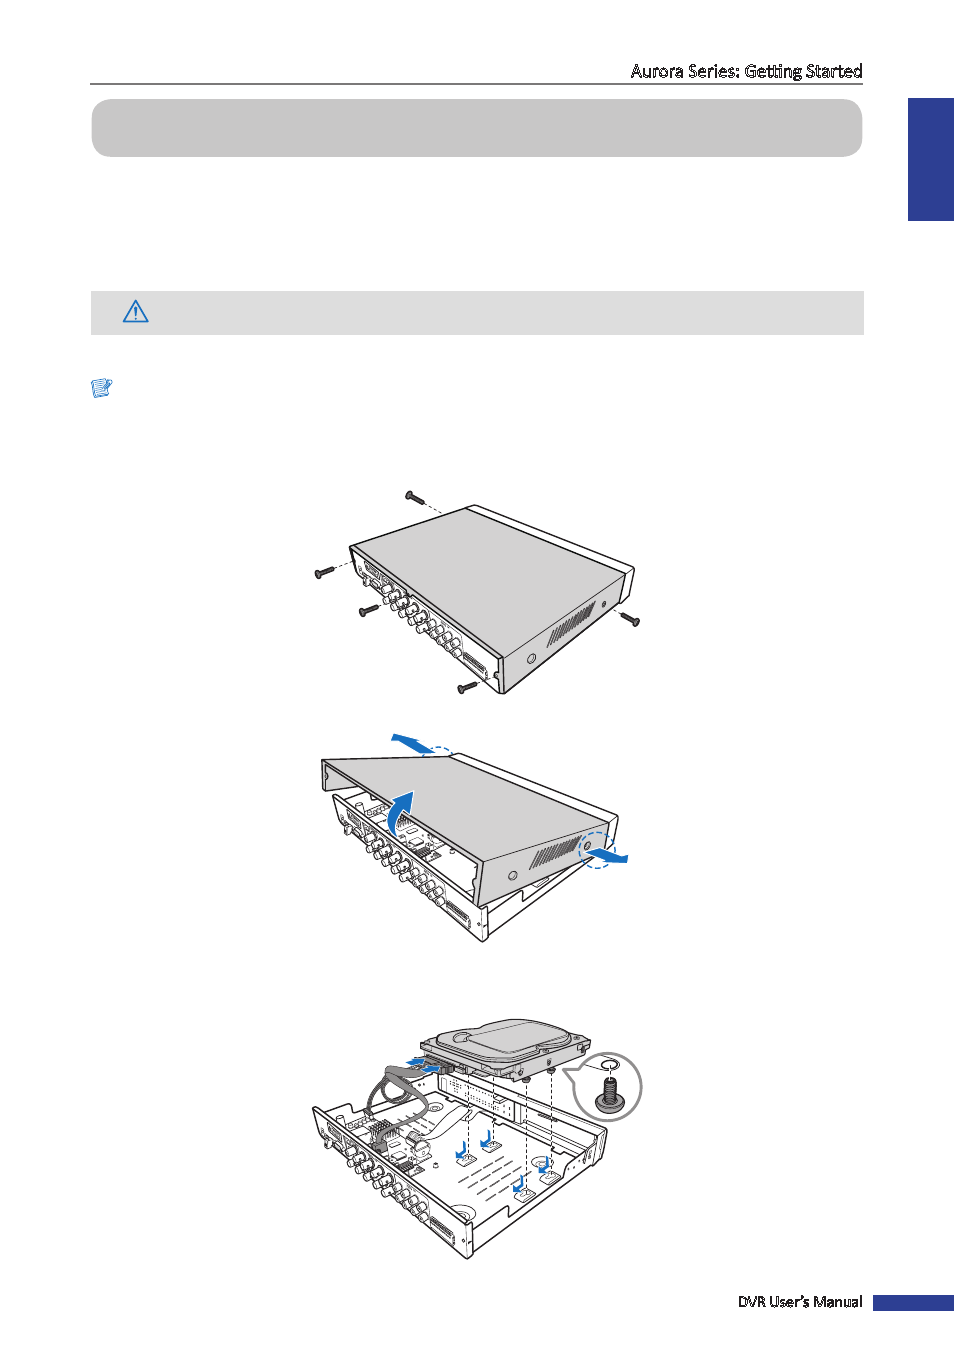
Step 1: Remove the cover
a. Loosen the screws in the left, right, and rear sides as shown.
b. Push back then lift up the cover to remove it.
Step 2: Install HDD
Connect the data and power cables to the hard disk drive (HDD) and place the HDD on the DVR case.