Position your philips stu 901 satellite receiver, Insert batteries in the remote control, Connect your satellite dish antenna – Philips STU 901/25R User Manual
Page 7: Connecting your receiver, Antenna control
Attention! The text in this document has been recognized automatically. To view the original document, you can use the "Original mode".
Position your Philips STU 901
Satellite Receiver
The STU 901 is intended for use in a domestic environment
only and should never be operated or stored in excessively hot or
humid atmospheres.
Choose a position at some distance
away from radiators or other sources
of heat.
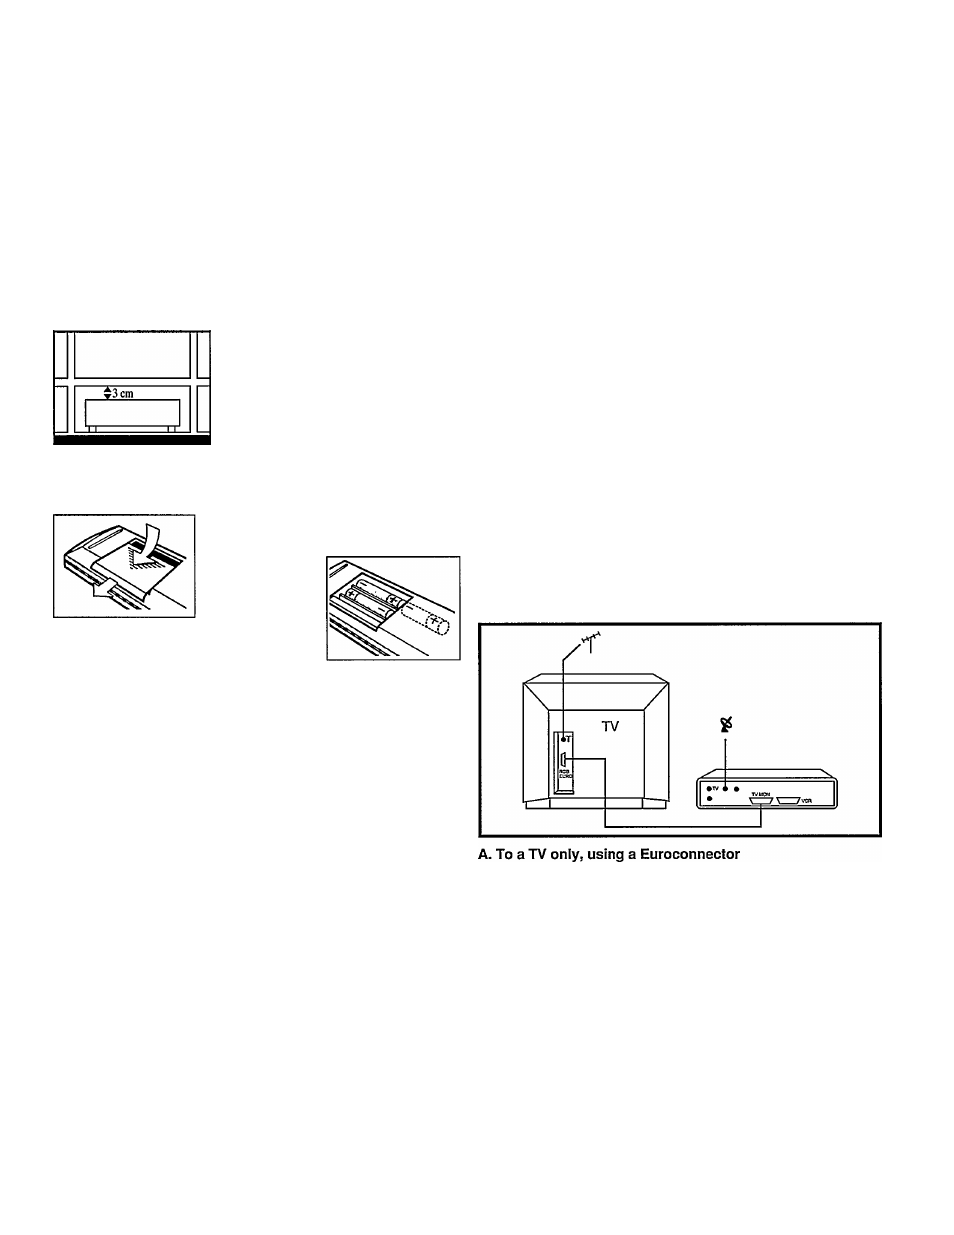
Leave a clear space of at least 3 cm
all around the set for ventilation.
Make sure that curtains, cupboards,
etc. cannot obstruct air flow through
the ventilation openings.
Insert batteries in the remote control
Remove the battery cover
located on the back of the
remote control handset.
Insert
three batteries
(type R03S1.5V).
Replace the battery cover.
Connect your satellite dish antenna
First, install the dish antenna and its receiving element - the Low
Noise Converter (LNC) - according to the manufacturer’s
instructions.
POWER
jz:
A
ANTENNA
CONTROL
w
1 2 3
You must only set the Antenna
Control (28) to the required position
when the Receiver is switched off.
If necessary, press POWER (12) to
switch the Receiver off.
Position 1
No power is supplied to the LNC! Use
this position if the distance (cable
length) between the Receiver and the
dish antenna is more than 30 meters.
You may need an extra amplifier in
the cable from your Receiver to the
dish - ask your dealer for advice.
Position 2
If you have one or two LNCs.
This is the usual situation. In this
case, the Receiver supplies the LNC
via the cable (14 or 18 V,300 mA
max).
Position 3
Not used.
Connecting your Receiver
This section tells you how to connect the Philips STU 901
Satellite Receiver to the equipment you already have, such as a
TV and Video Cassette Recorder (VCR).
There are many connection options of which the most common
are:
A. To a TV only, using a Euroconnector.
B. To a TV only, using a coaxial cable
C. To a TV and a VCR, using Euroconnectors
D. To a TV and a VCR using coaxial cables
E. To a TV and an S-VHS VCR
Option A is the best if you have a TV only because it gives the
best picture and sound quality - especially with D2-MAC
programmes. You will obtain even better sound if you connect
the Receiver to your hi-fi system.
See Additional Connections below.
Select one of the connection options, then follow the step-by-step
instructions below:
1.
Make the connections as shown in the drawing using the
Euroconnector supplied with your Receiver.
2.
Connect your Receiver to the mains socket.
3. Switch your TV ON.
4. Switch your Receiver ON (12)
5.
Press button number 0 on the Receiver remote control (6).
The programme number indicator (16) on your Receiver will
show 0. Press the MENU button (8) on the remote control.
You should now see the MAIN MENU on your screen
(see rear flap).
If not, you may have to select the
AN
input on your TV.
6.
Press MENU OFF and go to the section Aim your dish.
<5
b
) 3